How to set Automatic Reply in MS Outlook 2010.
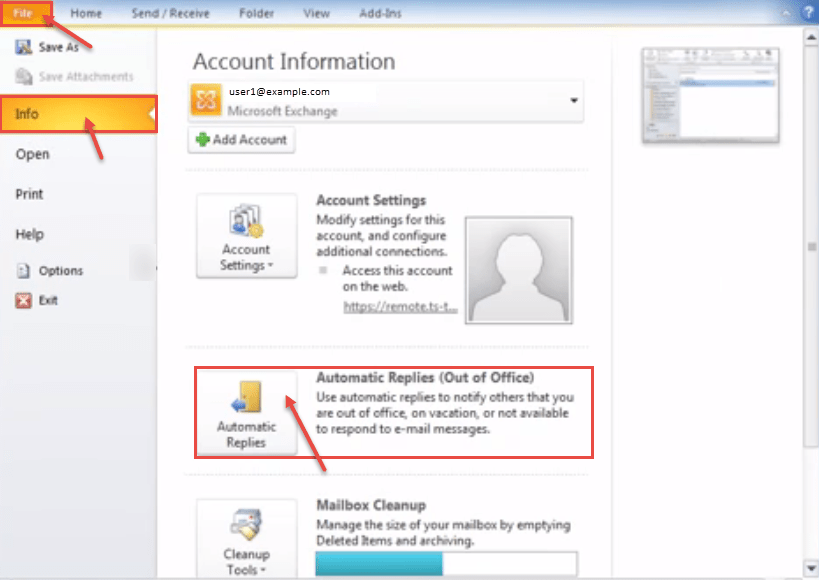
- In Outlook 2010, click on “File” tab, on the left. “Info” is selected by default, then click on “Automatic Replies (Out of Office)” button.
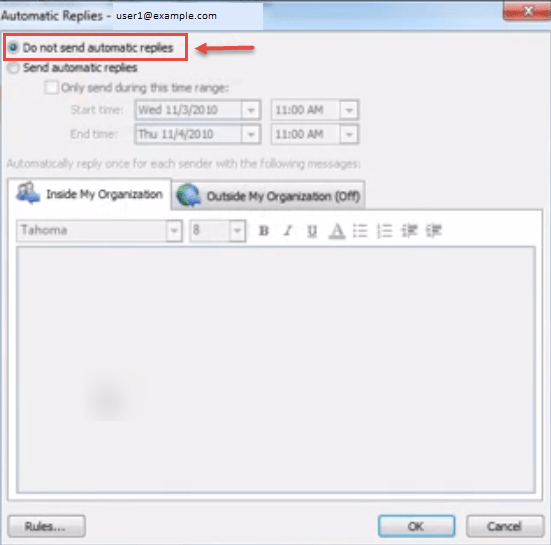
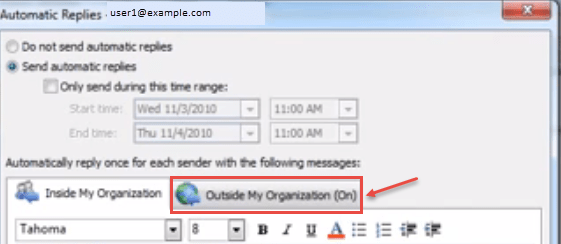
- The “Automatic Replies” window pops up. By default, “Do not send automatic replies” option is selected.
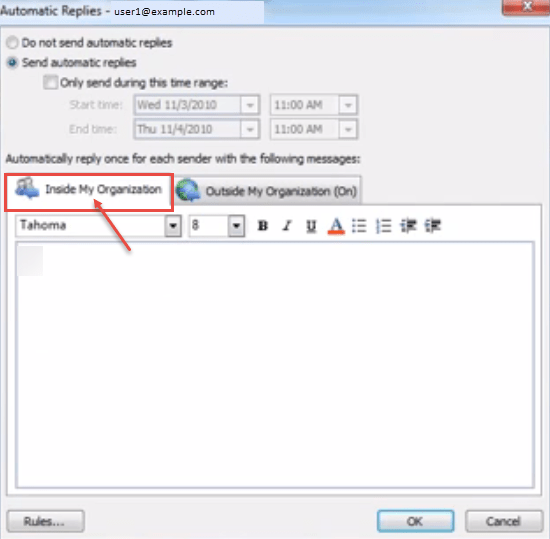
- Now, click on “Send automatic replies” radio button. You can also select “Only send during this time range:”. Define start and end time for automatic reply. Time duration is meant to restrict the automatic replies, when you are not able to check your emails. Not selecting will always send an automatic reply.

- You can specify different messages for the contacts within the organization or outside. Under “Inside My Organization” tab, you can compose your message and format it as required. Similarly, you can specify message for the contacts outside your company under the “Outside My Organization” tab.
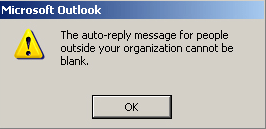
- If you want more specific conditions, then you can select “Rules” button. When you specify message for “In My Organization” only, a warning is displayed.
- If you want people out of your organization to receive auto reply, check “Auto-reply to people outside my organization” option.
- An Auto reply will be send to the people who mail you during the time range, set above. When on “Home” tab, you will see a notification indicating “Automatic Replies” set on. You want to disable the same, you can click on “Turn off” or follow the same procedure as above and select “Do not send automatic replies”. Set Automatic Replies in Microsoft Outlook 2016.


Leave A Comment