How to get rid of the paste options box in Outlook 2013
Step 1: To get rid of the “Paste Options” box in Outlook, click the “File” tab on the main Outlook window or you can also click the “File” tab on the ribbon on the “Message” window.
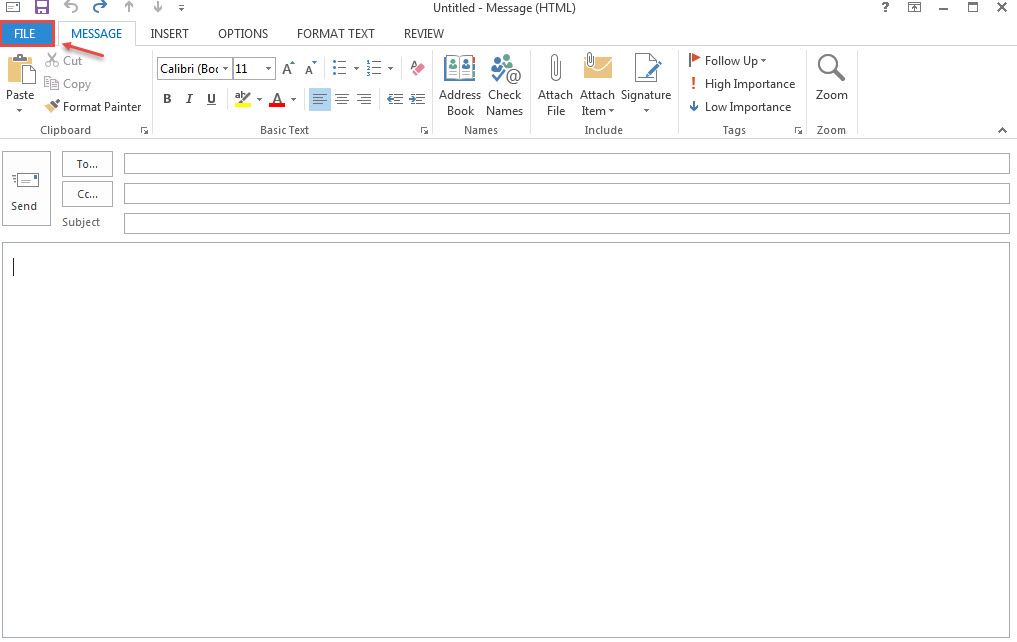
Step 2 : Click “Options” in the list of items on the left, whether you accessed the “File” tab from the main Outlook window or from the “Message” window.
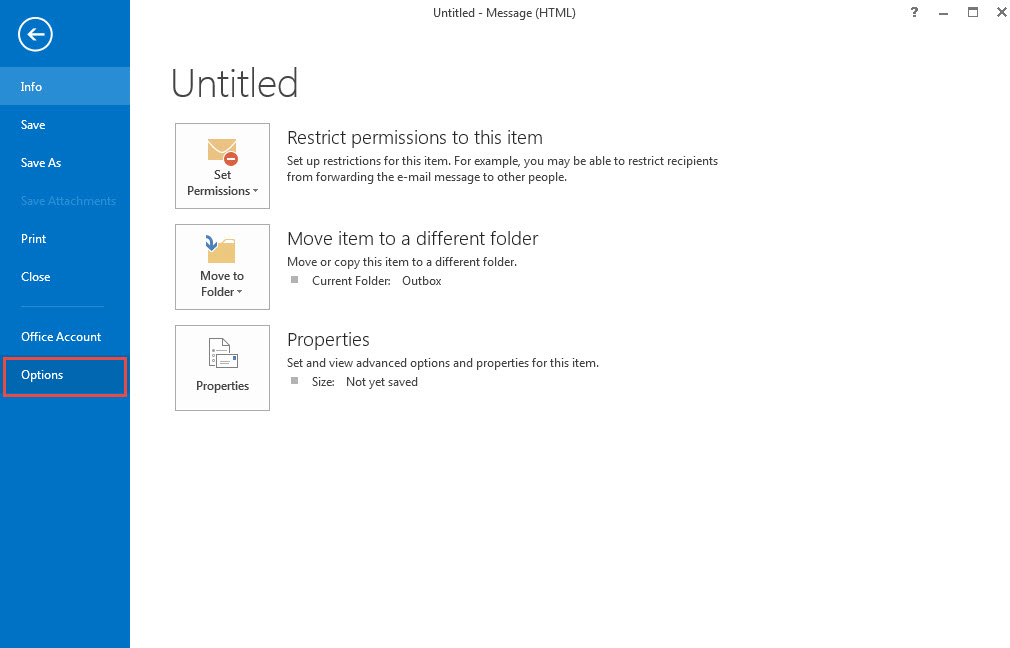
Step 3: On the “Outlook Options” dialog box, click “Mail” in the list of items on the left.
NOTE: If you opened the “Outlook Options” dialog box from the “Message” window, the “Mail” screen should already be active.
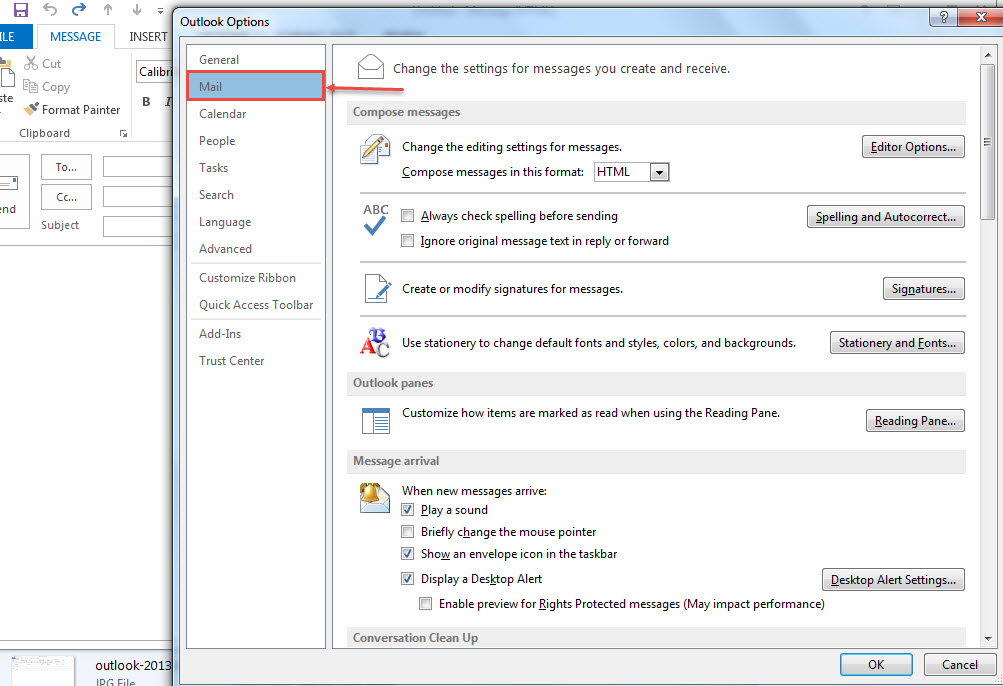
Step 4: On the right side of the “Compose messages” section, click the “Editor Options” button.
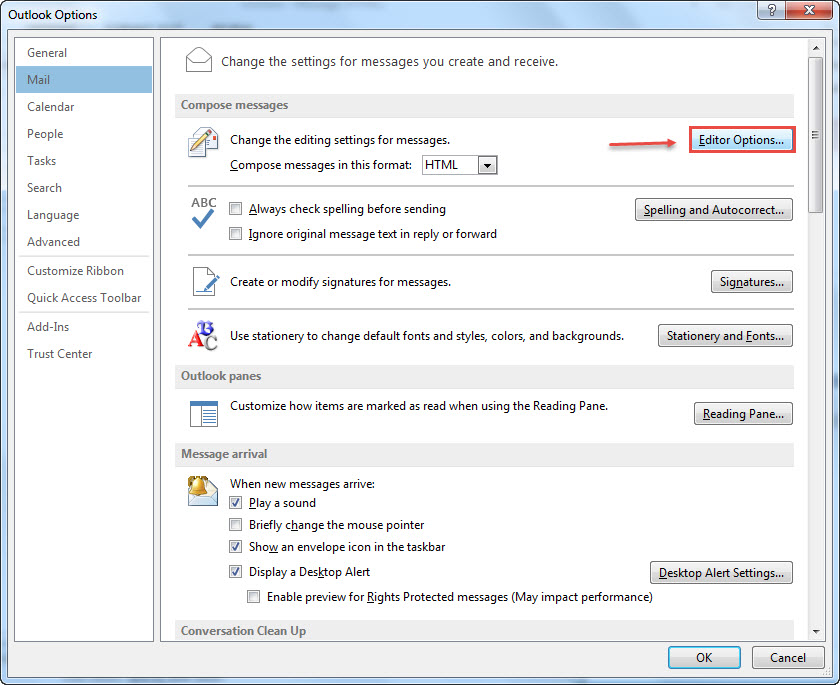
Step 5 : On the “Editor Options” dialog box, click “Advanced” on the left.
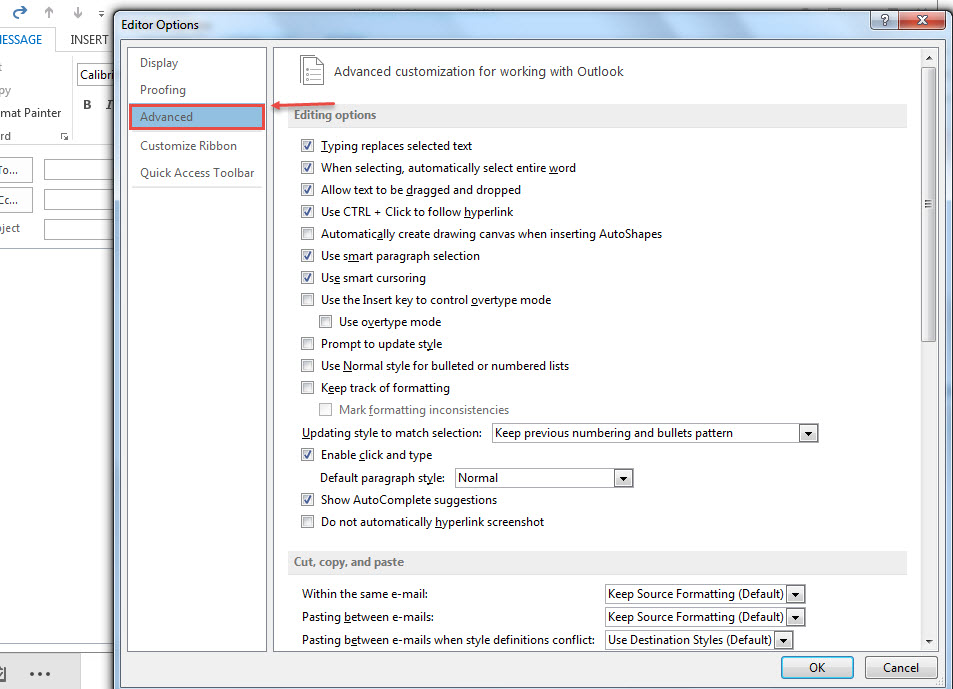
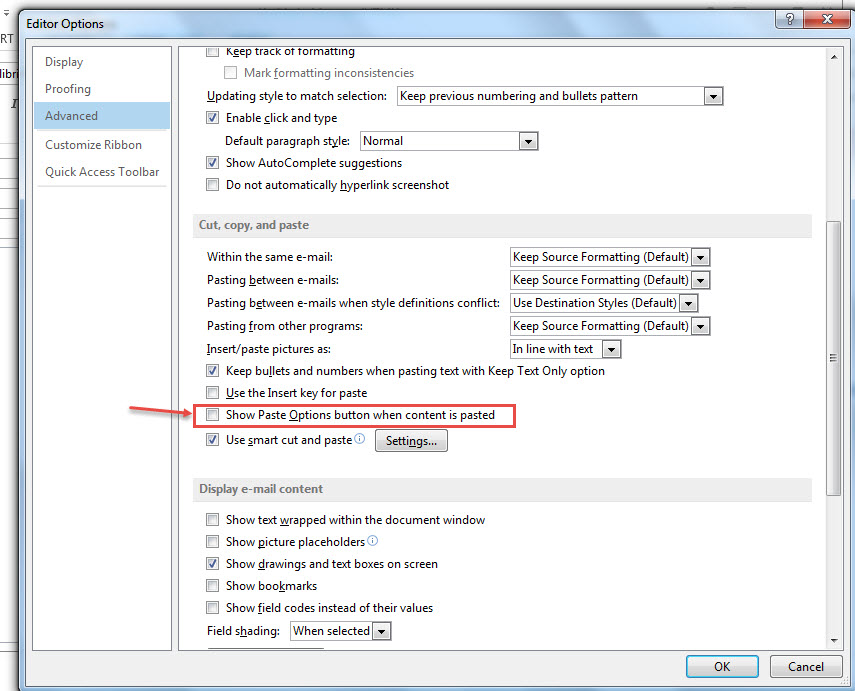
Step 6 : Scroll down to the “Cut, copy, and paste” section and select the “Show Paste Options button when content is pasted” check box so there is NO check mark in the box.
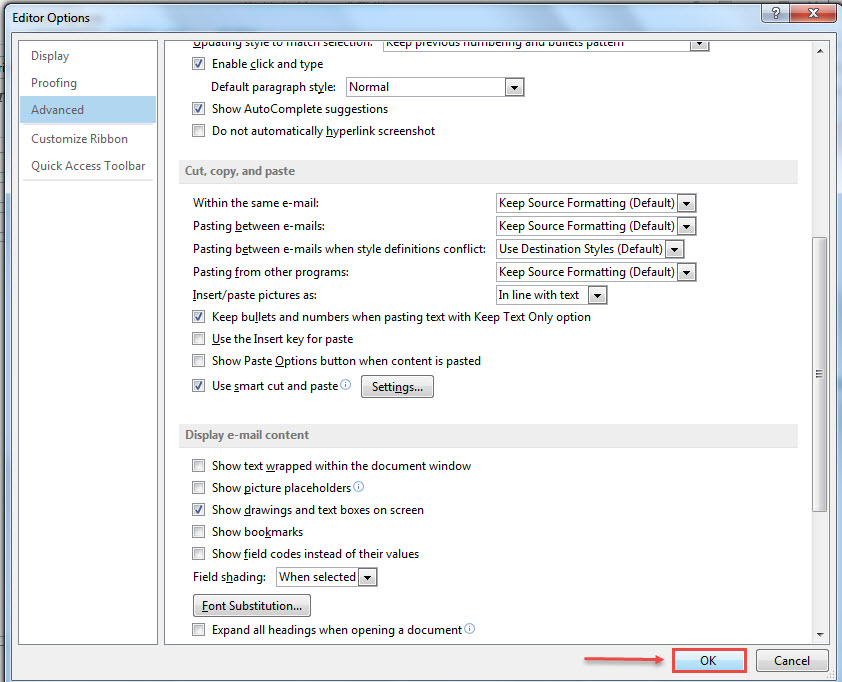
Step 7 : Click “OK” on the “Editor Options” dialog box.
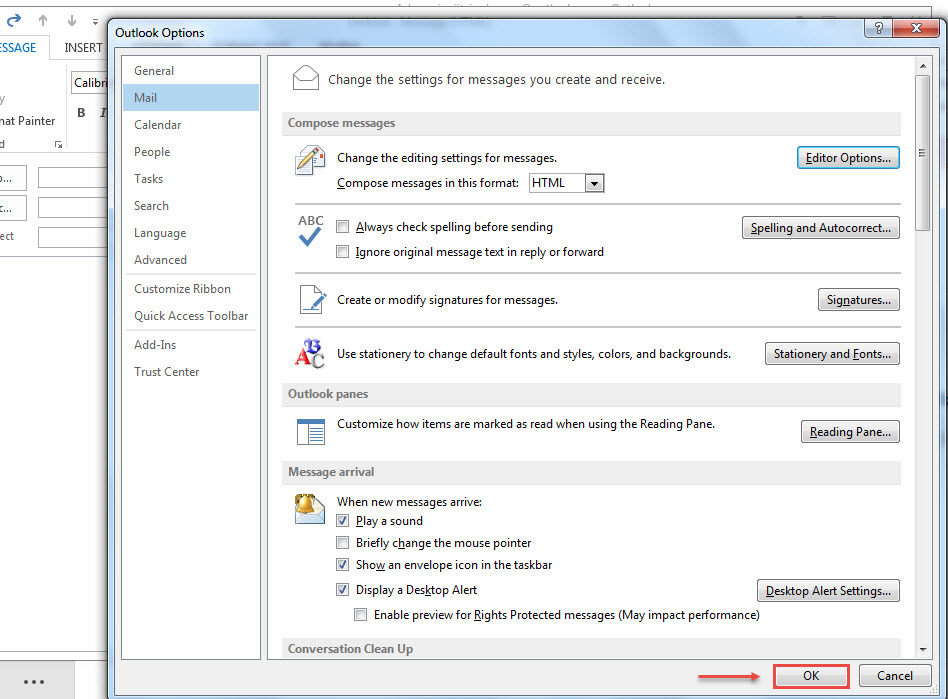
Step 8 : You return to the “Outlook Options” dialog box. Click “OK” to close it.
If you want access to the “Paste Options” box sometimes and don’t want to disable it, you can press “Esc” to dismiss it when you don’t want to use it.
Connect your iCloud account with outlook, How? Click Here to Know.

