
How to change DNS entries in office 365 – Part I
When you move your emails to Microsoft Office 365, you get a temporary url and access info. You need to then assign/map a FQDN of the existing domain to this temporary access. In this article we are going to change DNS entries for ABC User from the ABC company.
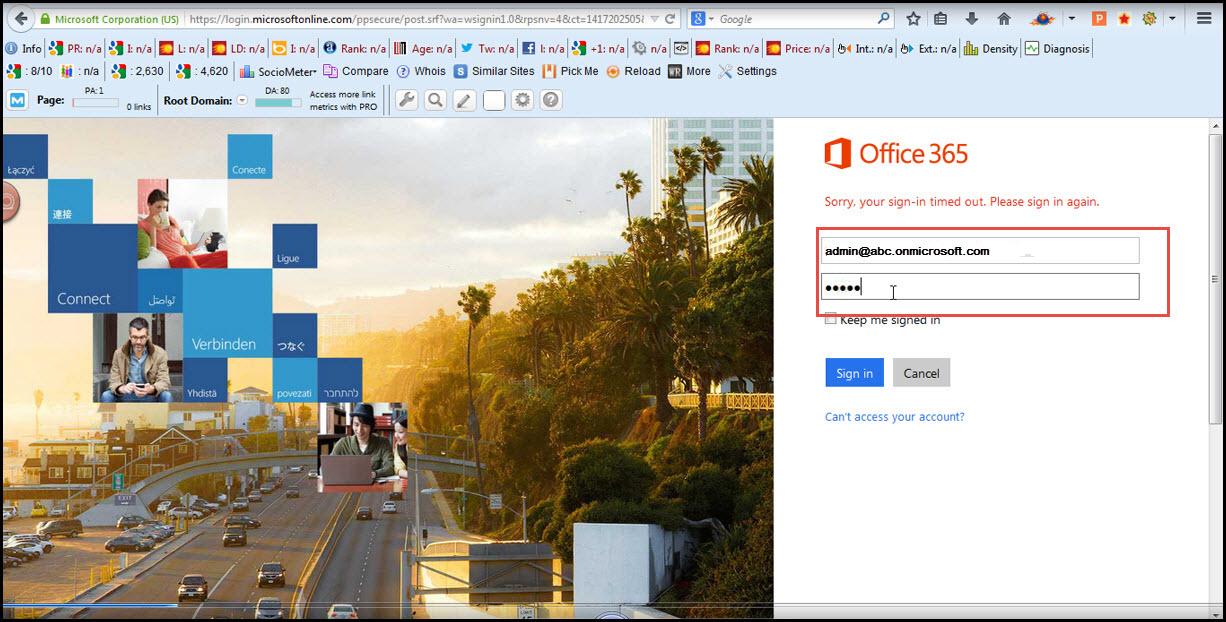
First of all, logon in office365 with admin user of ABC company. (http://office.microsoft.com/en-in/). The admin email/user-name will be like this “admin@abc.onmicrosoft.com”.
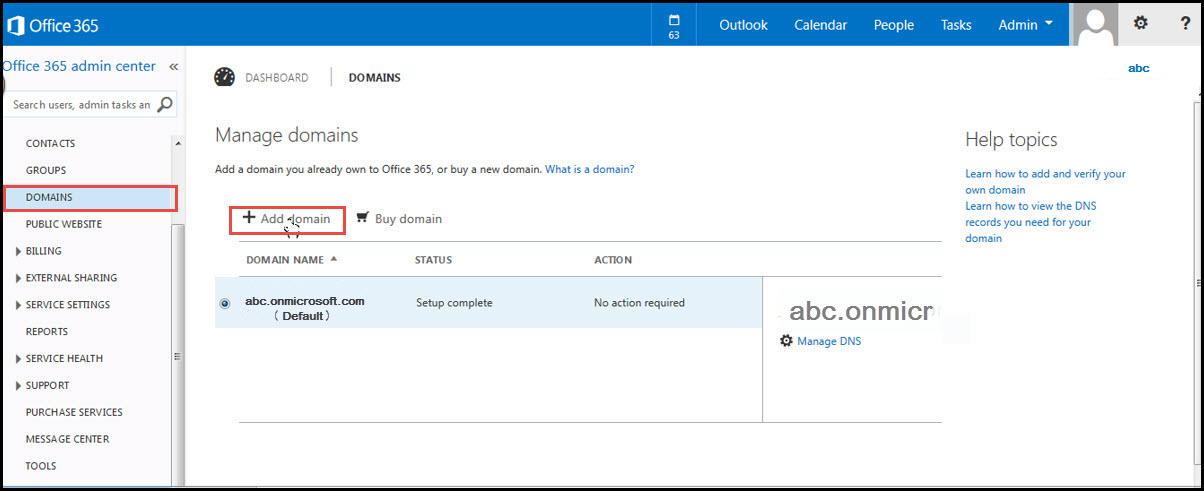
After logging in, click on DOMAINS. We are going to create new domain in office 365.
Click on, “ADD DOMAIN”.
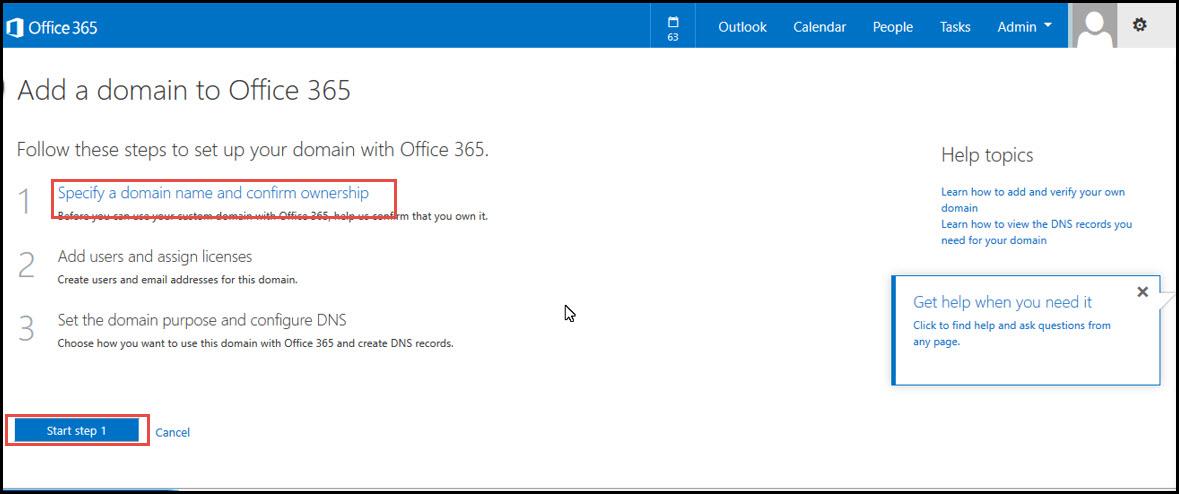
Step 1. In the first step, we will specify the domain name and confirm the ownership of that domain. To initiate process, click on “Start step 1″.
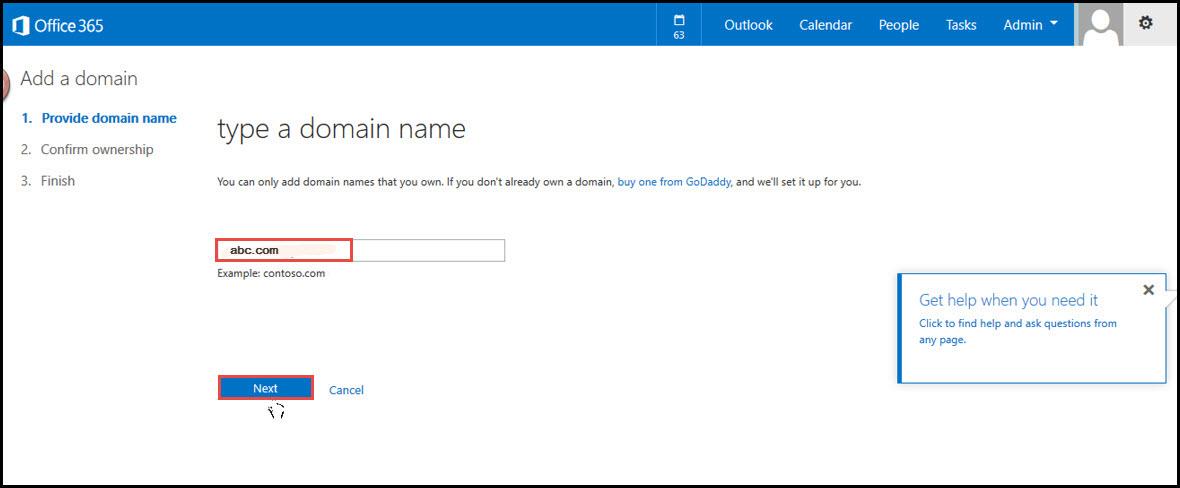
Type here domain name ie. “abc.com” Click on next.
Here select the Domain where we already host the domain (site). We will confirm the ownership by changing the “TXT Record” of the domain.
Drop down provides step-by-step instructions on changing “TXT” record for all major hosting companies. For the tutorial, we will select “Network Solutions”
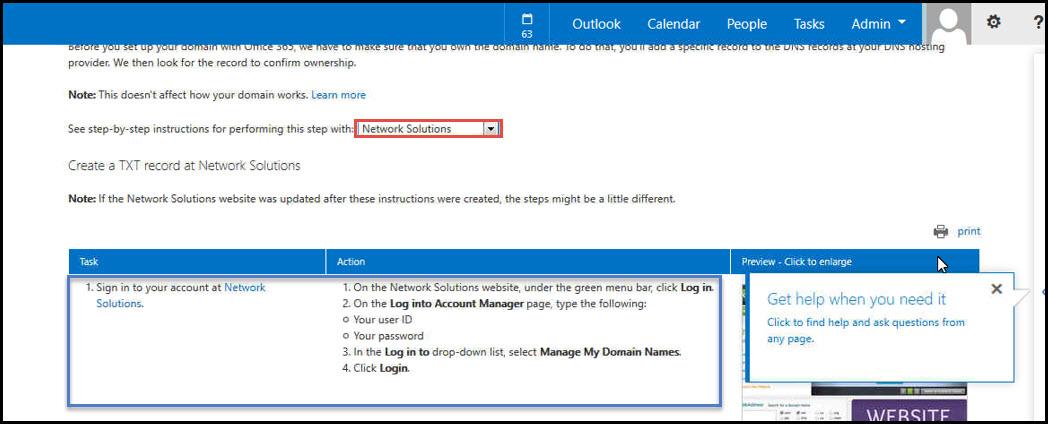
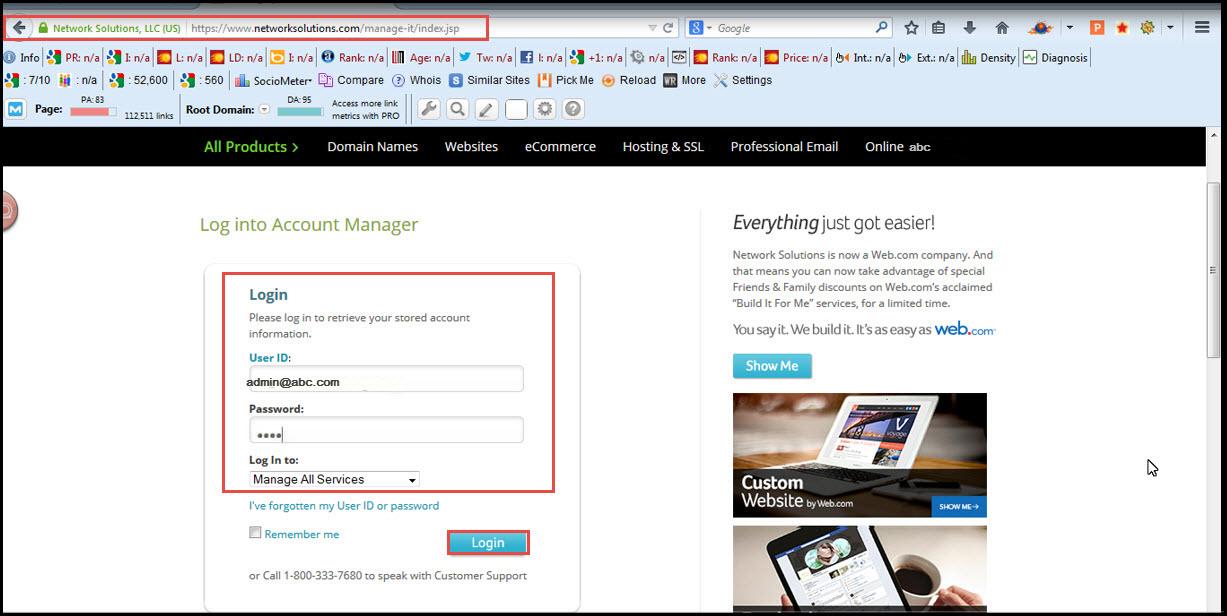
Now open http://Netowrksolutions.com in the second tab. And login with admin account for managing the domain.
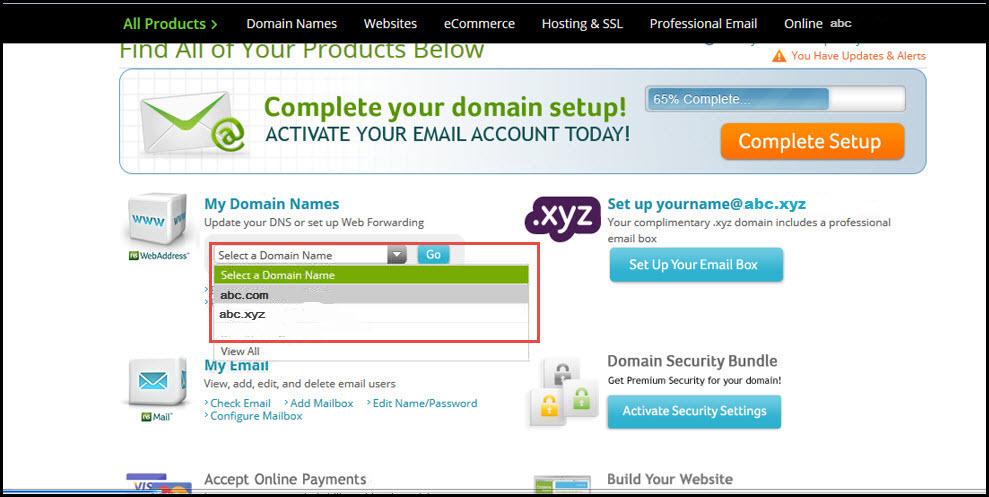
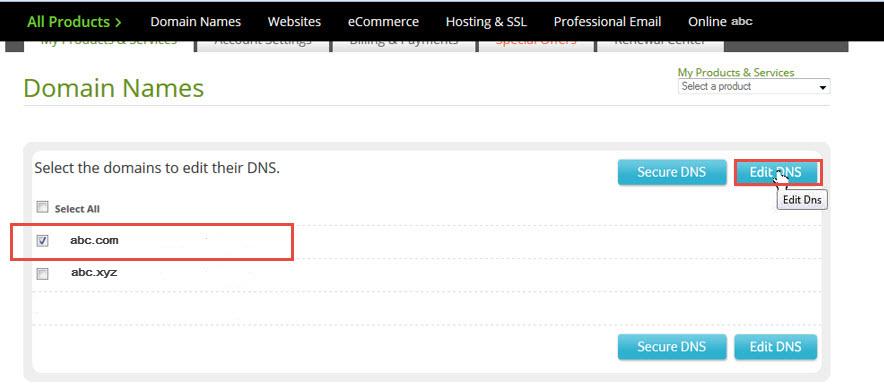
Here, from “My Domain Names” select “abc.com”.
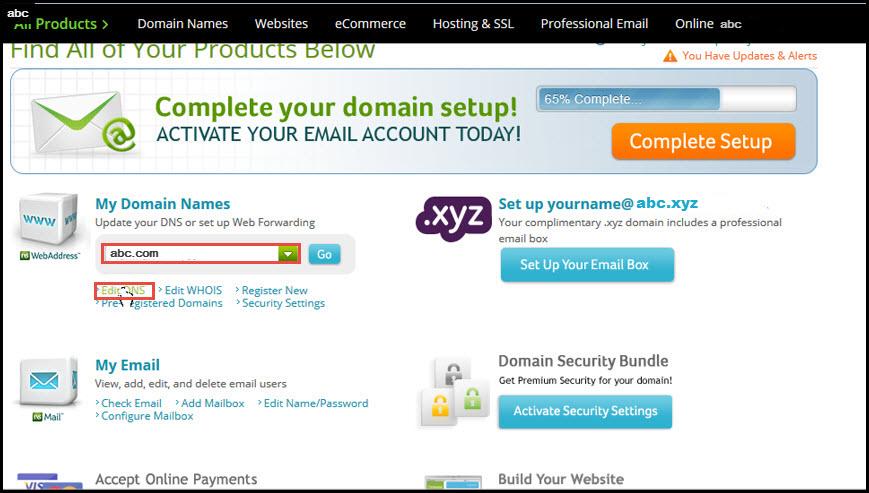
Click on “Edit DNS” to make changes in “TXT” record.
Select the required domain e.g. “abc.com” and click on “Edit DNS”.
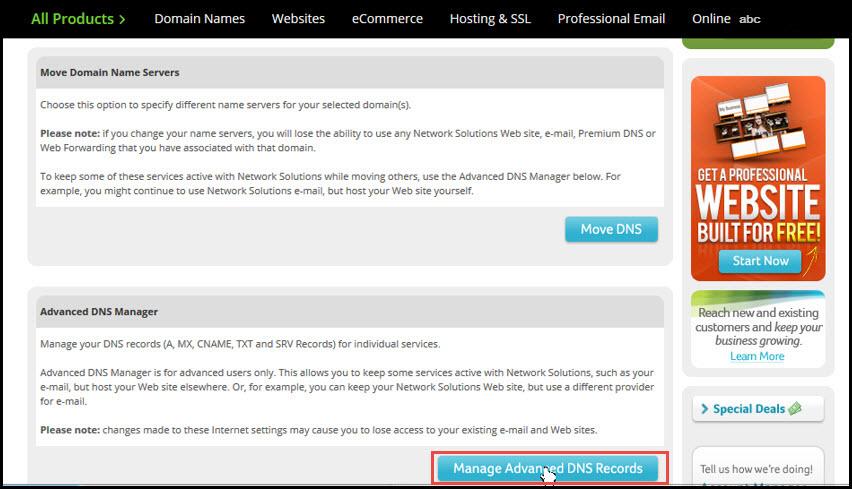
In the next step, click on “Manage Advanced DNS Records”.
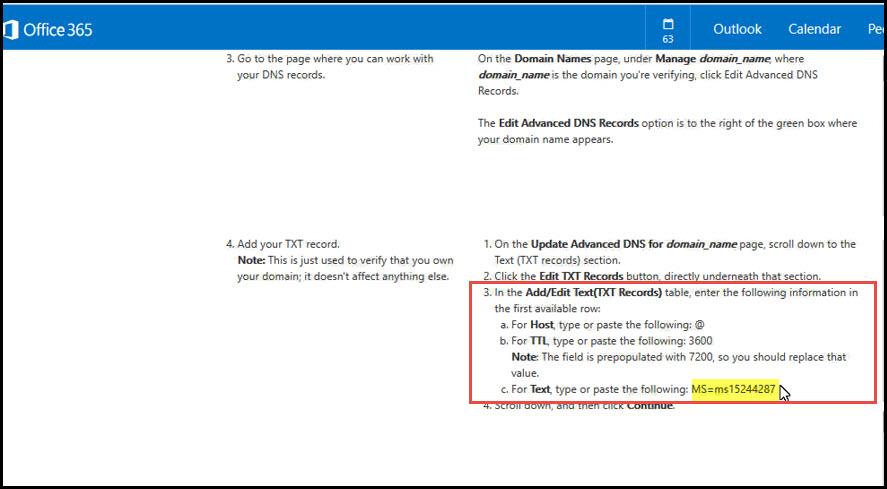
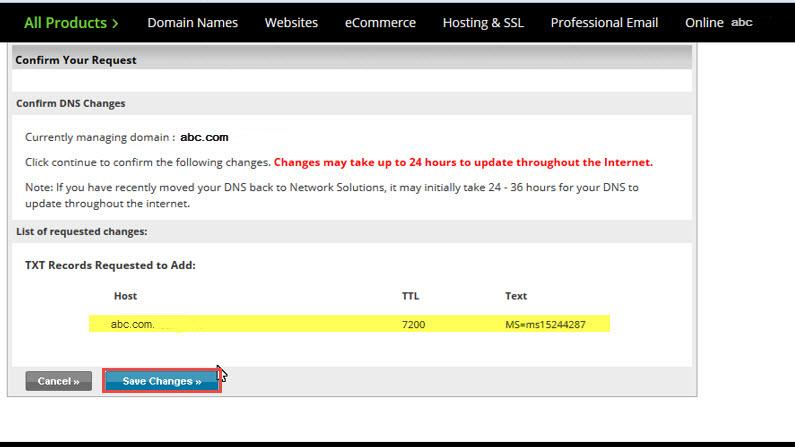
In Office 365, admin center copy the value for TXT record and then apply the same in the DNS edits. e.g. for the demo purpose, we will use the string as per the screenshot, i.e. copy “MSsms15244287”.
In Network Solutions:
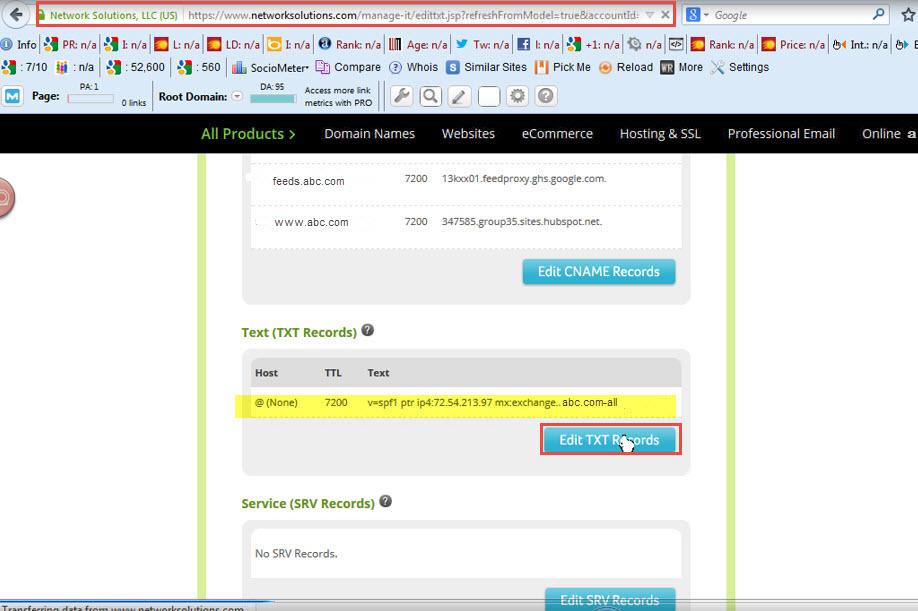
Click on “Edit TXT Records”.
Type the following details and click on continue.

Click on “Save Changes”
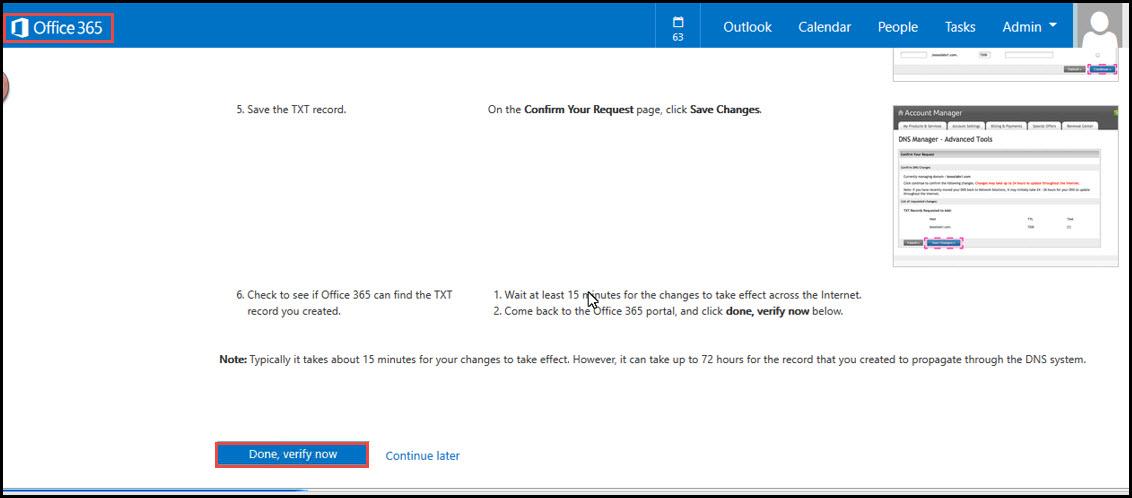
In Office365:
Click on “Done, verify now”.
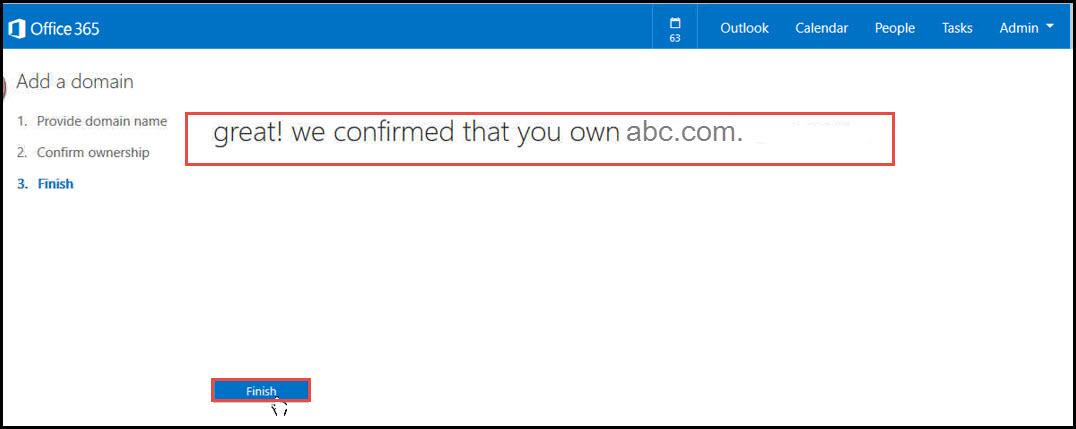
Now first step is complete. Click Finish.
 (1)")