
Add Users in Bulk in Microsoft Office 365
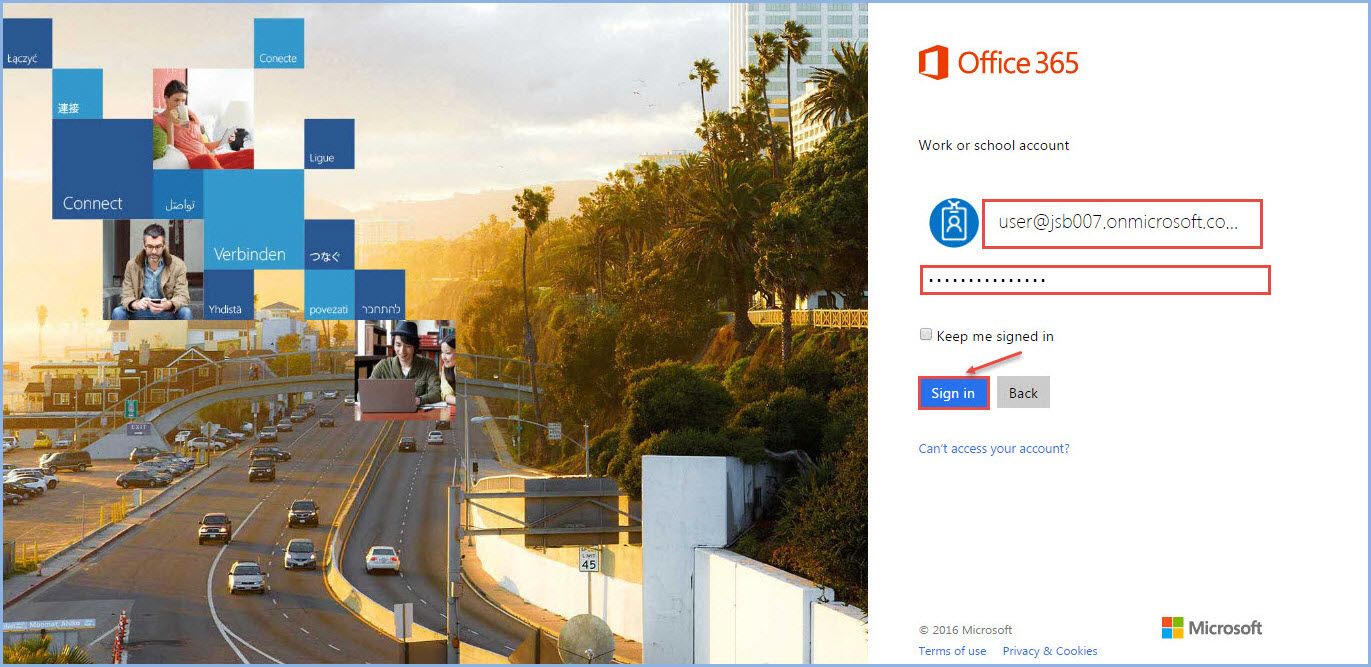
1.To begin, log into your Office 365 site using an Admin Account.
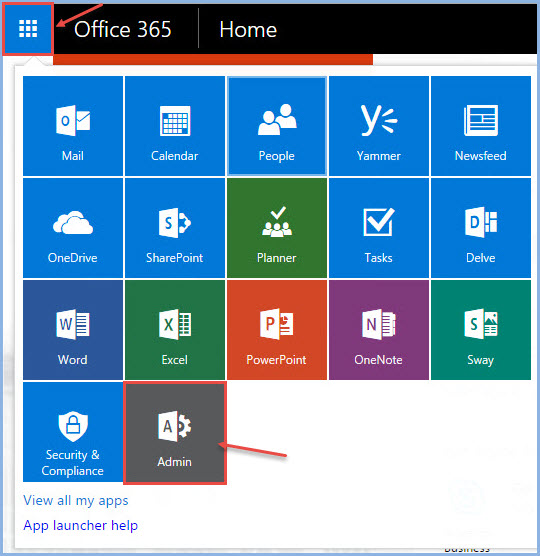
2.Next, go to the Office 365 Admin Center.
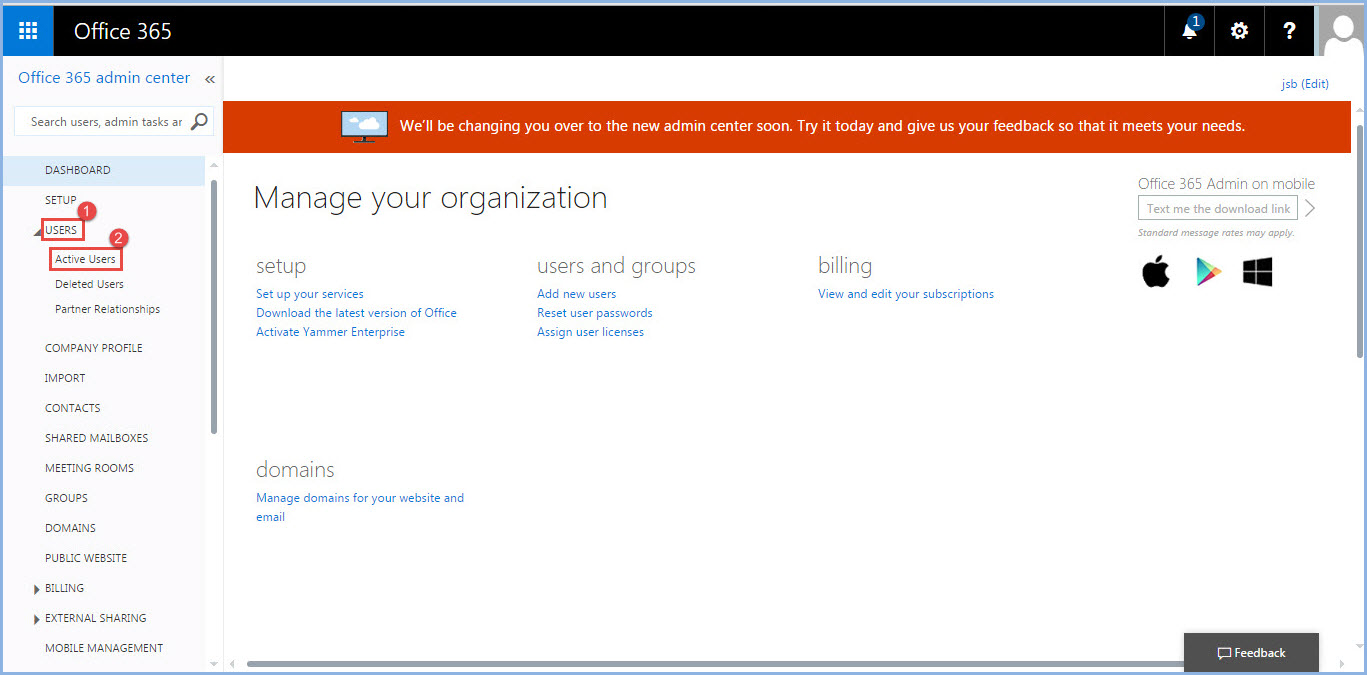
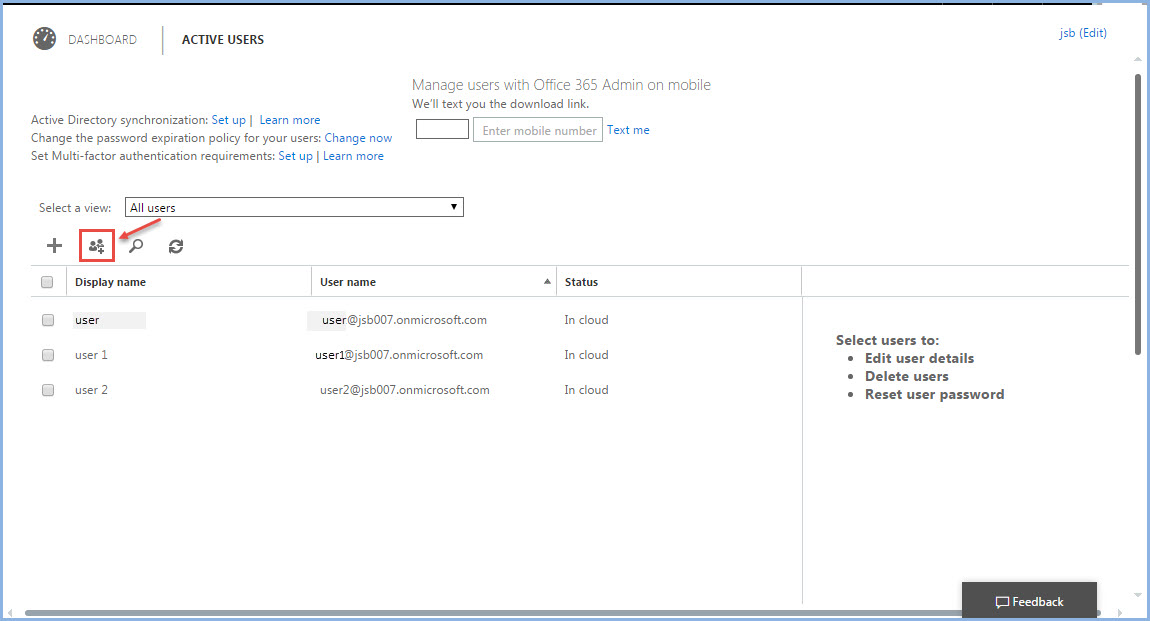
3.Expand the USERS section in the Dashboard and select Active Users from the menu. See image below.
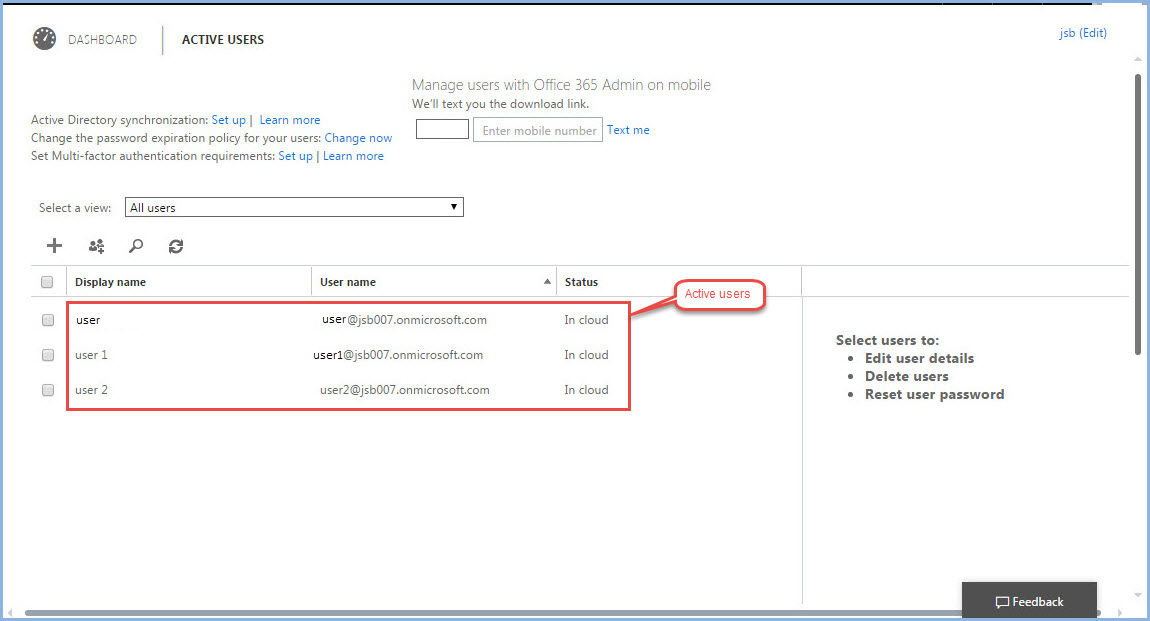
4. Here, you will see all Active Users.
5.Click on Bulk add icon as shown below:
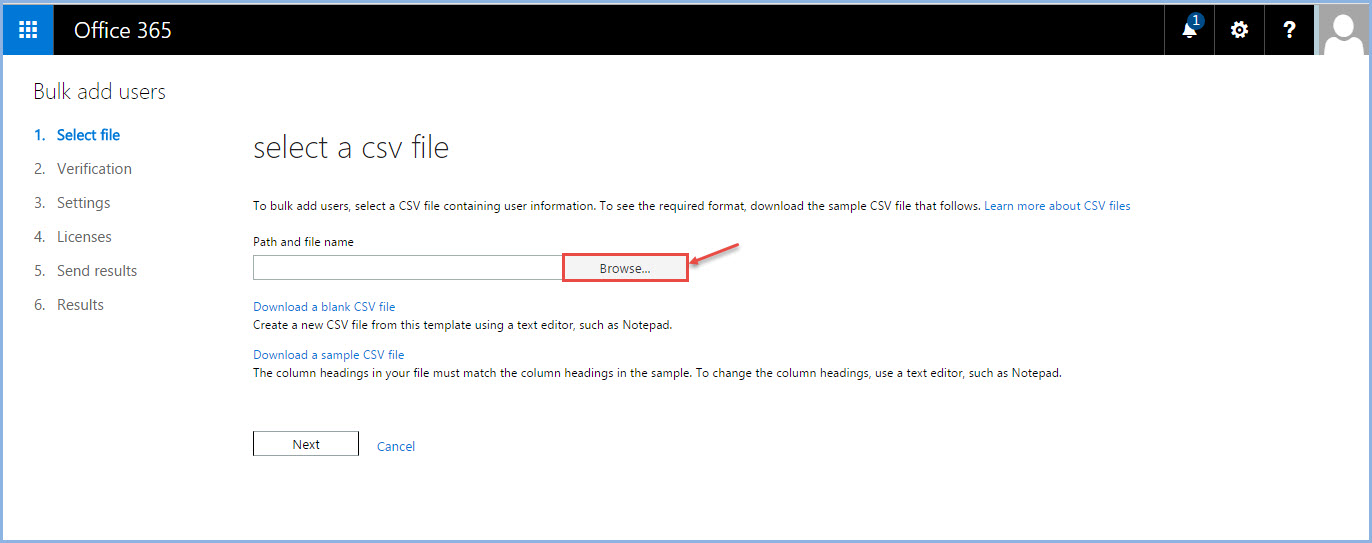
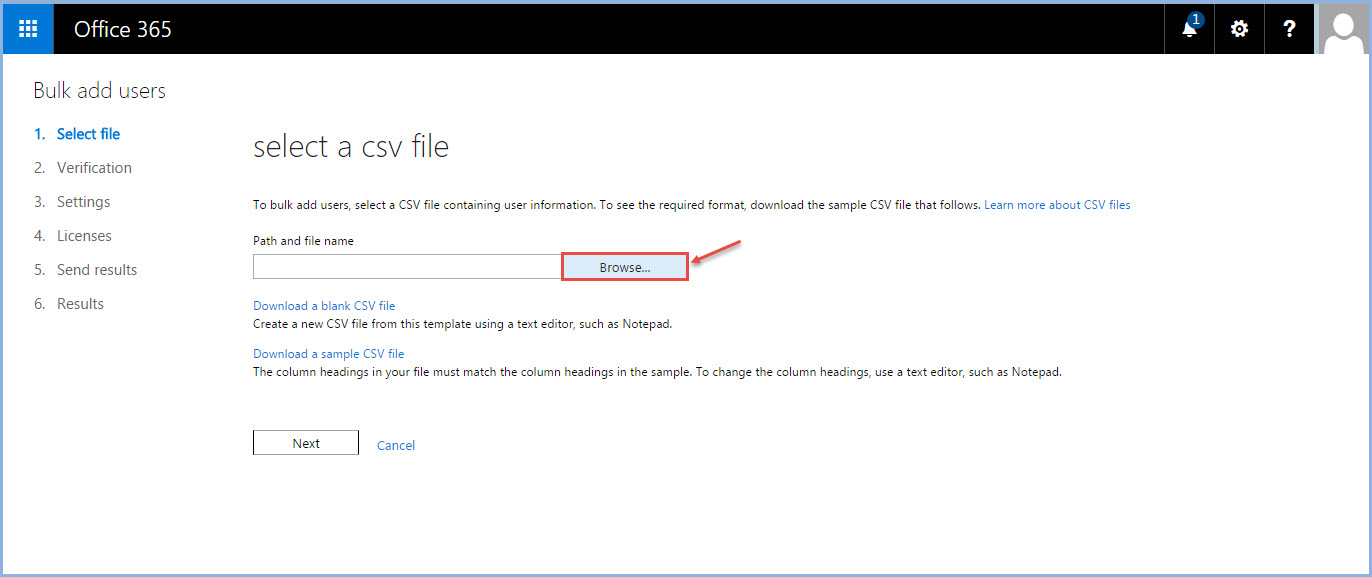
6.Bulk add option will ask to upload file of users that you want to add in bulk to your organisation, click on Browse, see the process in the image below:
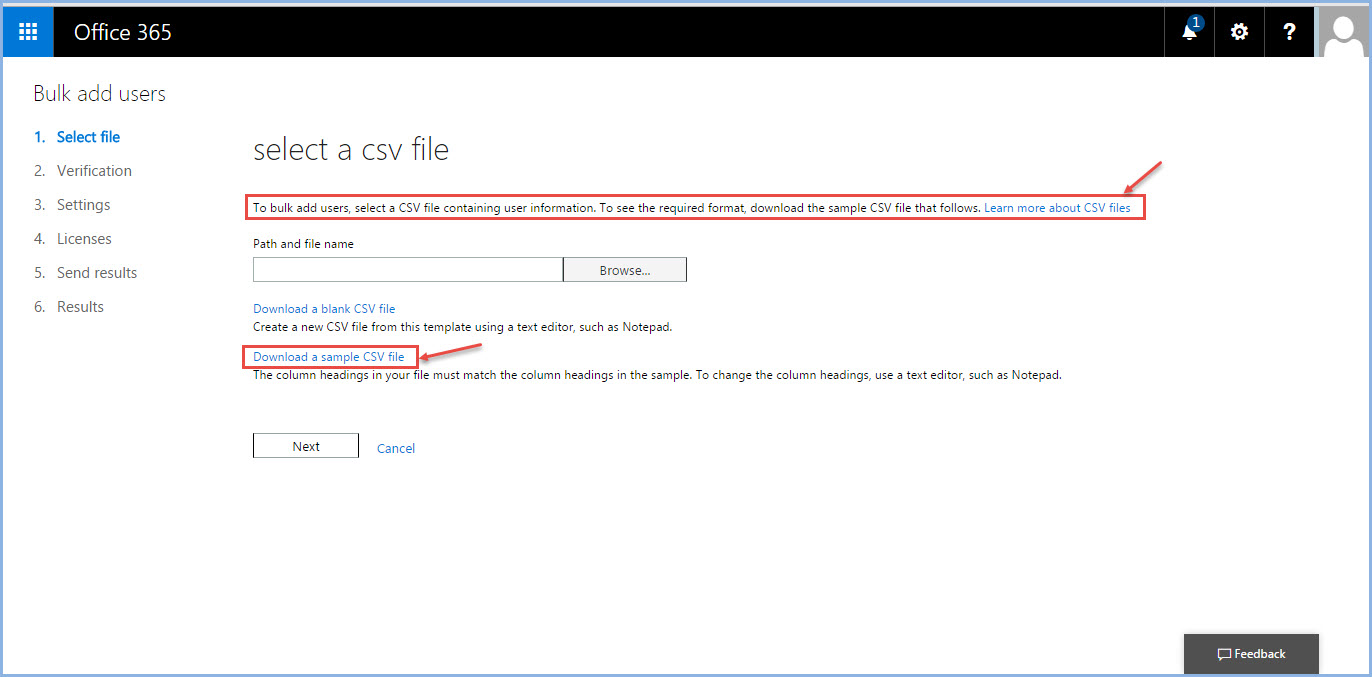
7.If you don’t have ‘CSV file’ format then you can download it from here as shown in the image below:
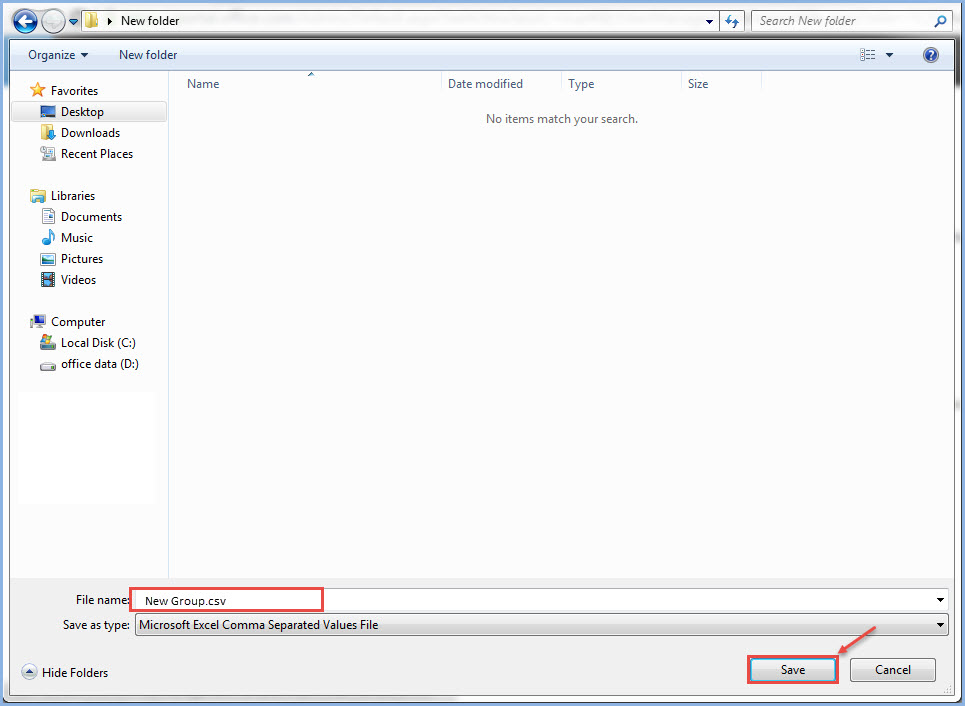
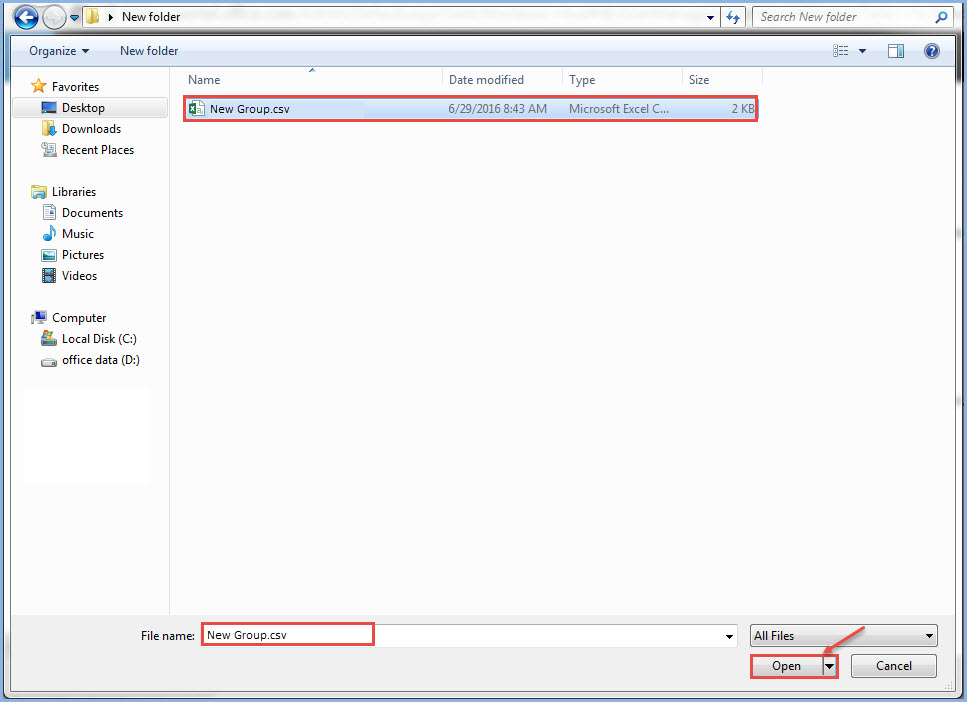
8.Choose the Path where you want to download CSV file and specify the name for the same.
9. Edit the downloaded csv file as per your requirement and then click on Browse to upload the same.
- Click Open, as shown in the images below:
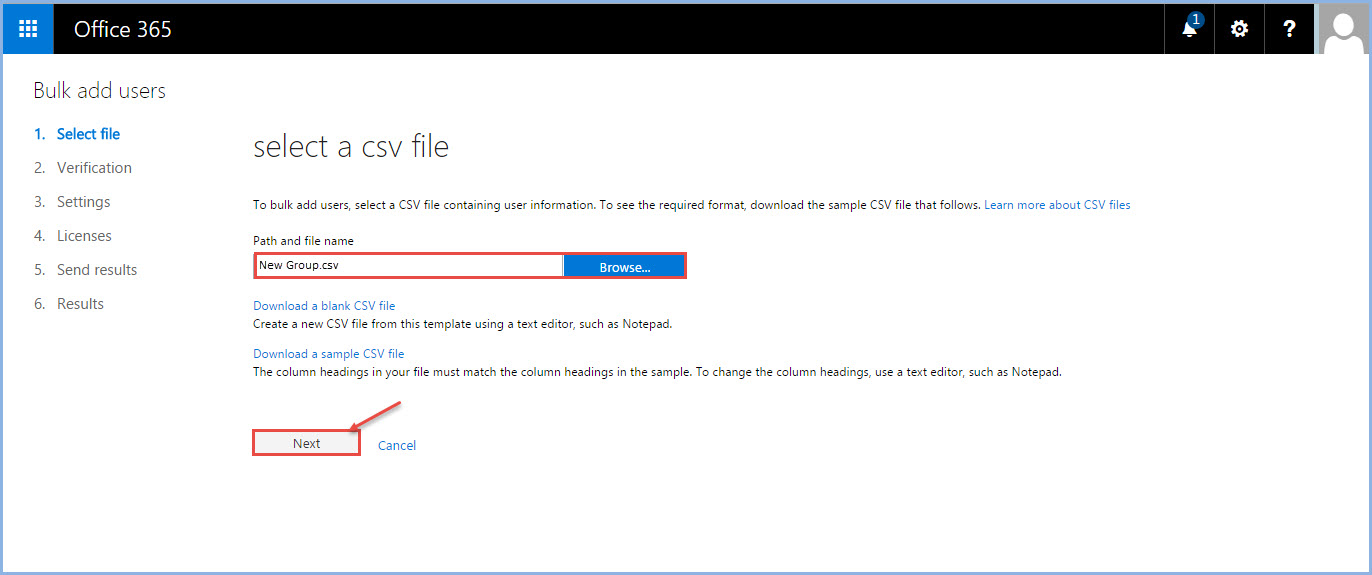
11.After select csv file, click on ‘Next’.
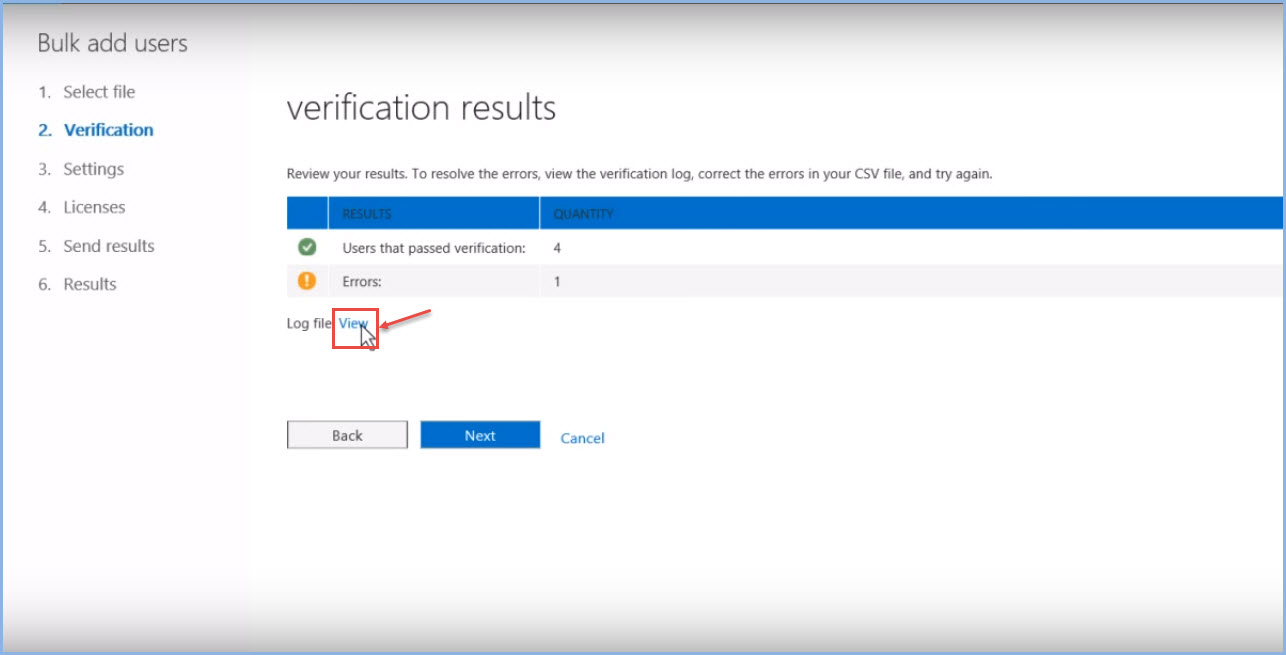
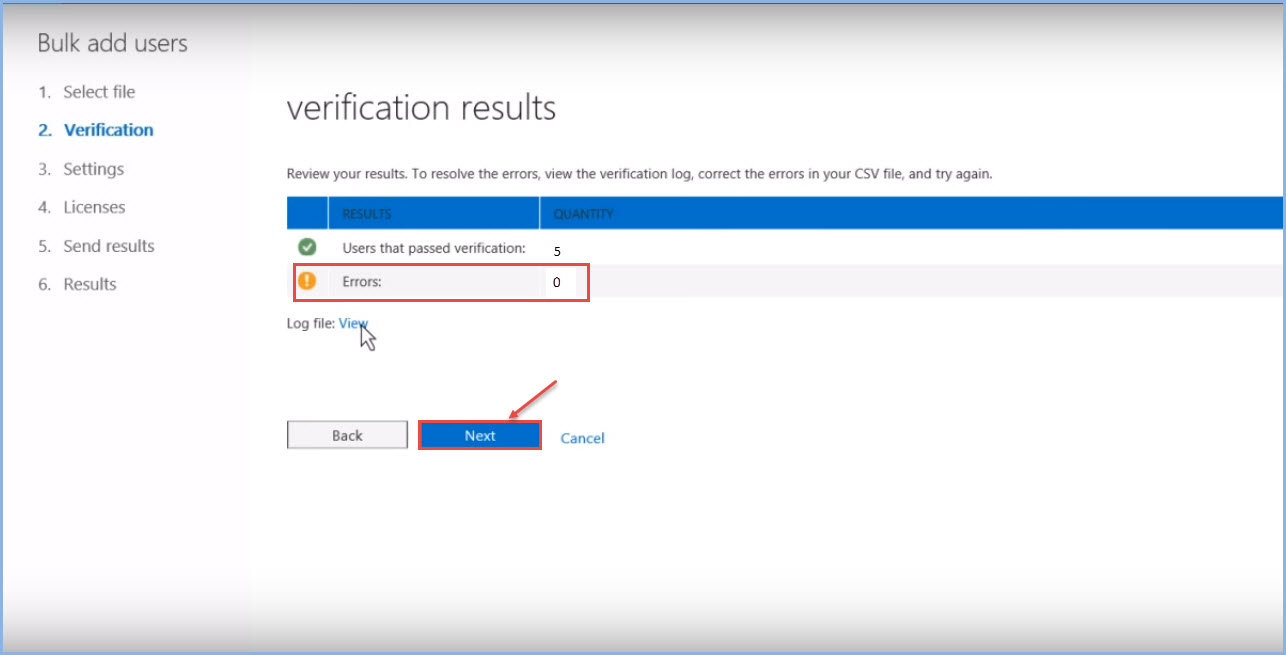
12. Once the process is complete, it will show ‘verification results’ screen. If no error encountered, it will show ‘0’ error as shown in the image below:
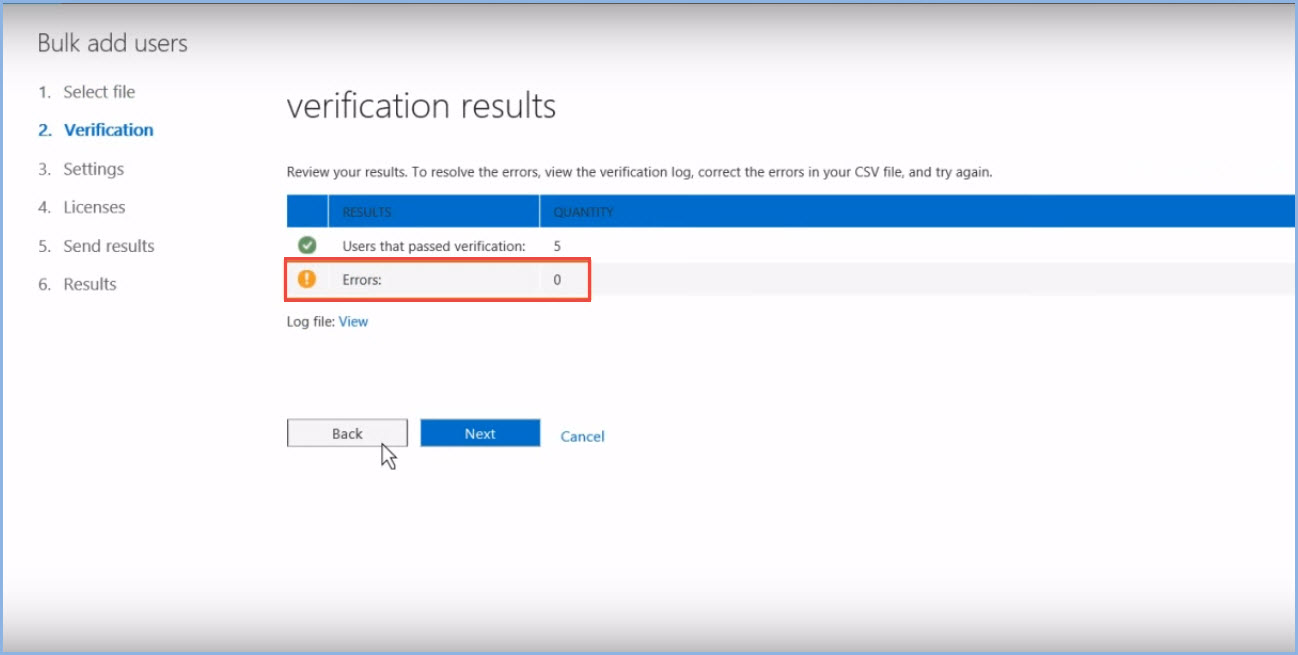
13. In case, you come across an error while uploading users in bulk, click on ‘View’ to see log of error’d out records on the ‘verification results’ screen.
- Then check csv sheet.
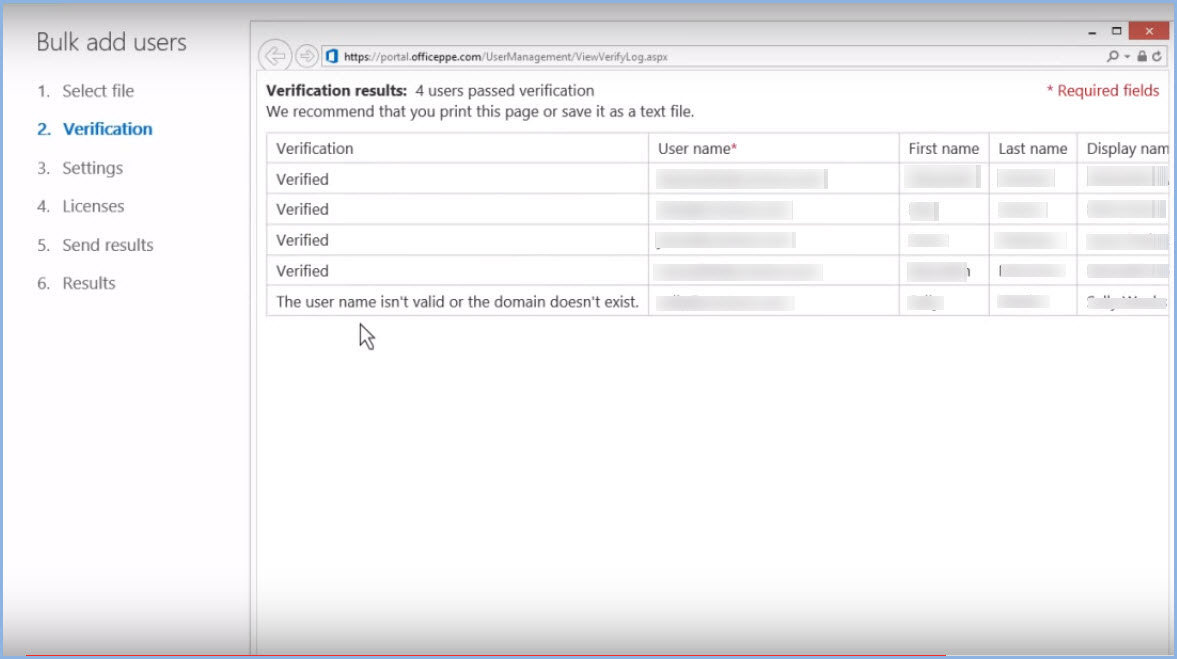
15.You can see the Error as shown in the image.
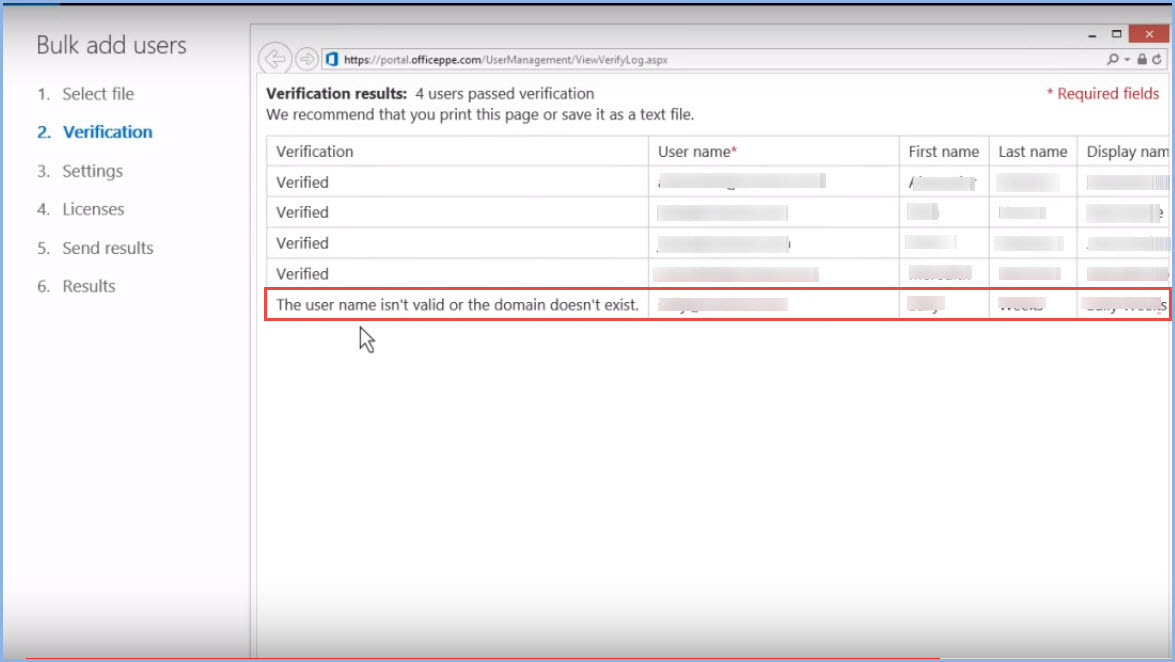
- Make required corrections and upload again, click on ‘Next’ again to check if an error is generated or not. If no error is generated, then click on Next to go ahead.
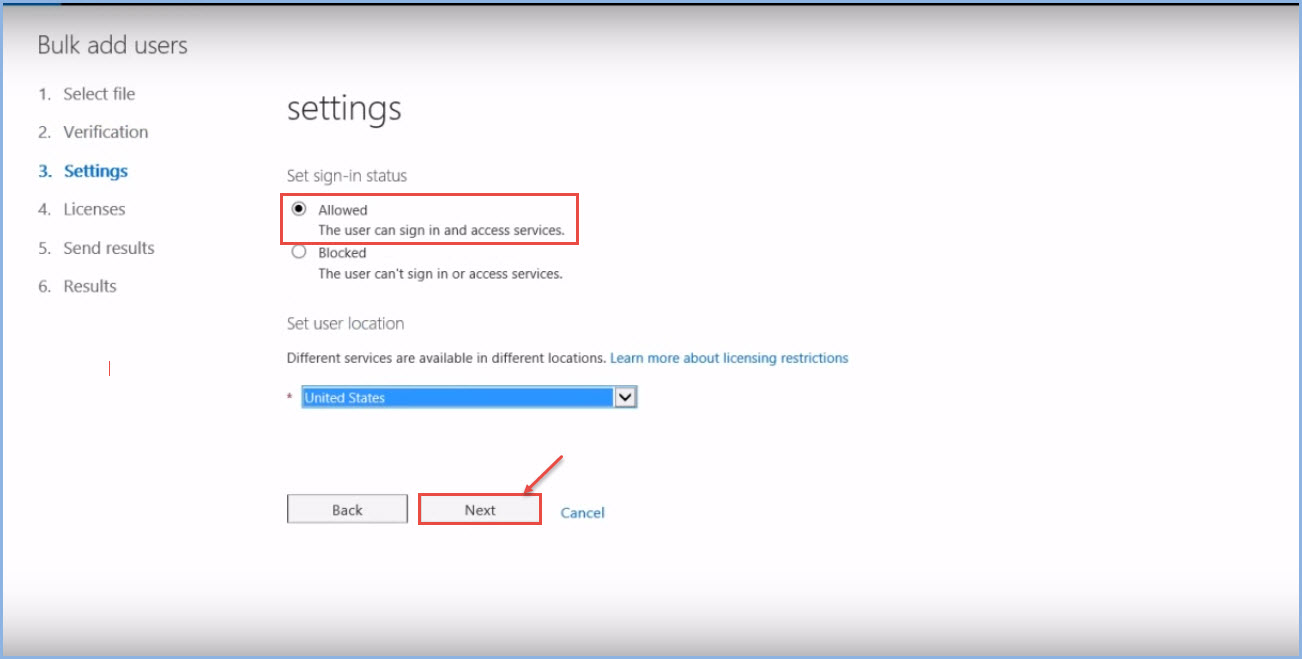
17. In the “Settings” screen, you need to set sign-in status – for the user to be able to log in and access the services. Specify user location and click on ‘Next’.
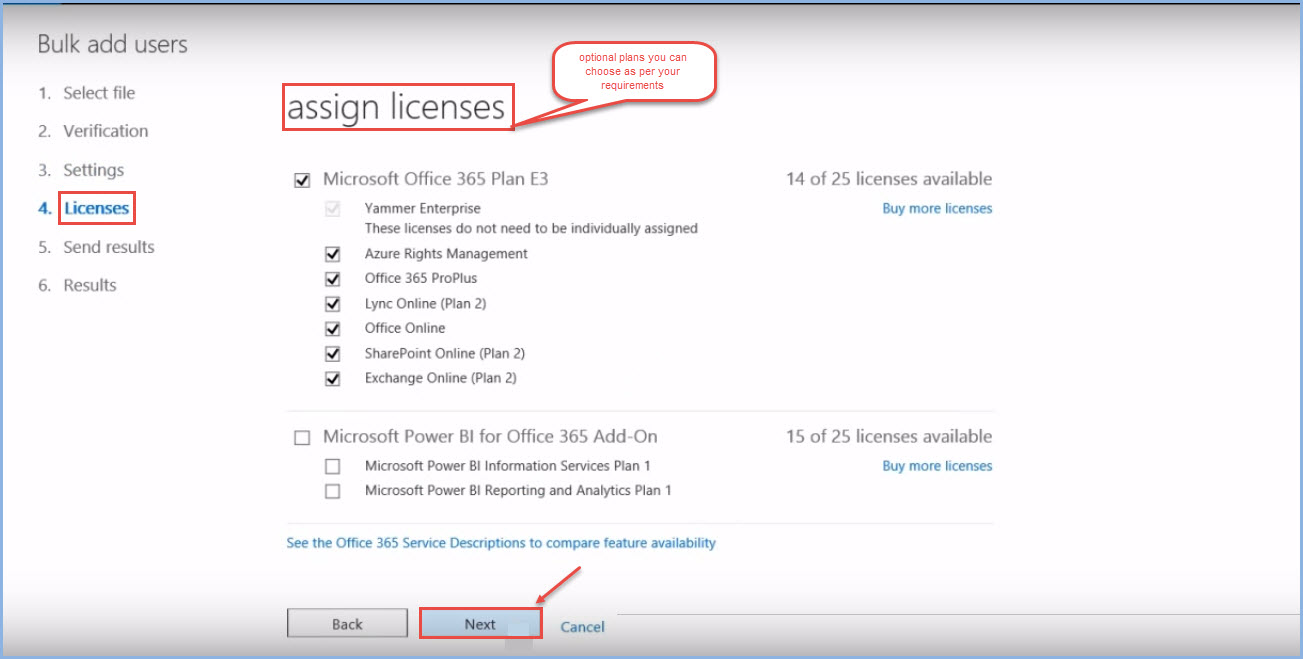
18. Next is ‘Licenses’ screen and you are prompted to ‘assign licenses’ for various services, as shown in the image. Then press ‘Next’.
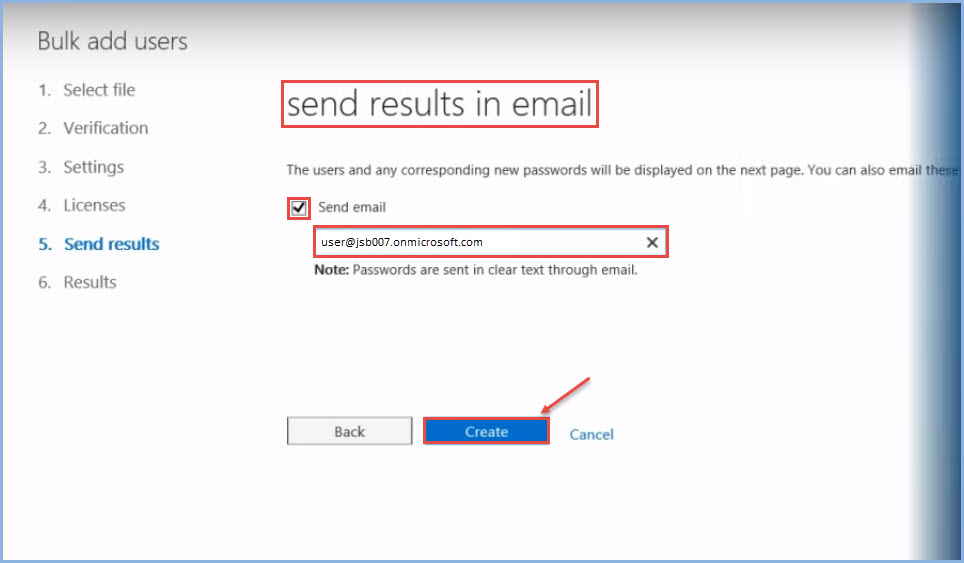
19. Next step, you are prompted to receive the results of whole process via email. You can check the “Send email” checkbox, specify your email address and then click on ‘Create’.
 (1)")