
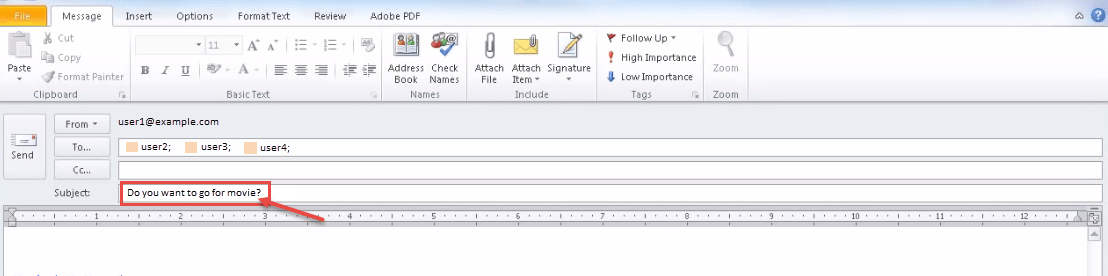
How to use voting button in Microsoft Outlook 2010.
Microsoft Outlook’s “Use Voting Buttons” is a useful feature, which can help you create an easy poll, and help you collect your colleagues’ or friends’ decisions, from with-in email messages easily. You can also create voting buttons in Microsoft Outlook 2013. Click here to know this process.
- In Outlook 2013, click on “New Email” in the “New” group on the “Home” tab.
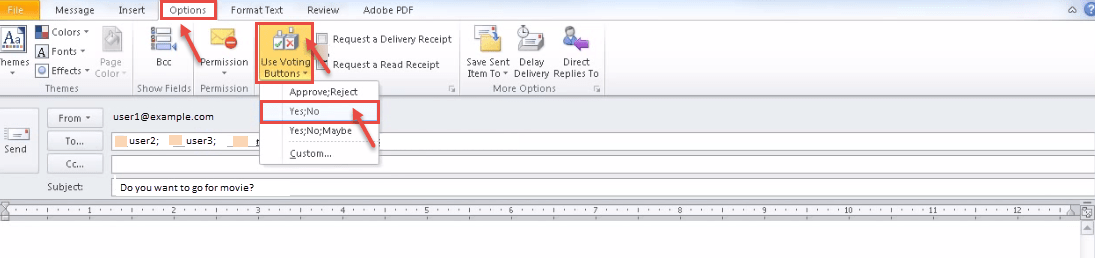
- Click on “Options” tab in the tracking group. Click on “Use Voting Buttons” and select “Yes; No” option from the drop-down.
- “You have added voting buttons to this message” message appears after applying the voting button.

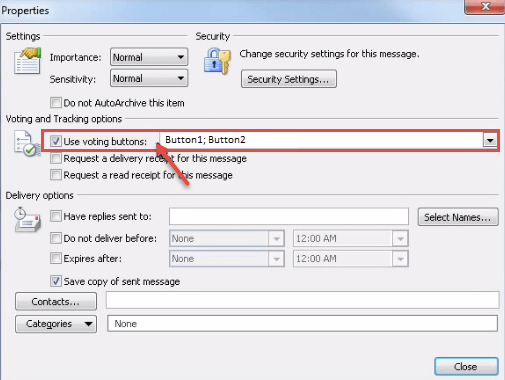
- If you want to create your own custom voting button names, click on “Options” tab in the tracking group. Click on “Use Voting Buttons” and select on “Custom..” option.

- Now, “Properties” dialog box appears. Select “Use voting buttons” check box under “Voting and Tracking options”. Delete the default option. Type the text and use semicolons to separate the button names. Click Close .
- “You have added voting buttons to this message” message appear on your windows screen. Compose your message and send it to all the recipients.

- In the “Sent Items”, open the message that you sent which included voting buttons. On the “Message” tab, in the “Show” group.
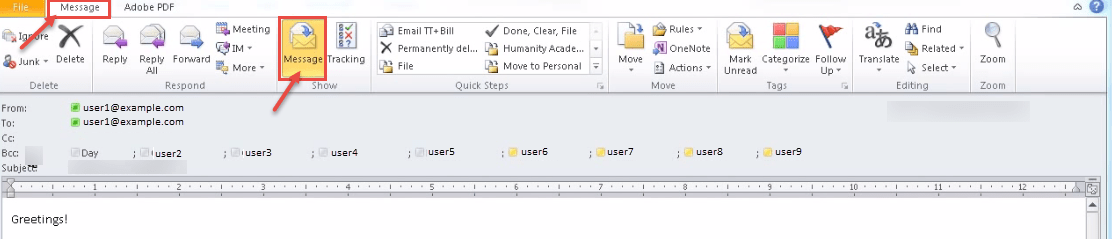
- Now, click on “Tracking” Option. Tracking does not appear until at least one recipient of the email message has replied with his or her vote.

 (1)")