
HOW TO FIX THE “OUTLOOK DATA FILE CANNOT BE ACCESSED” ERROR IN OUTLOOK 2019
When you install Microsoft’s Office applications suite, the one application which gets installed is ‘Microsoft Outlook’. It’s a tool used to send-receive emails to your contacts. With Outlook 2019 you need not log into the Web Interface of your email service for checking your emails.
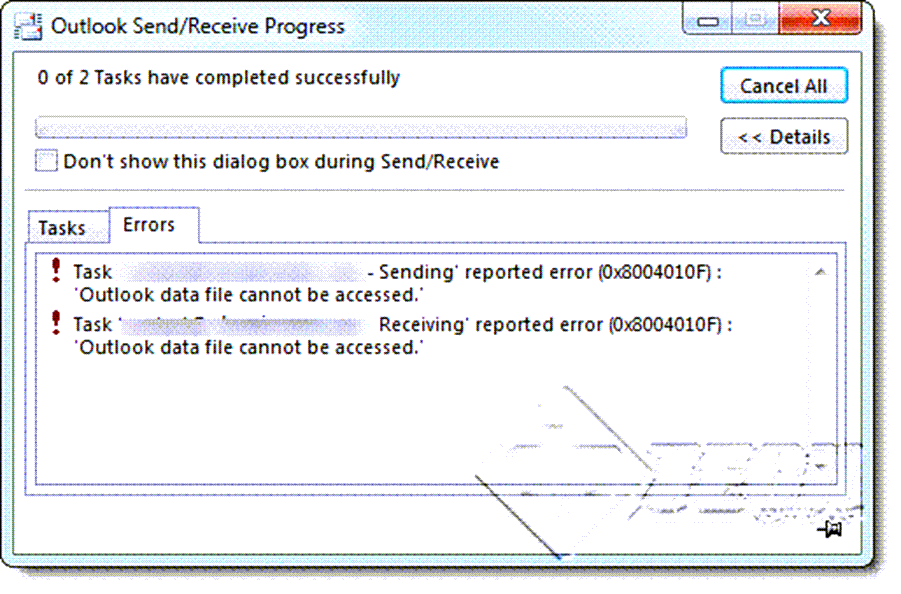
In Microsoft Outlook 2019 – ‘Outlook data file cannot be accessed’ – is an outlook ‘send/receive’ error that usually occurs due to a corrupt outlook profile or inaccessible outlook data files (.OST or .PST). Due to this error, Microsoft Outlook 2019 is not able to fetch any new messages or send emails, lying in the outbox. The image below shows the error message –
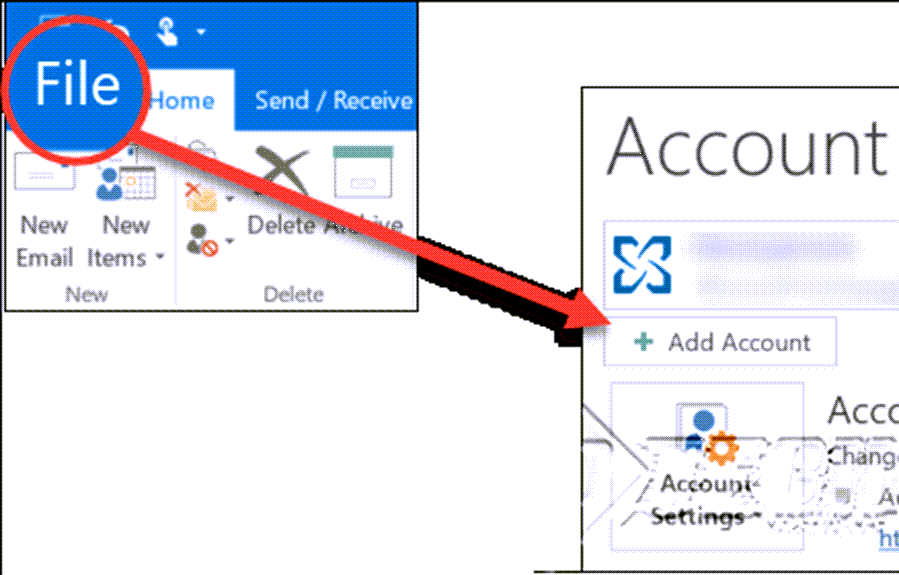
- To resolve this error, open Microsoft Outlook 2019. Click on the “File” menu and select “Account Settings” as shown in the image below –
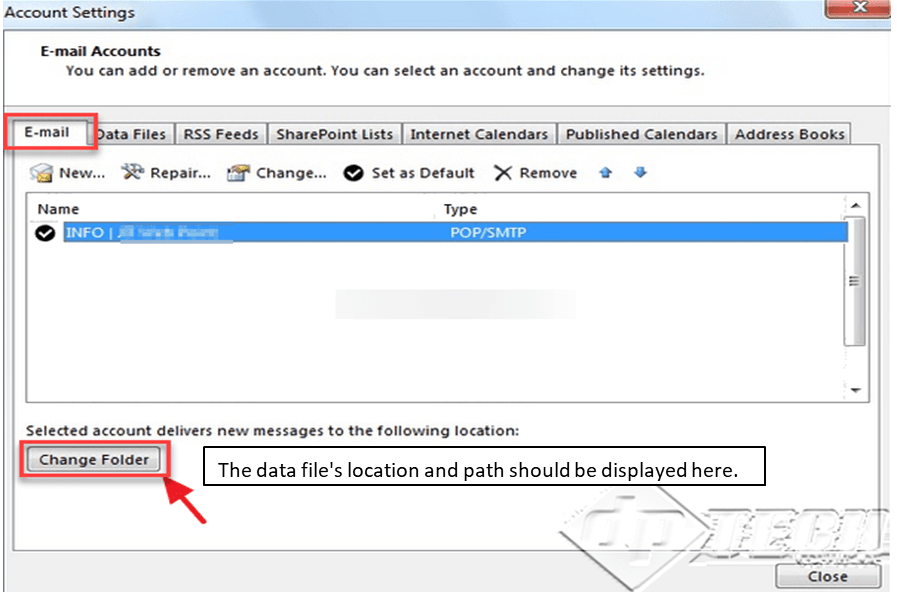
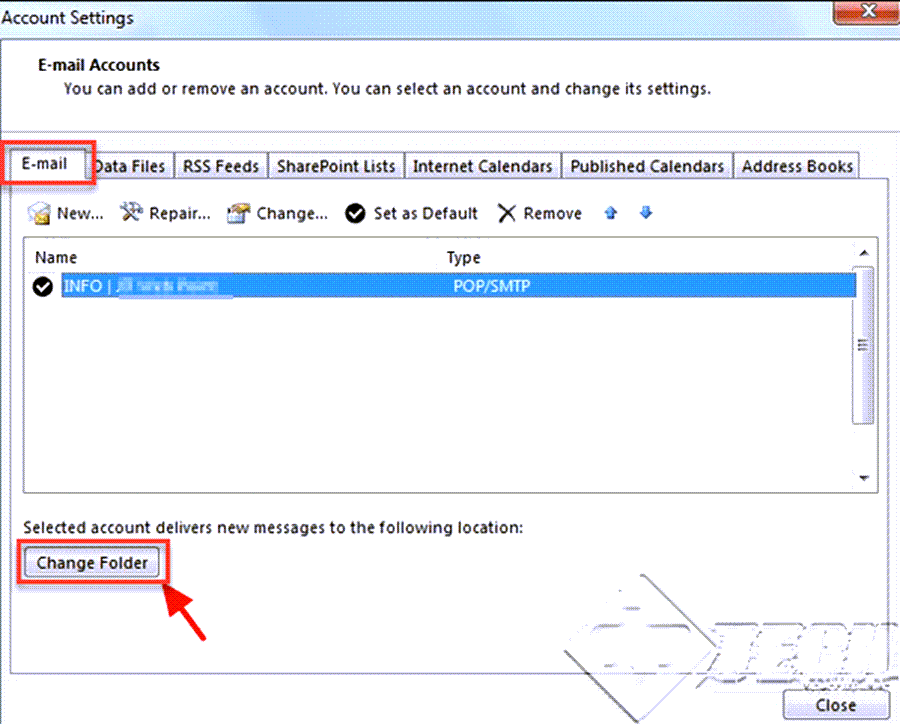
- From the “Account Settings” dialog box, click on the “E-mail” tab. If you have configured multiple email accounts, select the desired account with the problem and click on the “Change Folder”, as shown in the image. By default, the path of the existing data file should be displayed against the ‘Change Folder’ button. In case it’s blank, that means the specific data file was not found. The path displayed should be the same as in the ‘Data Files’ tab.
- From the subsequent dialog box, click on “New Outlook Data File” as shown in the image below.
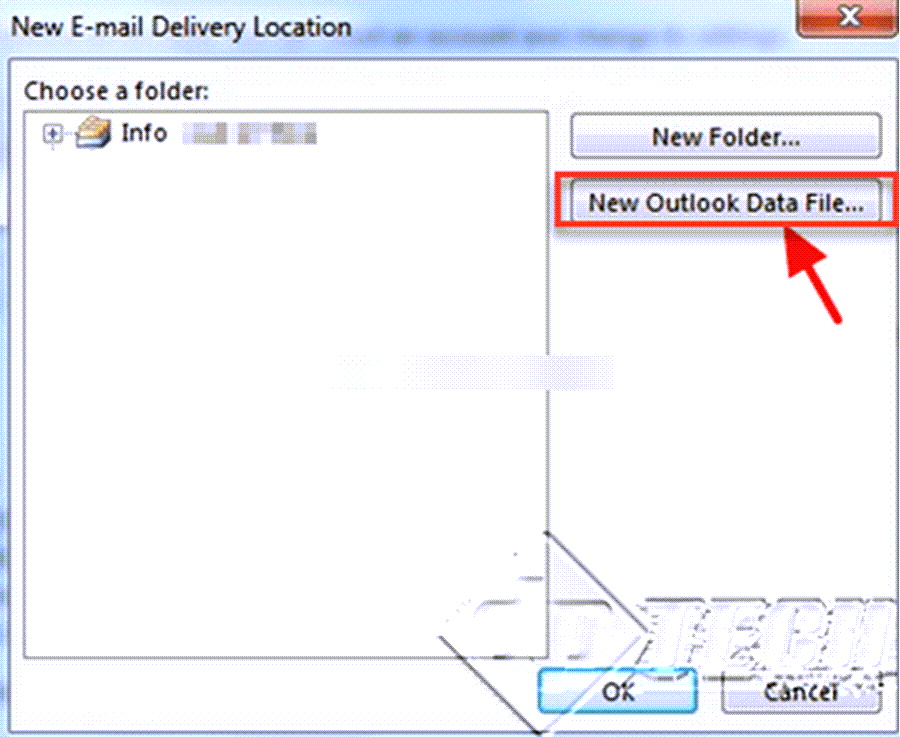
- In the ‘New Email Delivery Location’ dialog box, select the folder you want to set as the default delivery location. You can specify a new folder and/or, click on ‘New Outlook Data File’.
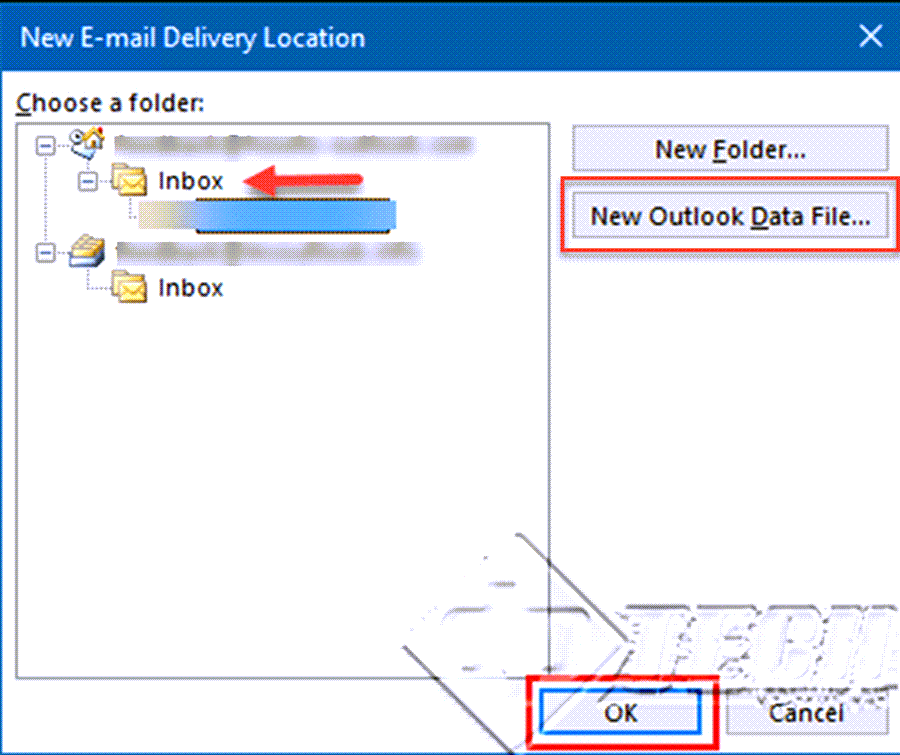
- After creating the New Data File, expand the view and select ‘Inbox’, and click ‘OK’.

- Once you have configured the temporary data file, on the ‘Account Settings’ screen, click on “Change Folder” again. Setting a new data file will refresh Outlook 2019 and it will ‘recognize’ the existing file. So, you can either select the new file – but settle for losing existing emails or select the default location as earlier.
- Switching the data files, should refresh the data files, and solve the ‘Data File Not Found’ error, and you should see the path of your OST or PST file (opposite the ‘Change Folder’ button). Click on ‘Close’ to close the dialog box.
- After closing the “Account Settings” dialog box, click on the “Send/Receive” option. Your emails should work properly.
If you are getting the same error in Microsoft Outlook 2013, click on this link.
 (1)")