
How to use Clutter in Microsoft Office 365
Clutter service in Office 365, automatically analyzes the mailbox, checks the most read/unread emails, scans the emails and moves the unwanted unread emails that are in the user’s mailbox to a new folder called Clutter. To manage “Clutter”, follow these steps –
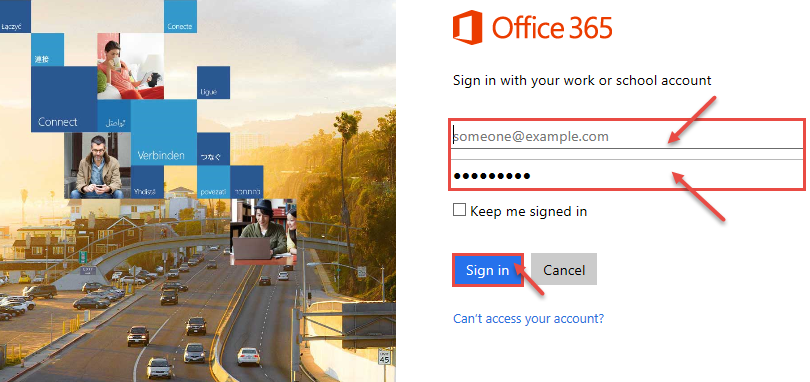
- Log into the Microsoft Office 365 account.
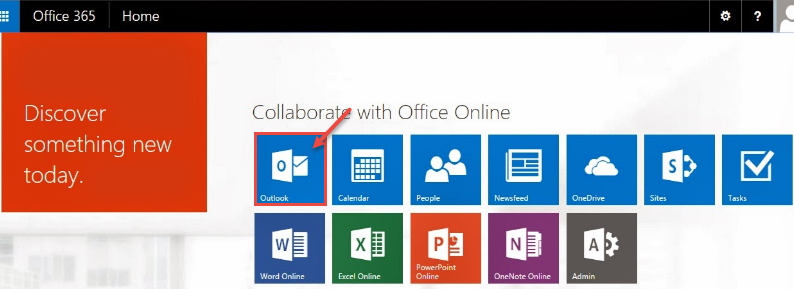
- From the “App launcher”, choose “Outlook” web.
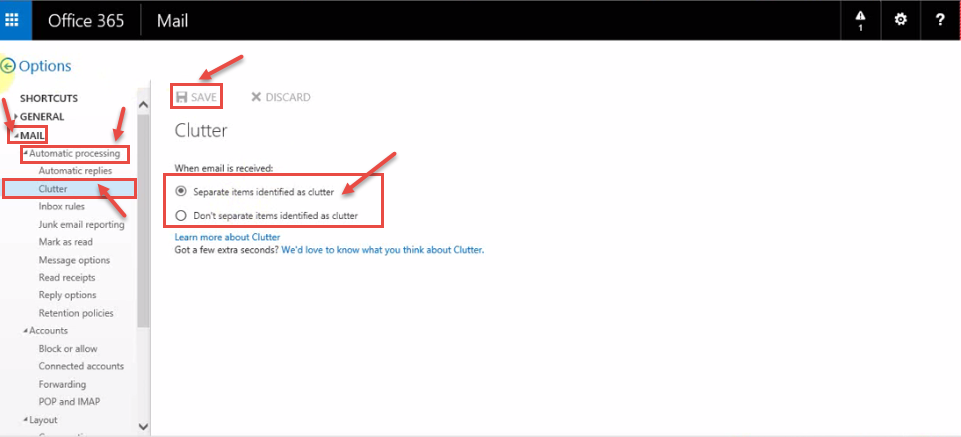
- Click on the “Settings” (“gear”) icon in the navigation bar. From the drop-down, select “Options”.

- “Options” window appear on your screen. Under “Automatic processing” in the “MAIL” option, select “Clutter” and there you will have 2 options to enable or disable the clutter feature as shown below. To enable “Clutter”, select “Separate items identified as clutter” radio button. To disable clutter feature, select “Don’t separate items identified as clutter‘. Click on “Save” to make changes permanent and exit the “Options” window.
- If you select the first option, then Office 365 Exchanges separates the identified emails and moves them into the clutter folder. Go to the “Home” screen”. You will see “Clutter” folder there.
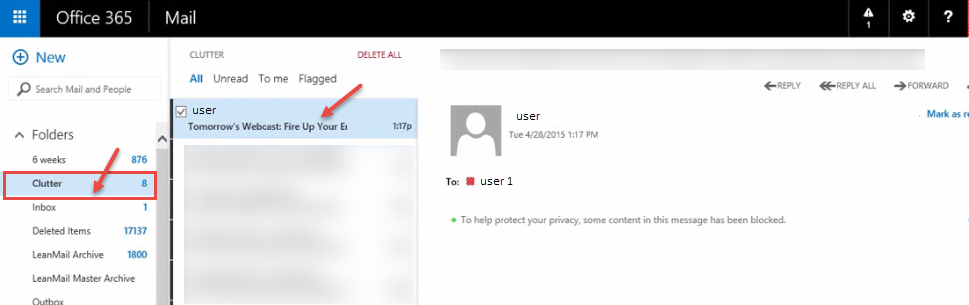
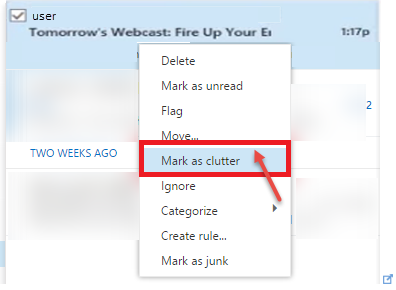
- Once this feature is enabled, you will have an option to right click on any email in the inbox and mark it as “Clutter“. This will automatically move the current email and the subsequent emails into the clutter folder.
- If you want to “mark” any email not to be stored in “clutter” folder and to be sent in your inbox, right click on the email in clutter folder and select “Mark as not clutter“.

 (1)")