
How to create shared mailbox in Office 365
- Log into your Microsoft Office 365 account.

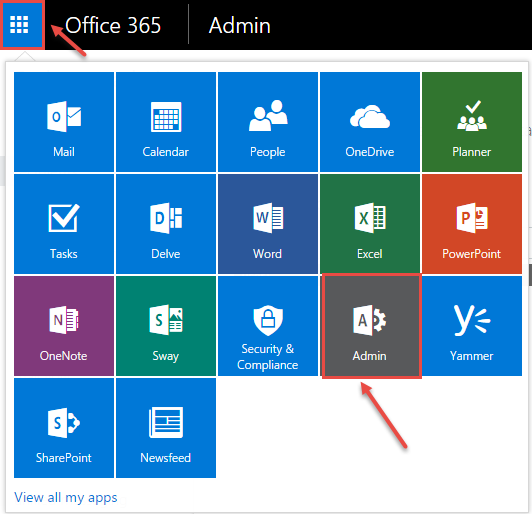
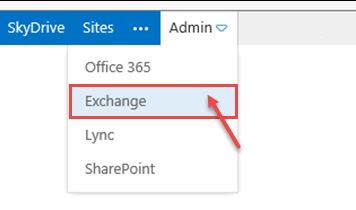
- From the “App Launcher” in the top left corner, “Admin”. Open the “Exchange Admin Center” from the menu, as shown in the image below…
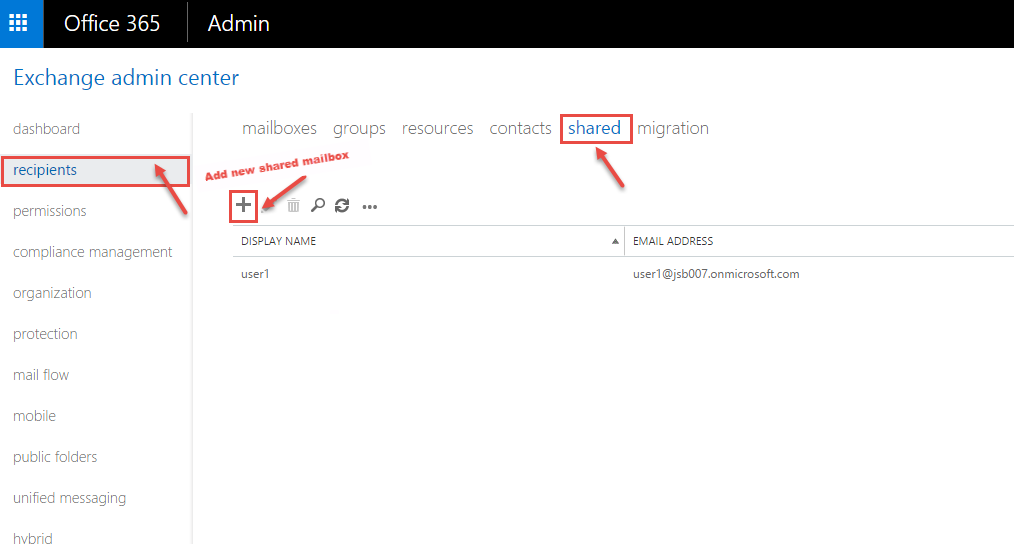
- In the “Exchange admin center“, click on “recipients” and select “shared” and click (+) for adding new shared mailbox.
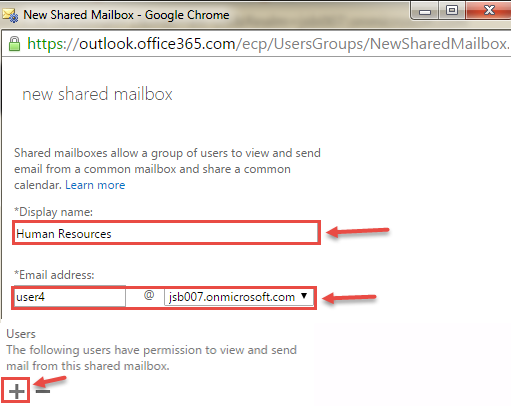
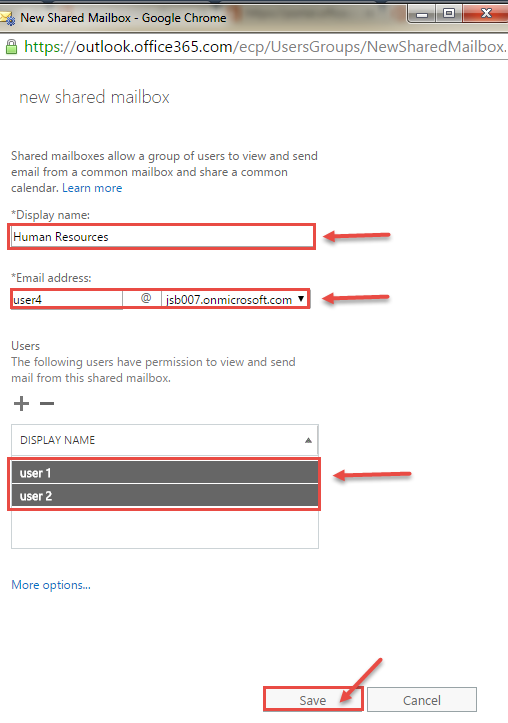
- “New Shared Mailbox” window opens on your screen. Fill the required information for creating new mailbox like “Display name”, “Email address” and “Users“. Click on “+” sign under “Users” to add all users who will access this “shared mailbox”.
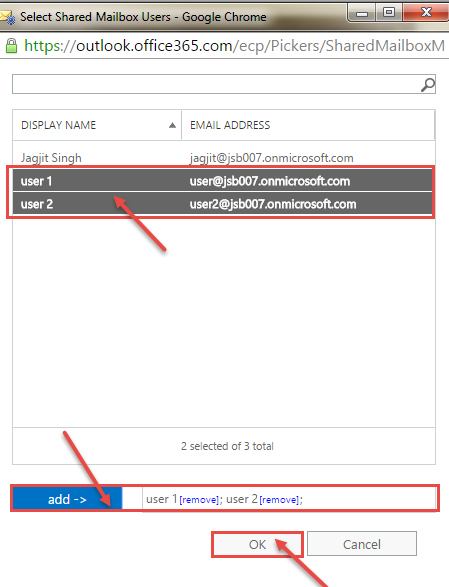
- Now, new window appears on your screen. Select user(s) by searching them in the “Search” box. Click OK. In following image, two users – “user 1” and “user 2” are added.
- Now, you can see full information filled by any user in following image. Click on “Save” button.
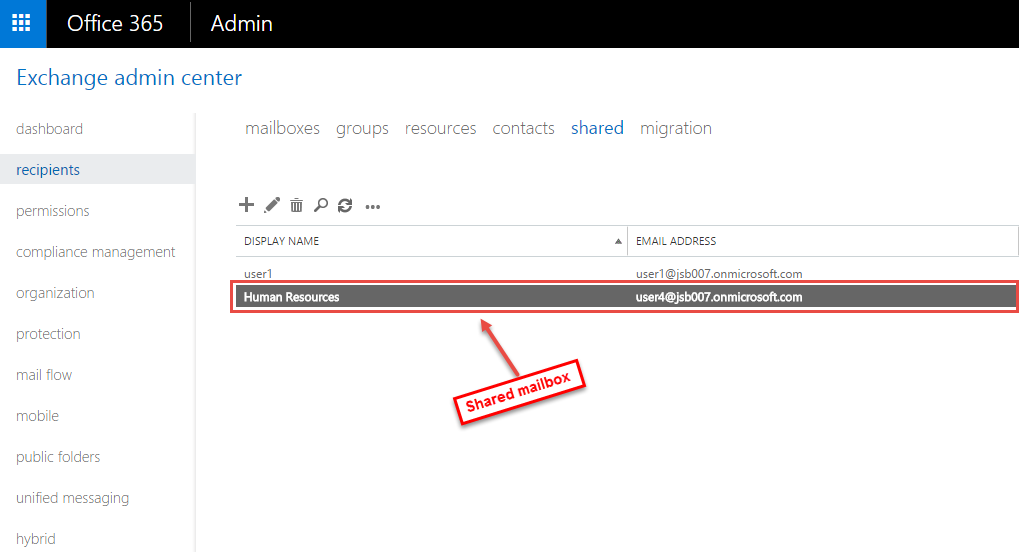
- Go back Exchange admin center dashboard and see your created shared mailbox in your screen.
- For “mailbox delegation“, click on the mailbox created in previous step. In the new window, select “mailbox delegation” and click on (+) sign, to add new user.

- Select new user and click on “add”. Click OK.
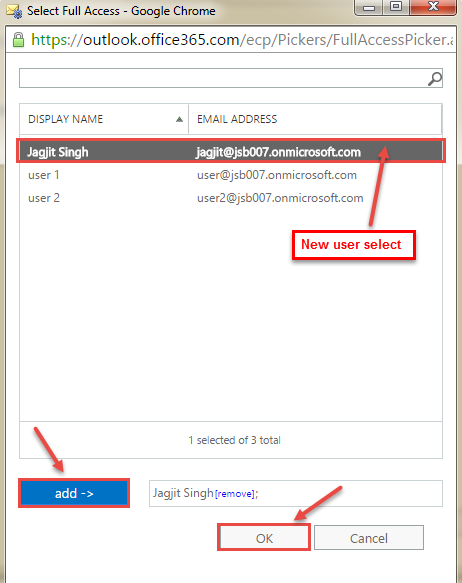
- Now, user add in your added user’s lists. Click “Save”. You can see all selected users in following image.

- Your shared mailbox is created along with mailbox delegation in Microsoft Office 365.
 (1)")