
Create and Open a Shared Mailbox in Office 365
Shared mailboxes feature in Microsoft Office 365, enables a group of people to monitor and send email from a common email address. When a person in the group replies to a message sent to the shared mailbox, the email appears to be sent from the shared mailbox, not from any individual user. Follow these steps to create a shared mailbox:-
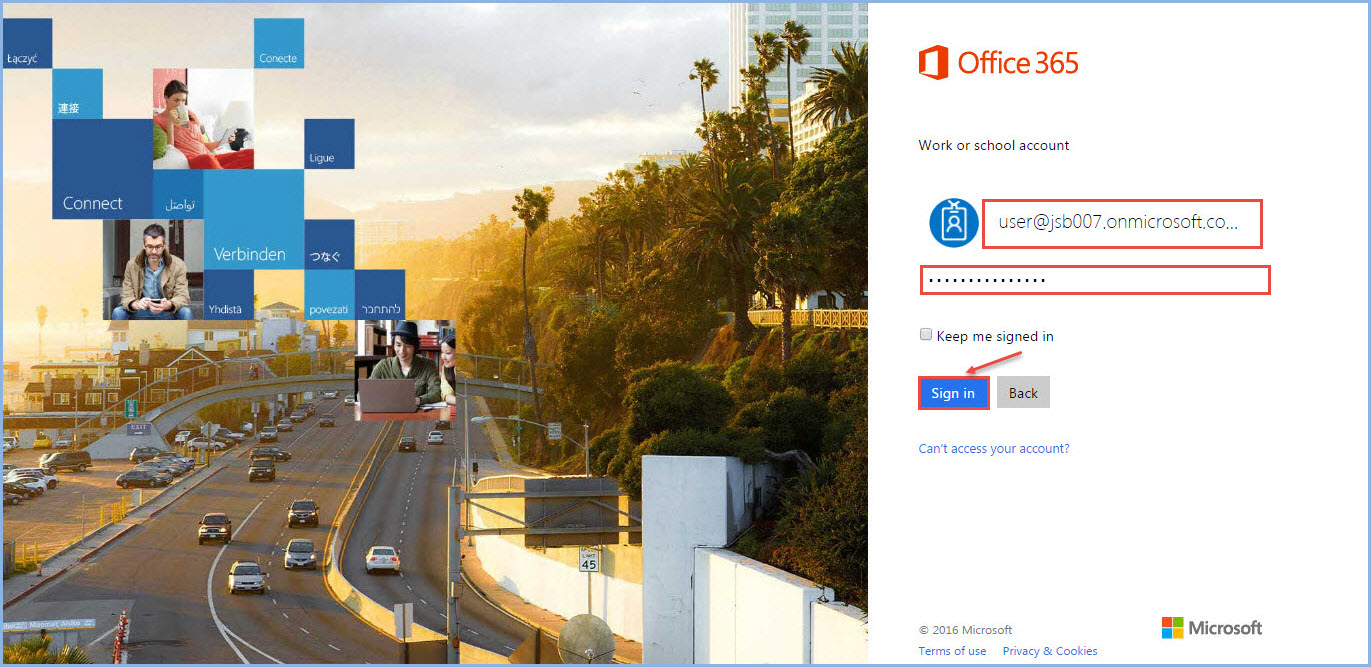
1.To create a shared mailbox in Office 365, login with your user credentials:
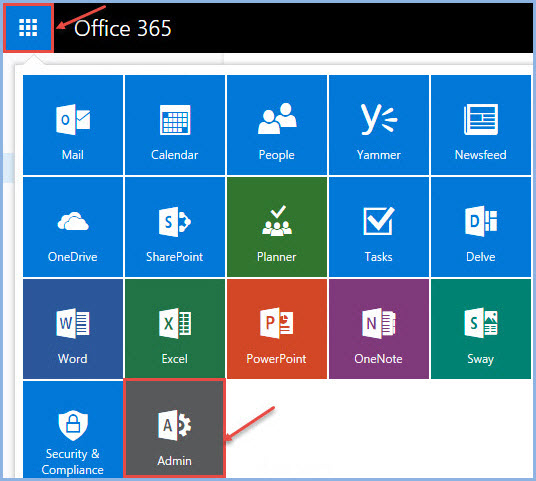
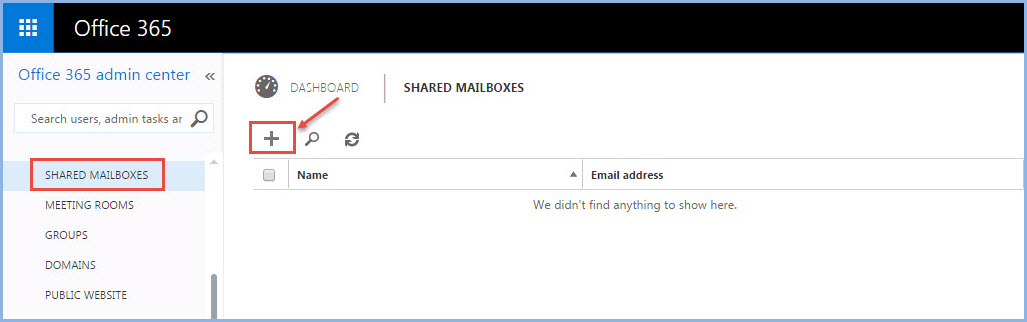
2.Go to ‘App Launcher’ on the left top of the user account and select on ‘Admin’ option.
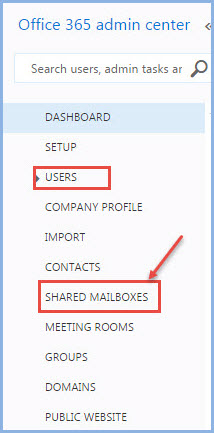
3.Under “Admin“, section select ‘USERS’ and ‘SHARED MAILBOXES’ as shown in the image.
4.You will the following window in your screen.
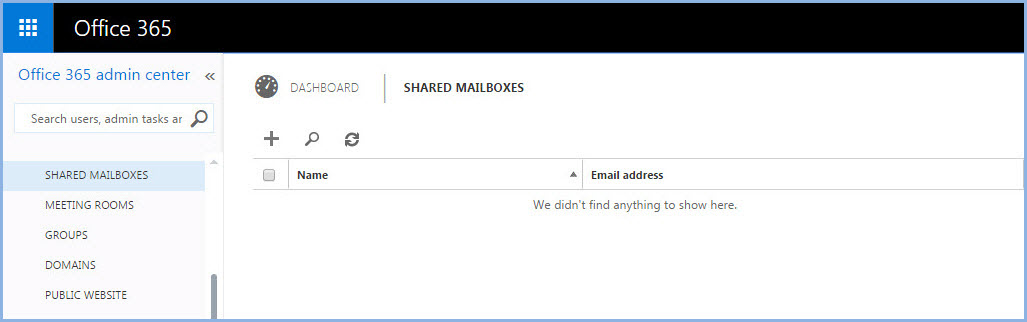
- Click on ‘+’ to add a new “Shared Mailbox“.
- Specify, “Name”, “Email address” for the mailbox and add members/users who can access this mailbox. In the Search field, type a person’s name and then select Search as shown in the image below:
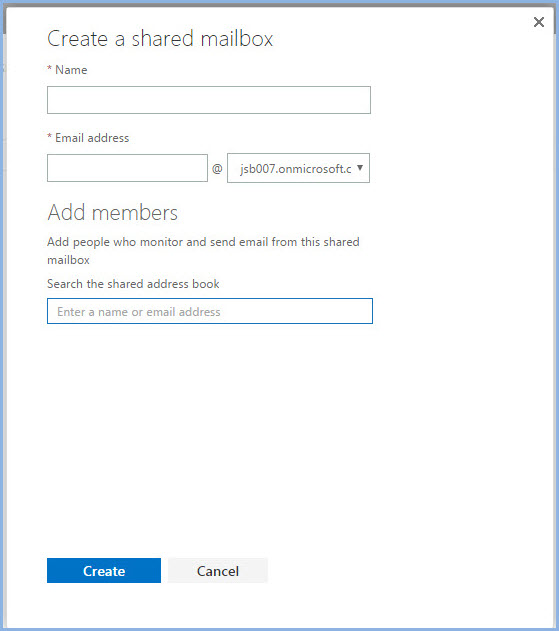
- To search a member, in the search field, type a person’s name and then select ‘Search’ as shown in the image below:

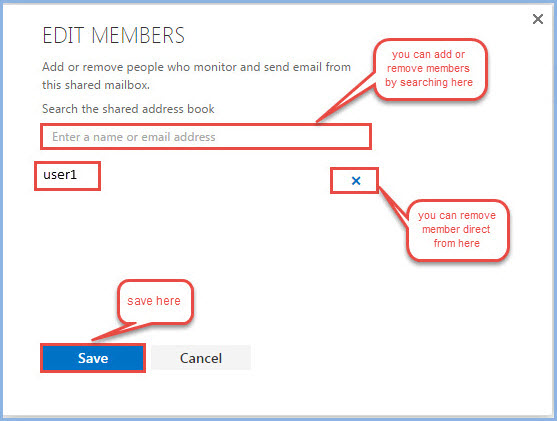
8.You can ‘Edit’ the member details related to ‘Email account of the member’ and ‘Name of the member’ by click on the name of the member then a screen on side of the account will appear, like image shown below. Once done, click on “Save” to close the dialog box.
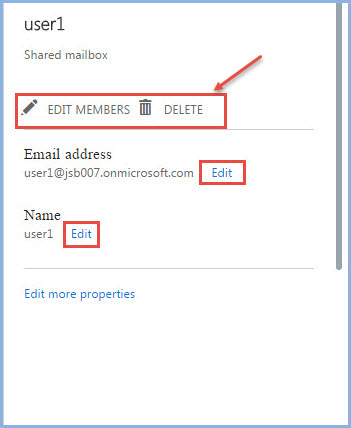
10. To remove a user from mailbox, edit the user and select ‘Delete’.
 (1)")