How to fix Synchronization error with repairing PST file in Microsoft Outlook 2019
Microsoft Outlook 2019 software is used to access emails without directly accessing the OWA. With this software, you can compose, send and receive messages without accessing the official web version of Outlook. The user feels stuck and is at a loss of productivity when the Microsoft Outlook 2019 software cannot synchronize with the Web interface. Without synchronization, you cannot check the latest messages nor can send the emails, you composed offline.
There are many ways to fix the synchronization error, and we will focus on repairing the Personal Storage Table (PST) file. We will be using the Inbox Repair Tool (scanpst.exe) provided by Microsoft. This tool is automatically installed when you install Microsoft Office 2019. To locate the scanpst.exe file, move to ‘C:\Program Files\Microsoft Office\root\office16\’ location.
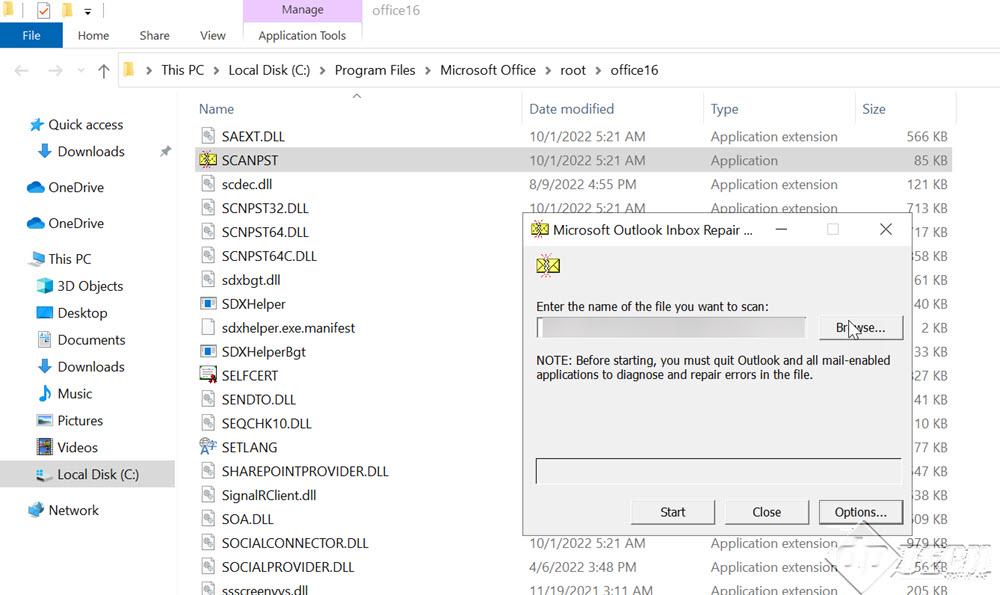
- Open the ‘scanpst.exe’ file in the location specified above – ‘C:\Program Files\Microsoft Office\root\office16\’. When you run ‘scanpst.exe’, it automatically detects the location of the ‘PST’ file configured on your machine. In case you don’t see the correct path, click on ‘Browse’ to locate the correct file.
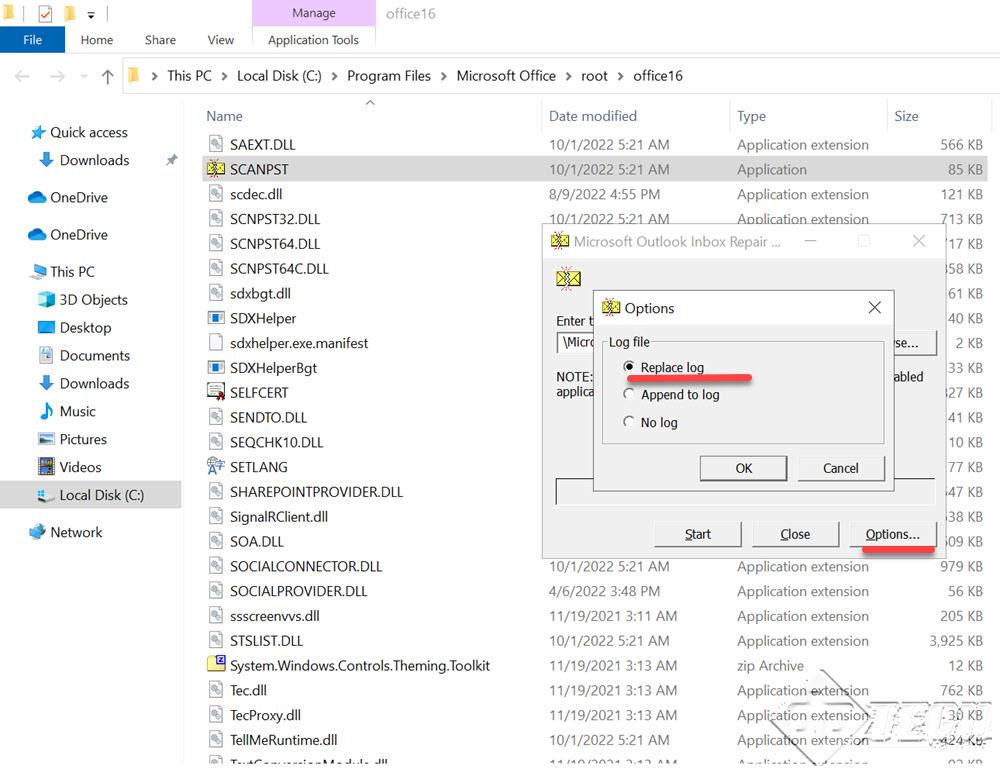
- You can also change the log options by clicking on ‘Options’. The default option is ‘Replace log’ – the latest run will overwrite the previously saved log.
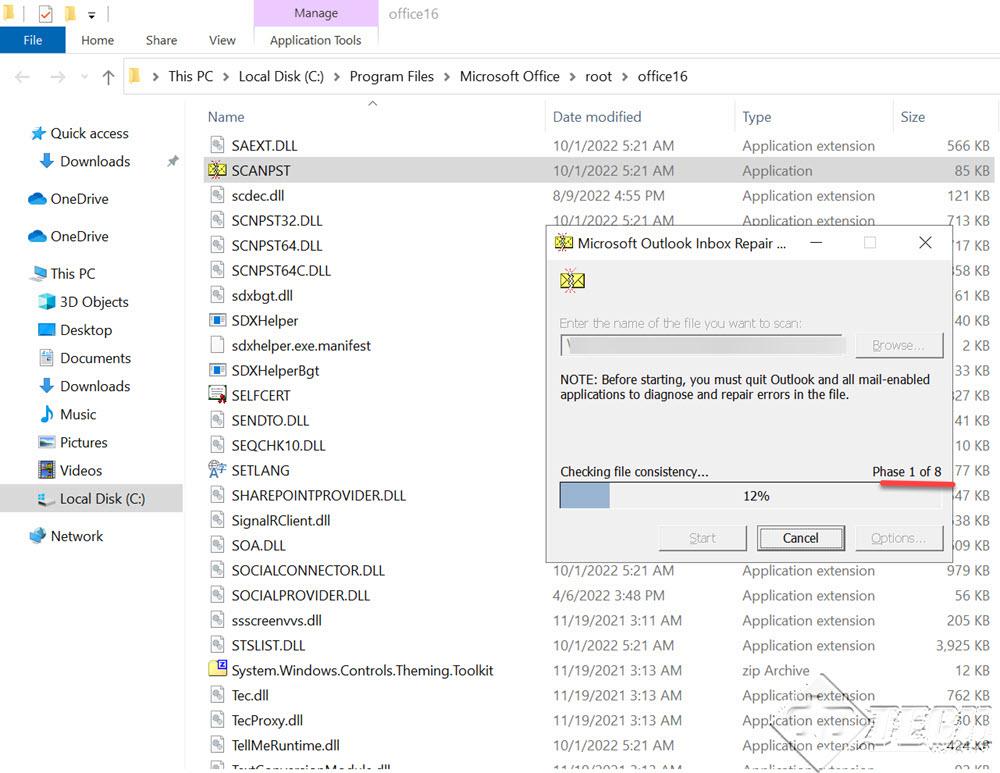
- When you click on ‘start’ – an 8-phase process is initiated. The process also checks the consistency of your PST file.
- After the process is complete, ‘Scanpst.exe’ shows you the summary (see the image below) and prompts you to save the file before running the repair. You can either opt for the default location for storing ‘backup file’ or may provide a custom location using ‘Browse’.
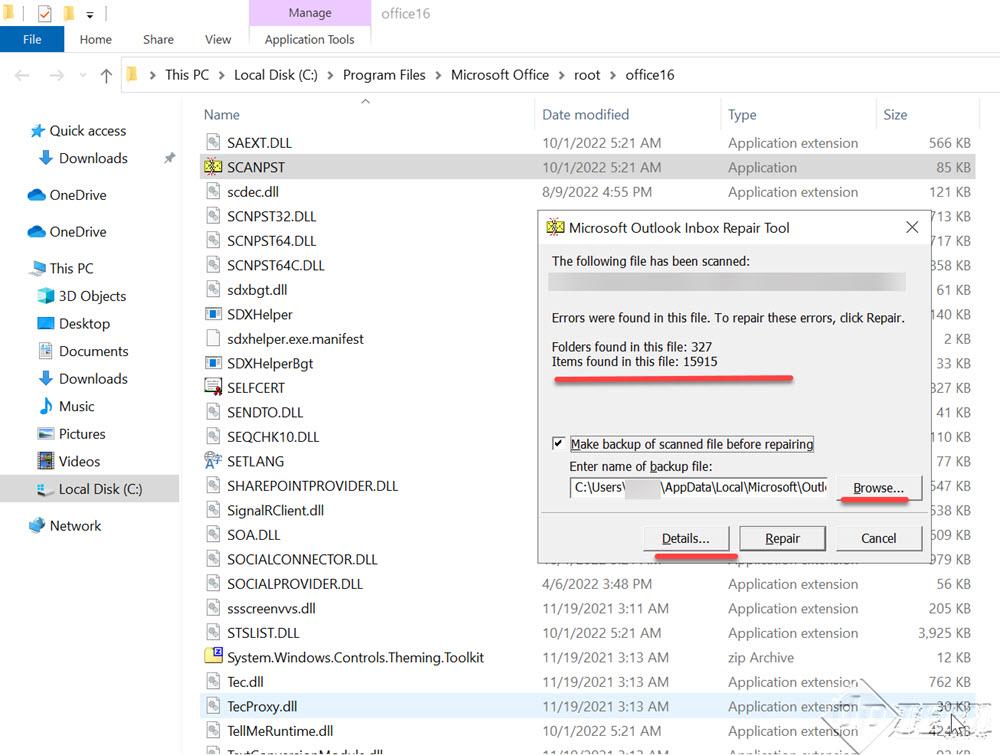
- If you click on ‘Details’, you can see the status of the scan process. You can confirm from this if the PST files need to be repaired or not.

- You can initiate the repair process by clicking on ‘Repair’, as shown in the image below. Before starting the repair process, ensure you back up your file by checking the ‘Make backup of scanned file before repairing’ checkbox. It’s checked by default. Depending upon the size of the PST file, it may take a few mins to a few hours and may go ‘not responding’ for some time. Sit back, relax and let the process complete.
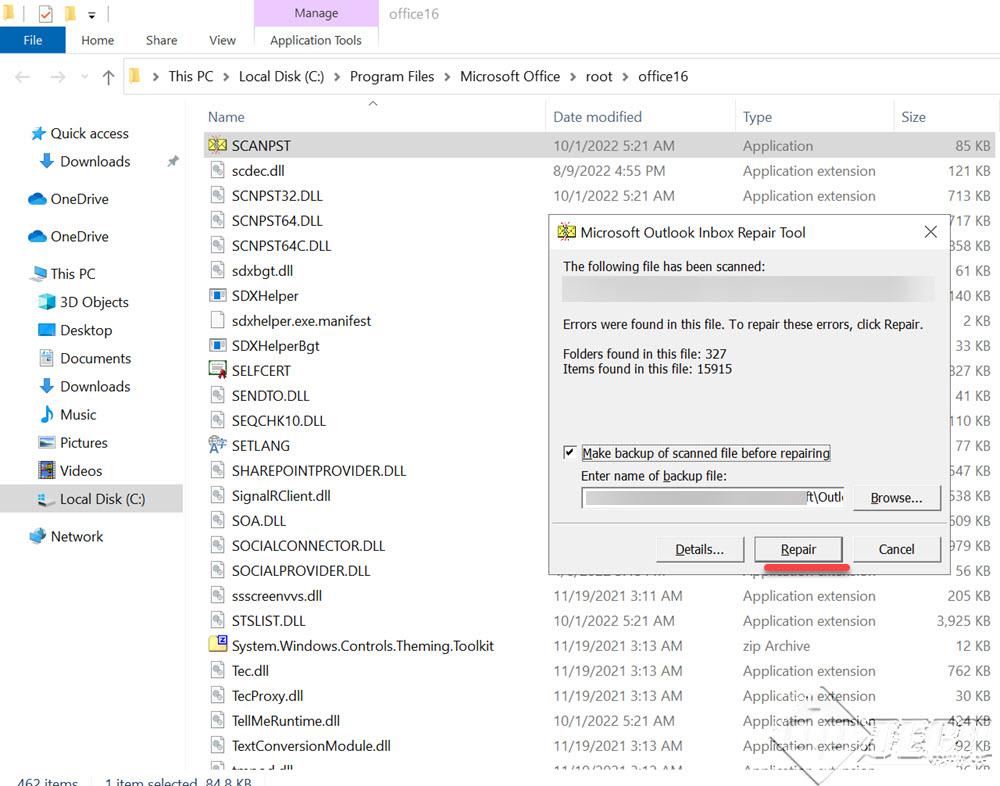
- If the process ‘freezes’ for quite some time, open the ‘Task Manager’ and check for disk activity. If it’s zero, then you might need to force terminate the process and start again. Otherwise, let it run and complete on its own. After the completion of the process, you will get ‘Repair Complete’ message (as shown in the image below).
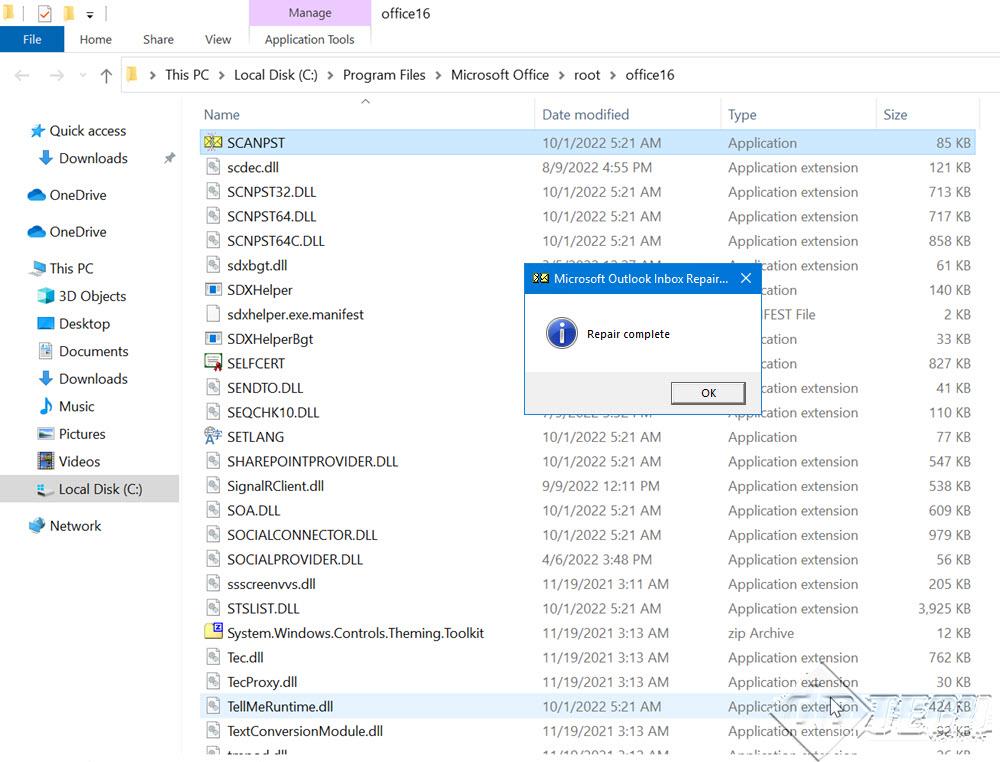
In case if you still get an error message try running the process again. In case after multiple runs, if you are not able to fix the ‘PST’ file – either restore the file from the backup or create a new PST file (if Outlook opens). For repairing an older version of Microsoft Outlook, check this link.

