Server Install guide to Windows Server 2012
Server Install guide to Windows Server 2012
Windows Server 2012 is the sixth release of Windows Server. It comprises of whole new set of wonderful features that make it really quick and easy for you the System Admin to deploy domain controllers.
Follow the steps mentioned below to learn how to install Microsoft Windows Server 2012.:
Hardware Requirements for Successful Installations of Win Server 2012
- 1 Processor 64 Bit
- RAM 512 MB (Minimum) for better performance
- HDD 32 GB (Minimum) for better performance
- DVD writer
- Super VGA (800 * 600)
- Keyboard Mouse
- Internet Access For Windows Update or bugging
Detailed Installation Steps for Windows Server 2012 Installation:
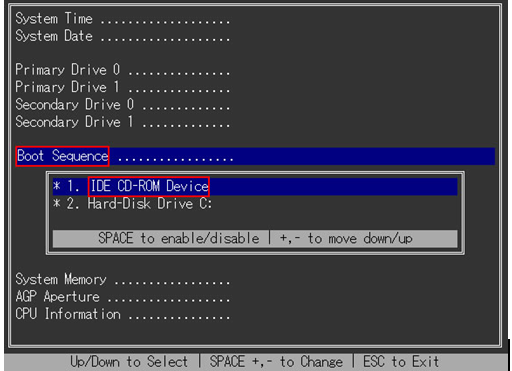
Step 1: Insert the (bootable) Operating System DVD into the DVD drive. Make sure the DVD is the first boot device in BIOS. (Check the screenshot below)
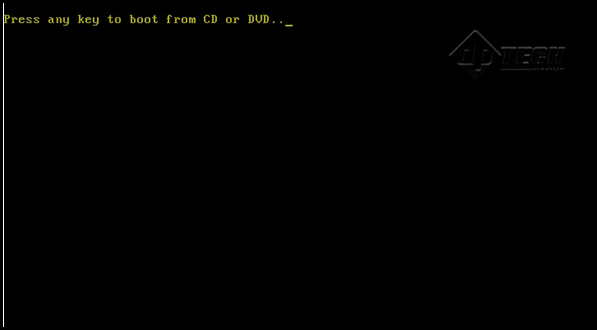
Step 2: Restart your system and press any key to boot from the bootable CD or DVD. (Check the screenshot below)
Step 3: The following message will now be displayed on your screen – “Windows Loading Files”. (Check the screenshot below)
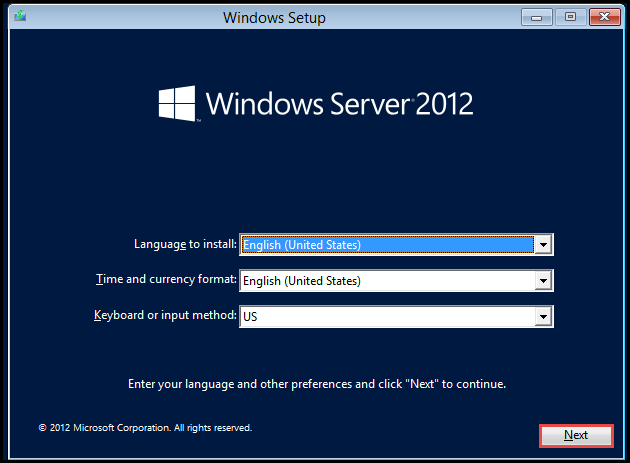
Step 4: The “Windows Setup” dilogue box will now appear on your screen. Click on Install
Select the “Language To Install”, “Time Format” and “Keyboard Or Input Method” as applicable. (Check the screenshot below)
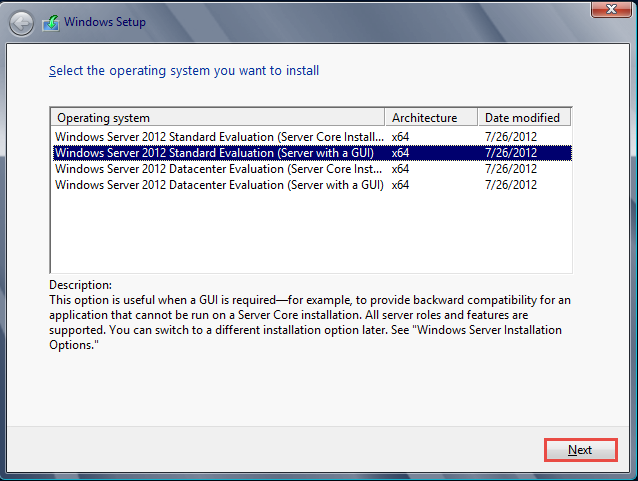
Step 5: Select the Server 2012 Edition that you want to install and click on the “Next” button to continue. (Check the screenshot below)
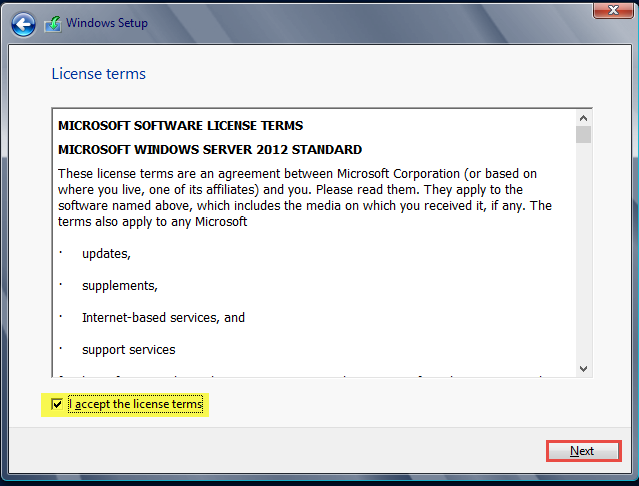
Step 6: In the next window, check the “I accept the license terms” option and click on the “Next” button to continue. (Check the screenshot below)
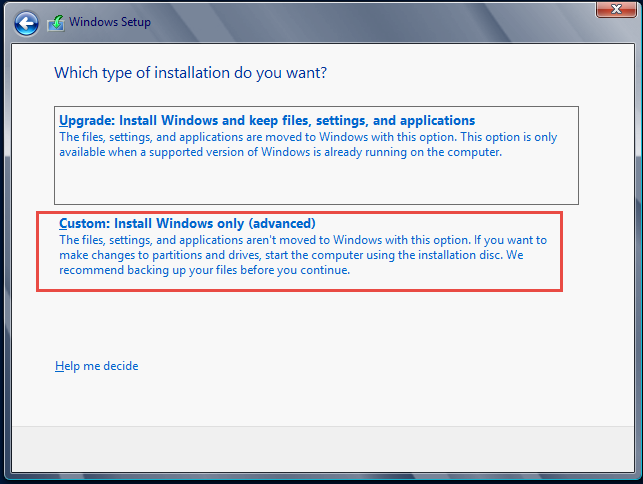
Step 7: The next dialogue box will ask – “Which Type Of Installation Do Your Want.”
Here, click on “Custom: Install windows only (advanced)” to install MS server 2012.
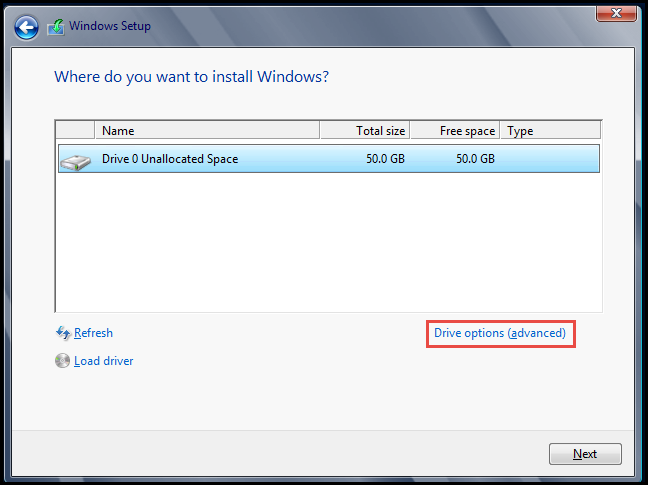
Step 8: The next dialogue box will ask you “Where Do You Want To Install Windows”.
Click on the desired Drive Option where you want to install Windows Server 2012 and click on the “Next” button if you have installed a new hard drive. (Check the screenshot below)
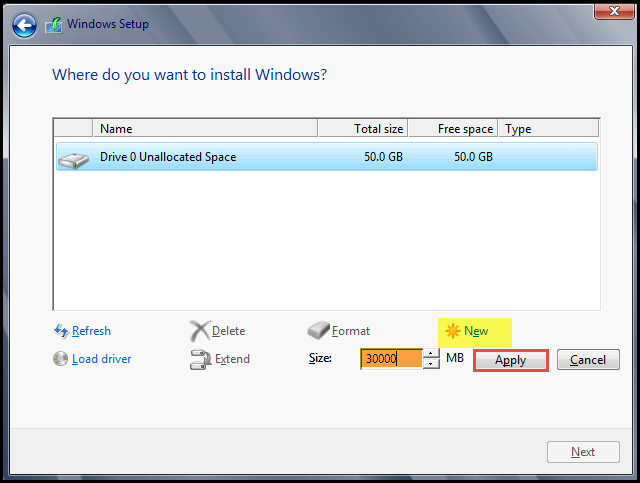
Step 9: Click on the “New” option and after that, click on the “Next” button.
Step 10: Select the size for new partion and click on the “Apply” button. (Check the screenshot below)
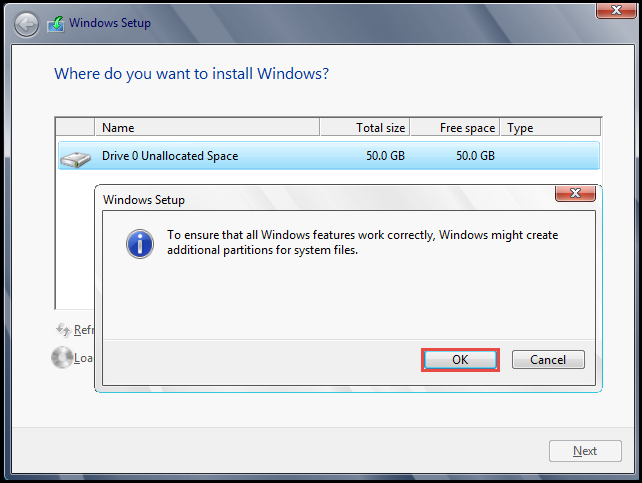
Step 11: The “Windows Setup” dialogue box will now appear on your screen, displaying a warning message.
Click on the “OK” tab to continue. (Check the screenshot below)
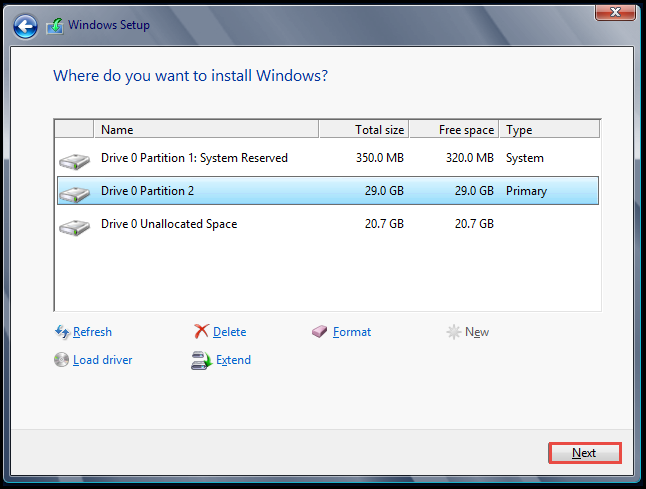
Step 12: Next, select the target drive where you want to install MS Server 2012 and click on the “Next” button. (Check the screenshot below)
Step 13: The “Windows Setup” dialogue box will now appear on your screen. Click on the “Install now” button to begin installing MS Windows Server 2012.
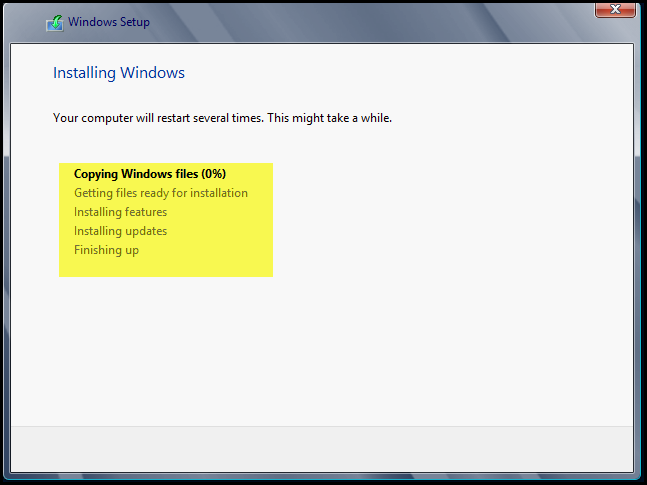
Step 14: Now, MS server 2012 installation will begin (Check the screenshot below)
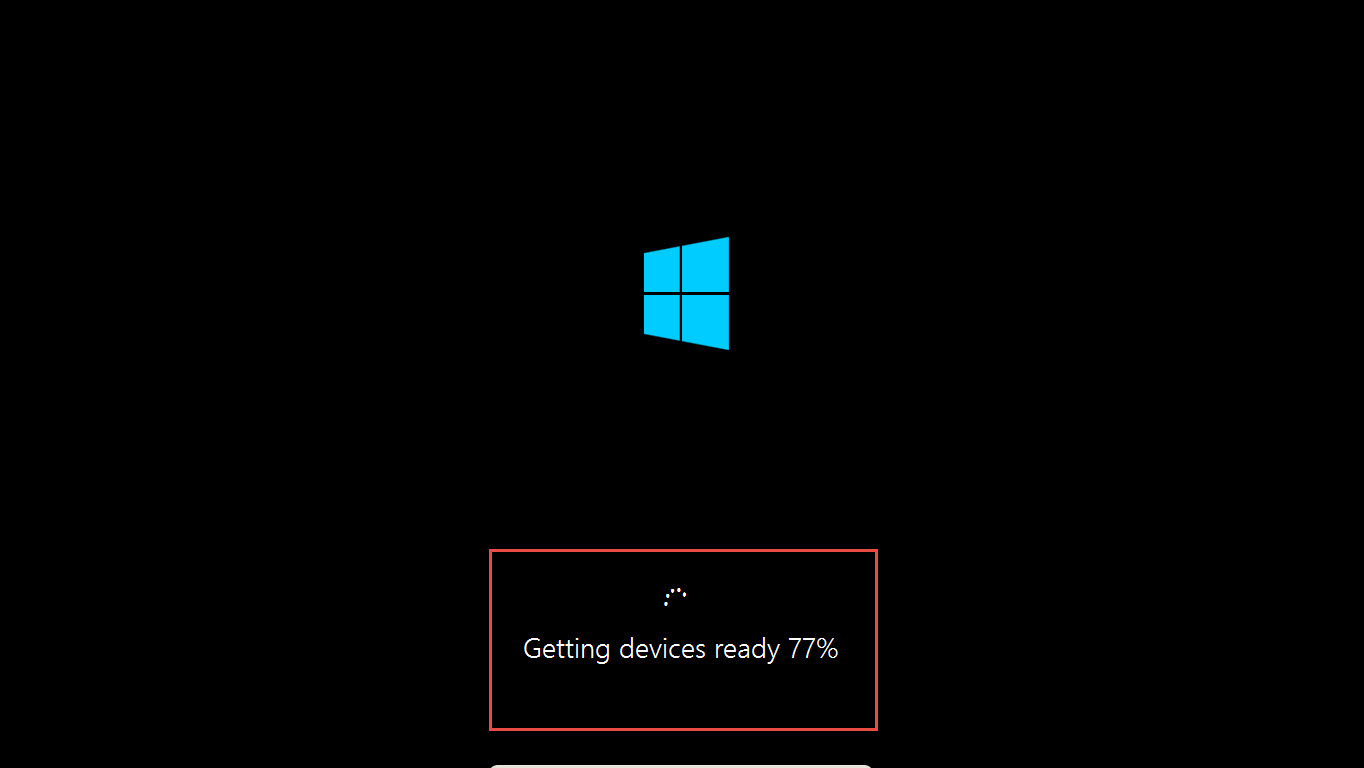
Step 15: Your system will reboot to begin the setup process.
Step 16: MS Server 2012 will now get ready for use. (Check the screenshot below)
Step 17: Next, click on the “OK” button.
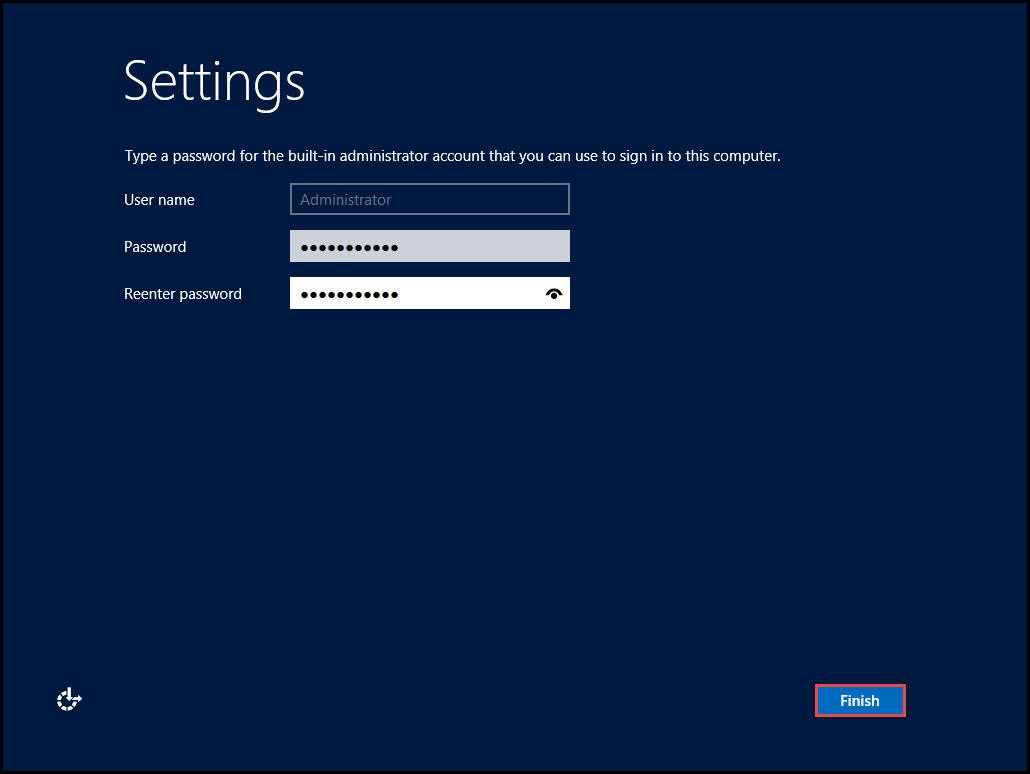
Step 18: Enter the “Administrator Password” and re-enter the password (for confirmation) for logging into new installed MS server 2012.
Click on the “Finish” button to exit. (Check the screenshot below)
Step 19: Click on the “OK” button.
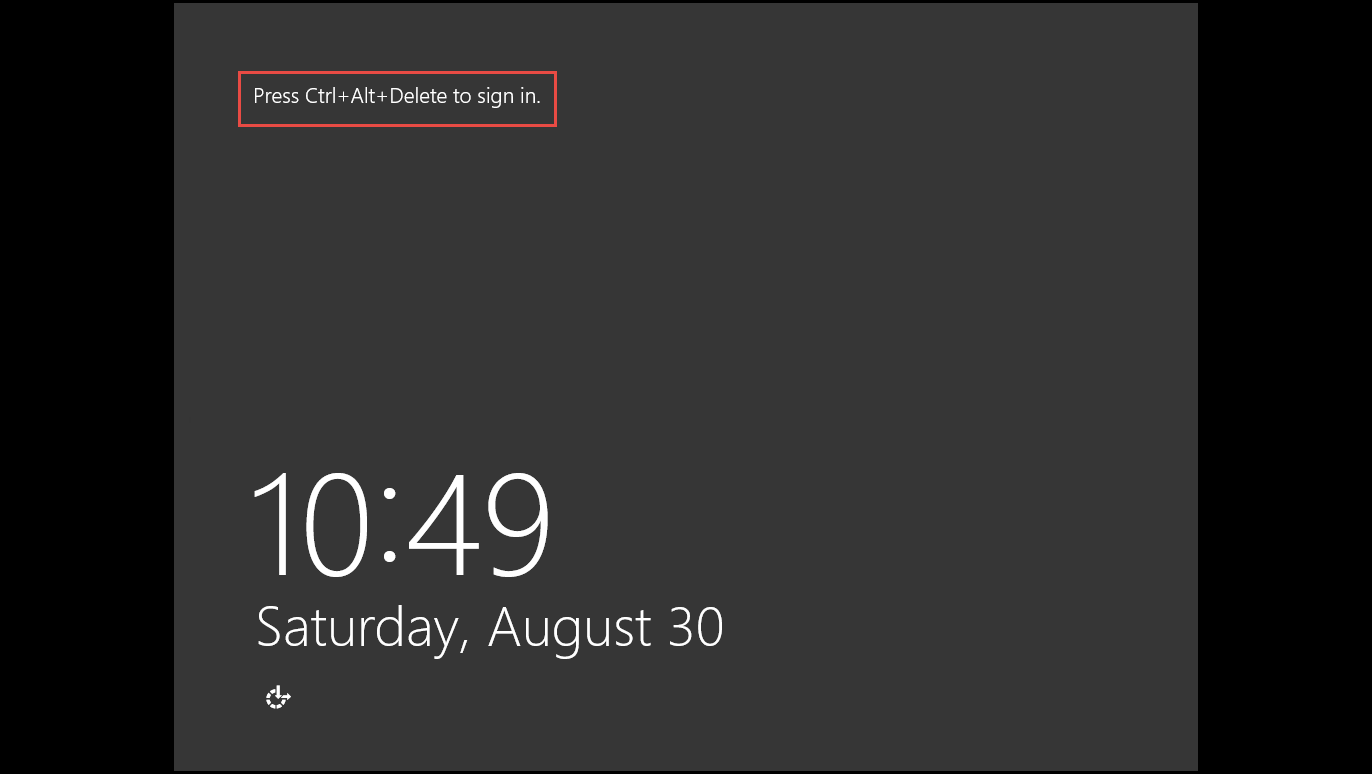
Step 20: MS server 2012 installation has been completed succesfully.
Now, press “Ctrl+ Alt+ Del” to sign in. (Check the screenshot below)
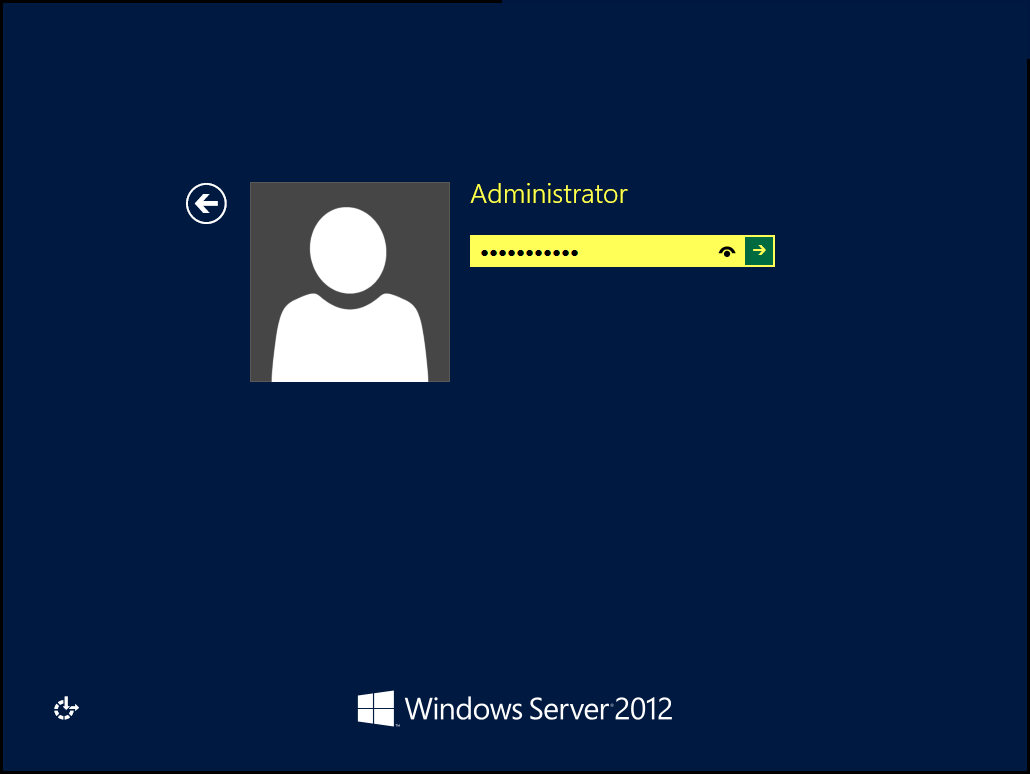
Step 21: Enter the “Administrator Password” to log on to MS Server 2012. (Check the screenshot below)
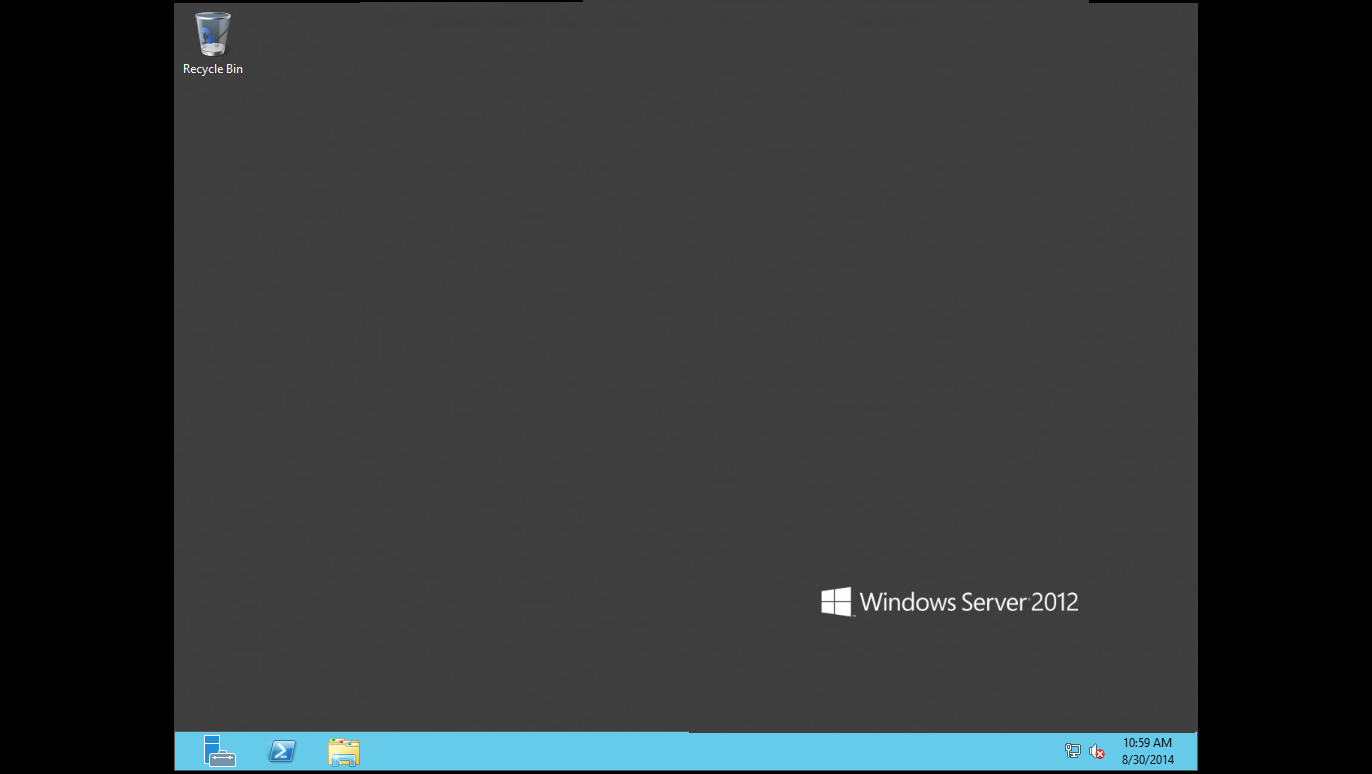
Step 22: MS Server 2012 is now ready for you to use.
Congratulations!
Here’s we’ve got a selection of tutorials dedicated to Windows Server 2012 usage. Do check them out!
If you faced any difficulty while installing Windows Server 2012, write a comment below. A senior Windows Server Admin will reply to your questions.

