Share documents or folders in Office 365
You can easily share your documents and folders with anyone in your personal contacts or organisational contacts. Here we will explain the steps for sharing documents with other users.
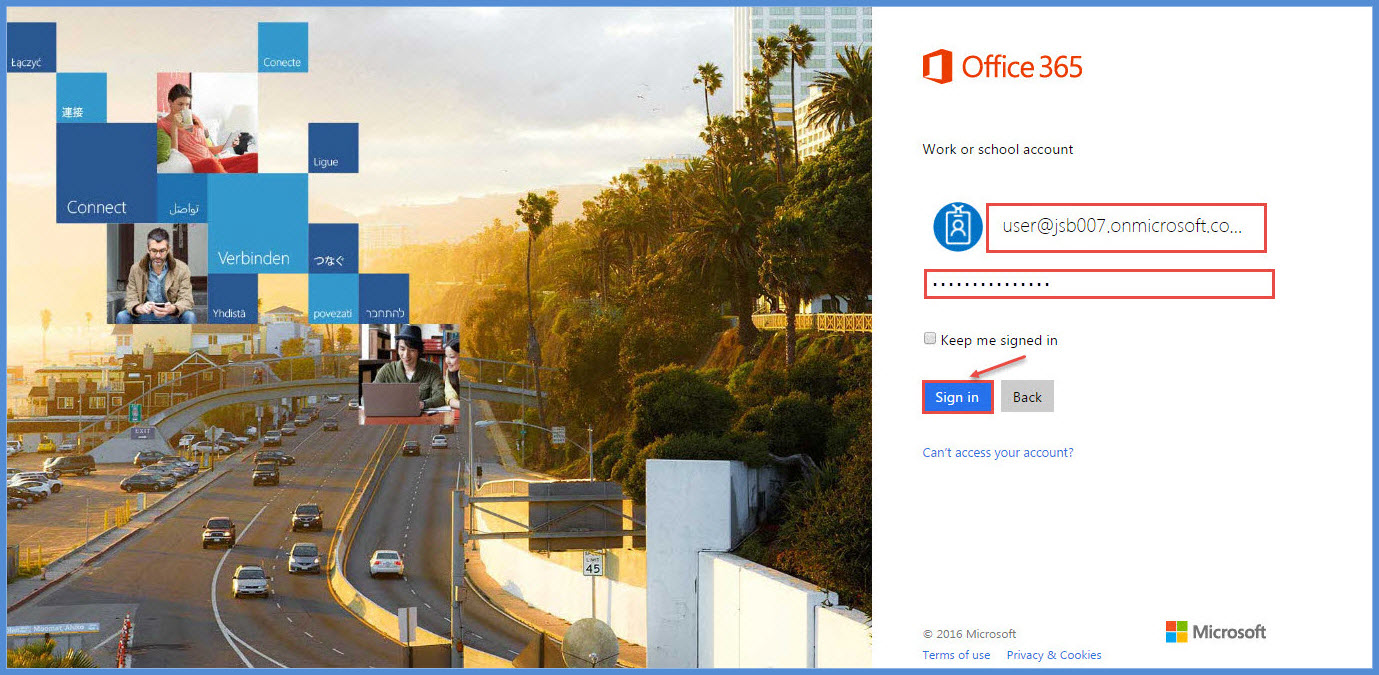
- First login with Office 365 account at ‘Office365.com’.
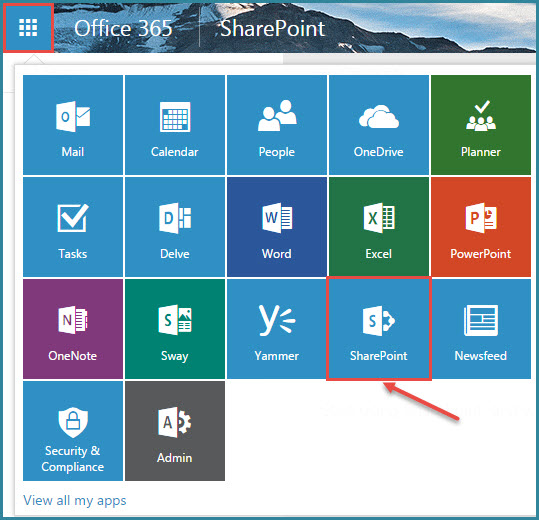
- Go to App Launcher from the left top and then click on ‘SharePoint’.
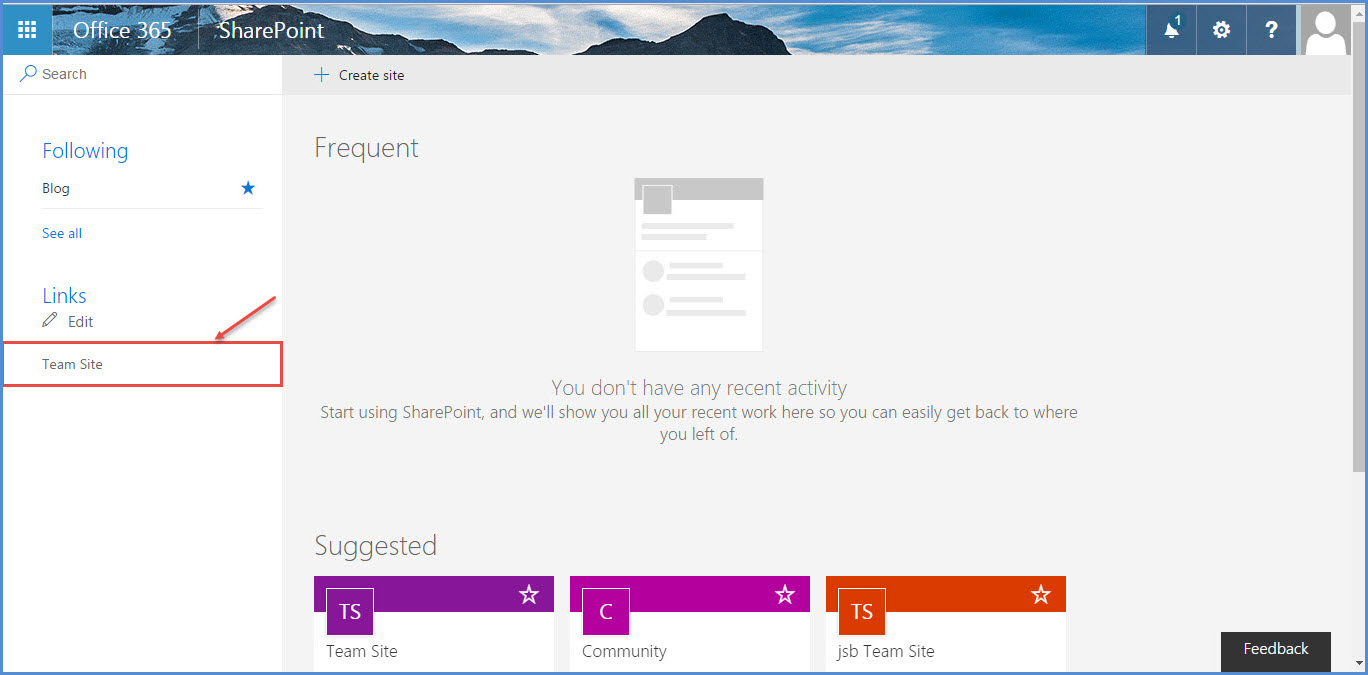
3. Under ‘Links’, you will find ‘Team site’. Click on it to expand.
4.You will find ‘Documents’ and other folders under ‘Home’ as shown in the image below:
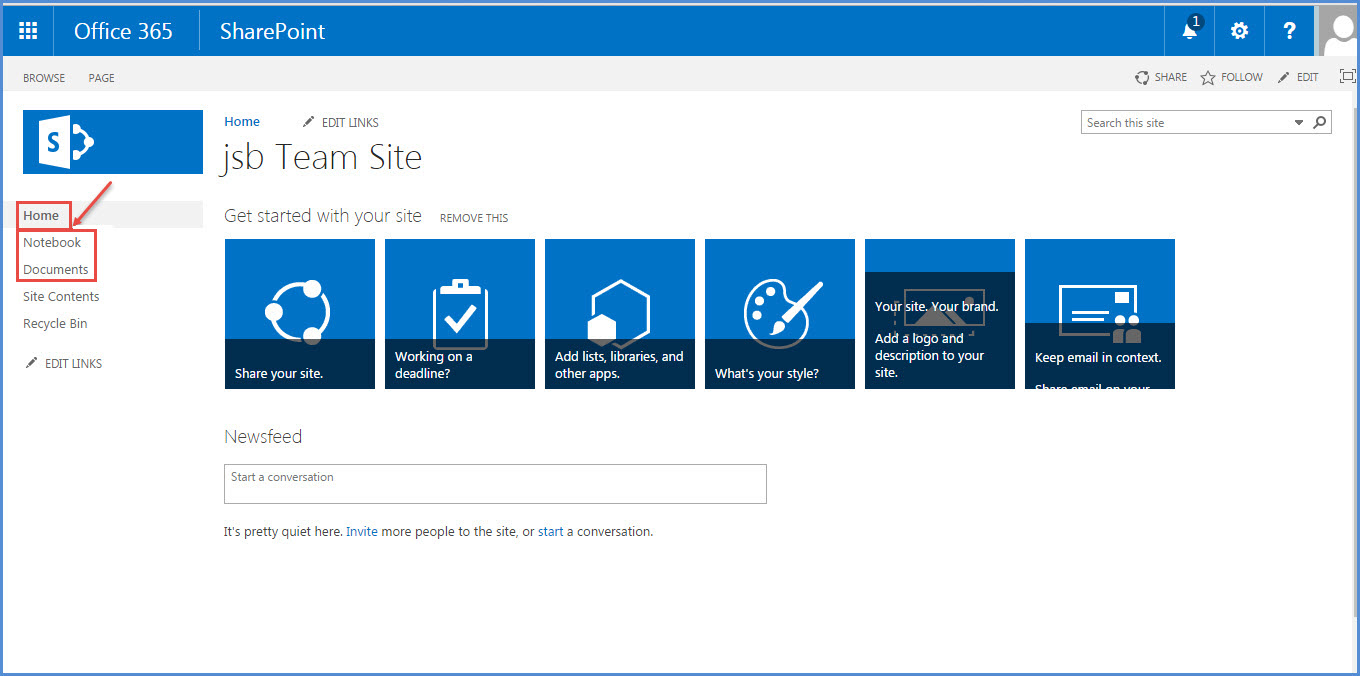
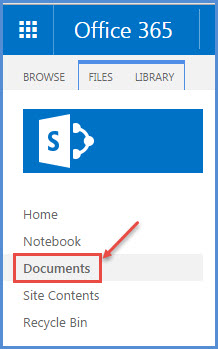
5.If we want to share any document, click on ‘Documents’.
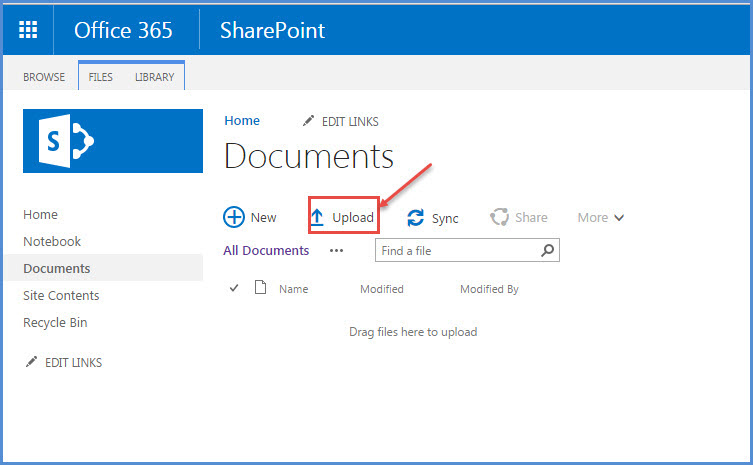
6. Upload documents by clicking on ‘Upload’.
7.The document is uploaded.
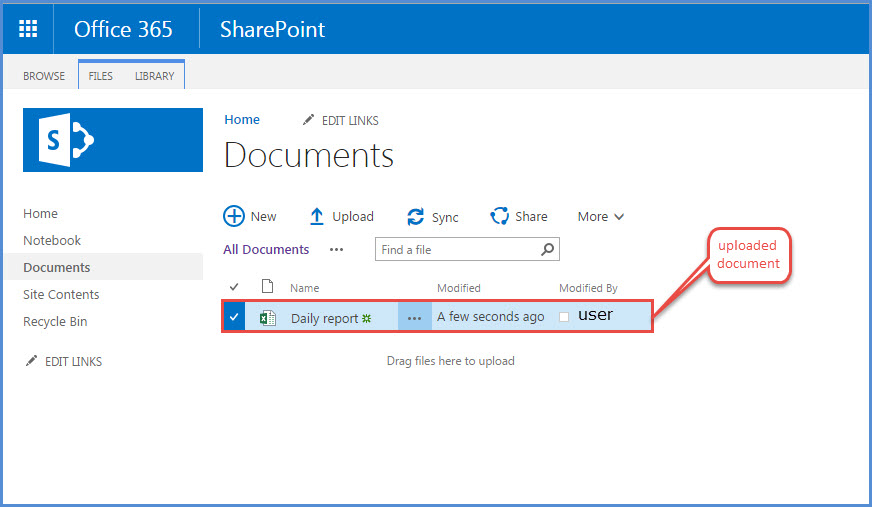
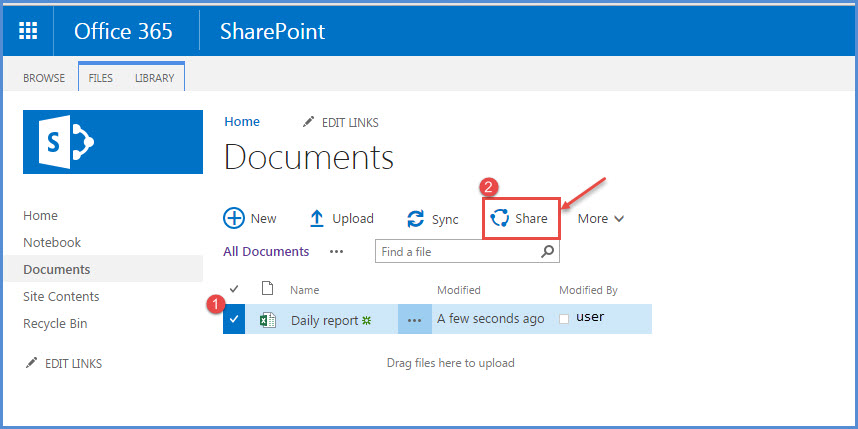
8.Now you can share this document to anyone in your contacts by clicking on ‘Share’ option as shown in the image below:
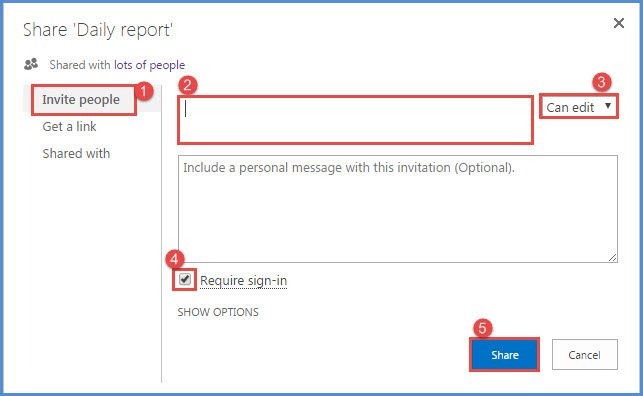
9.Share option will show – Invite people, Get a link, Shared with – to invite people fill the name or email address of the person, assign edit or view permissions and check the box ‘Require sign-in’ if you want that the user use his login credentials for security purpose and click on ‘Share’.
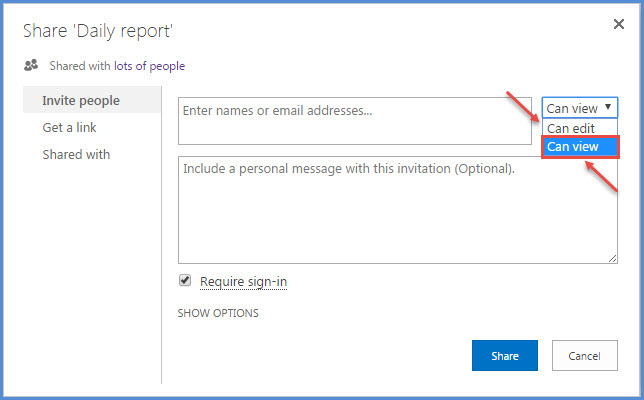
- Edit and View permissions.
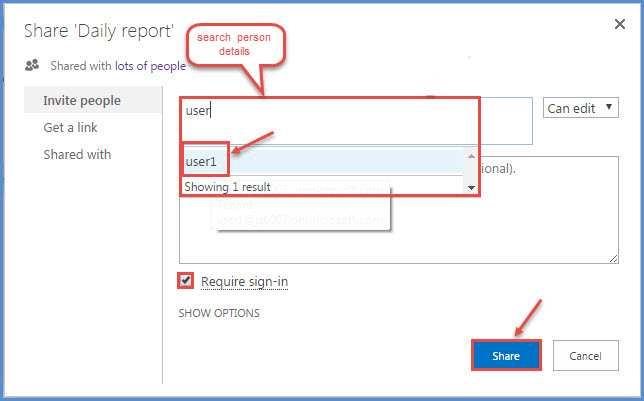
11.Search the person name or email id to whom you want to invite as shown in the image:
- You can share document by click on ‘Get a link’ with different permissions as shown in the image below:
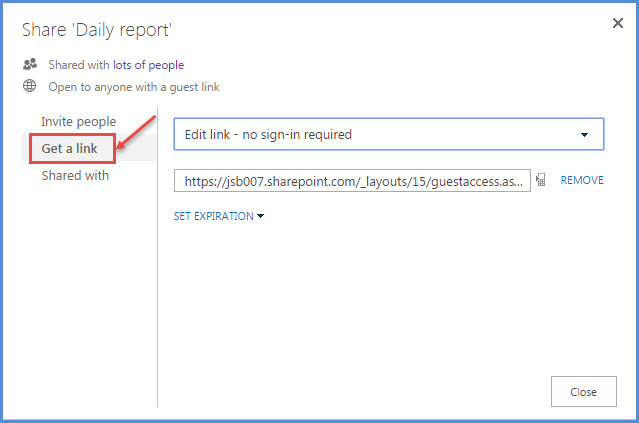
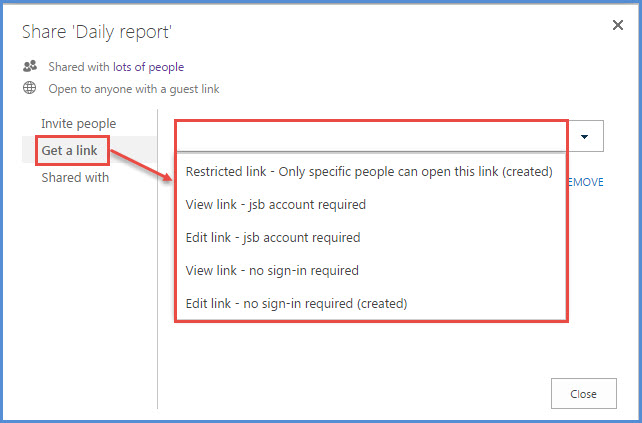
13.Choose options for link from Drop Down.
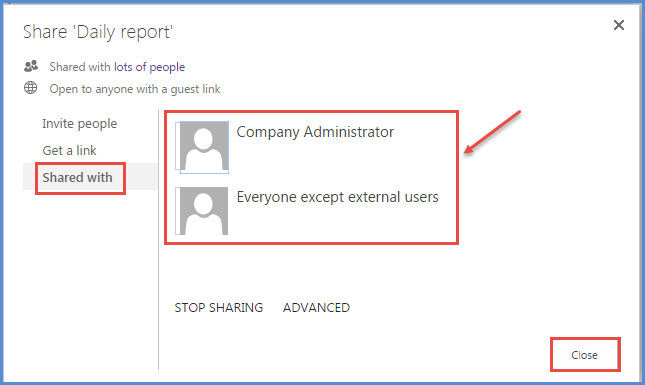
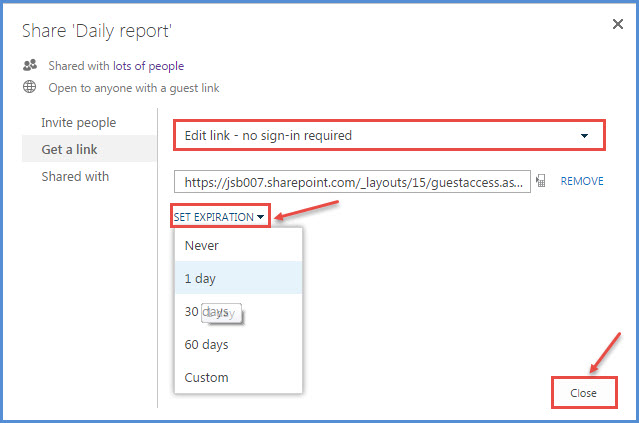
14.You can also ‘Set Expiration’ for your document select the desired option and then click on Close, as shown in the image below:
15.Last option is ‘Shared with’ from where you can check the status of shared documents, press close after checking, see the image below:
