
How to create a group in Office 365
A group in Office 365 is the starting point for the Distribution Groups (for details on how to create Distribution Group, click here). Groups provide a shared workspace where people can share files, emails and other information. To create a group,
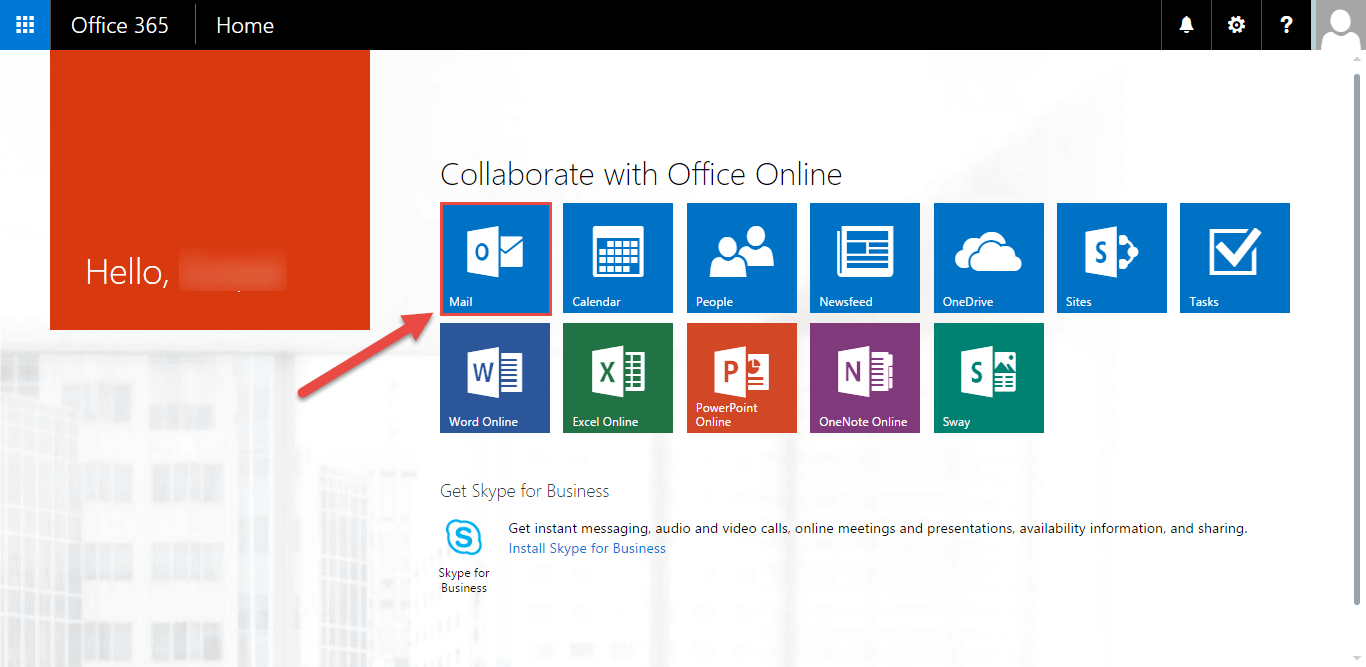
- Log into office 365 and select “Mail”.
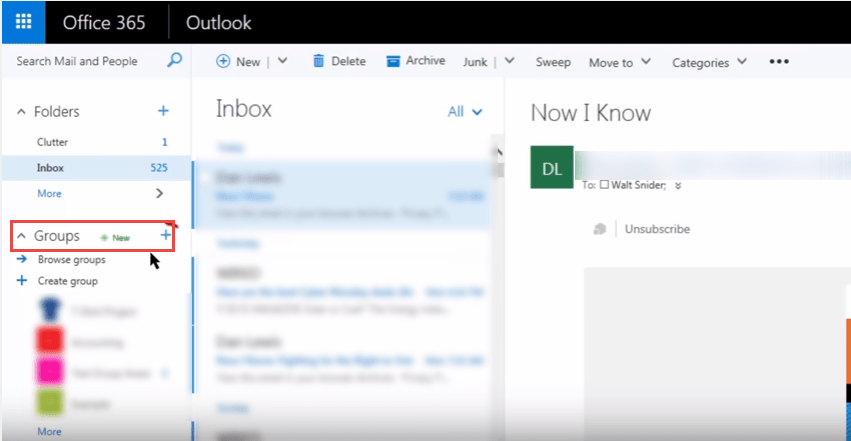
- Now select the “Groups” option and click on “+” icon to create a new group.
- “Create a group” dialog box will open .
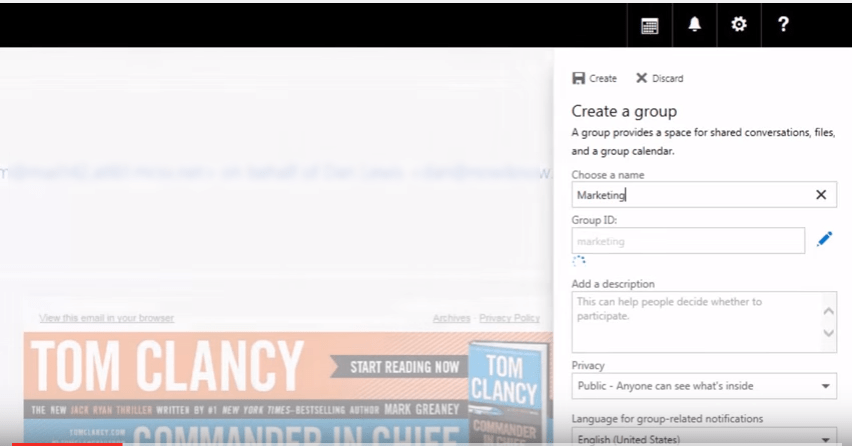
- Specify the name of the group, along with description and “Privacy” settings. Click on “Create” to complete the process.

- You can add users to this newly created group. Start by searching them in the text box. Type email or name of the user and press enter, when prompted. Once done, click on “Add” to close the dialog box.

 (1)")