How to manage storage space in Outlook 2019
Microsoft Outlook 2019 accounts generally have a limit of storage which fills in due course of time – depending on the number of emails and/or attachments in the emails. At one point in time, you may be unable to send/receive any email as Outlook exceeds its storage limit. You get the following error message –
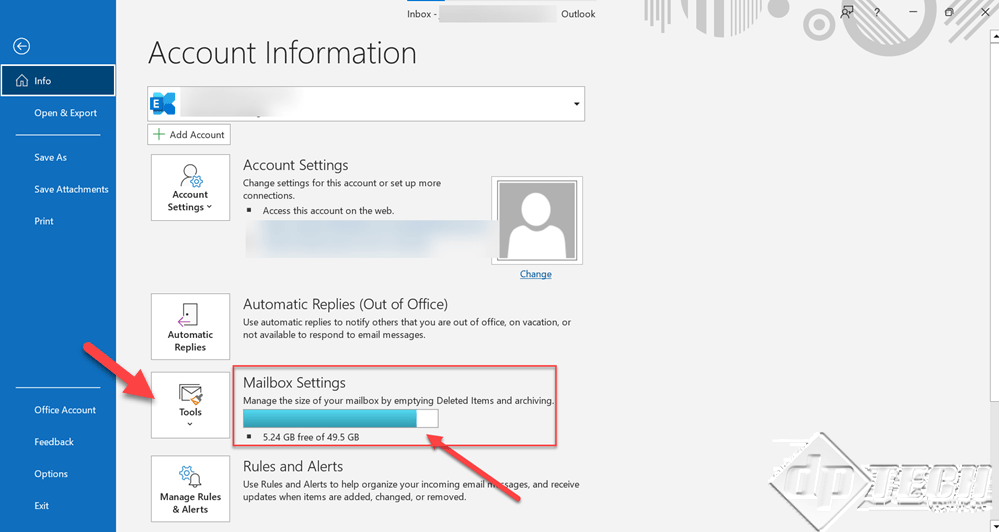
There are a few methods, with which we can free space like emptying ‘Deleted Items’ or ‘Junk Email’ folders. Let’s check out these steps in detail. The first step is to determine the space used up by Outlook 2019. For this click on the ‘File’ menu -> ‘Info’ tab and go to the ‘Mailbox Settings’. This will show you the current size of the Outlook data file along with the maximum disk space available.
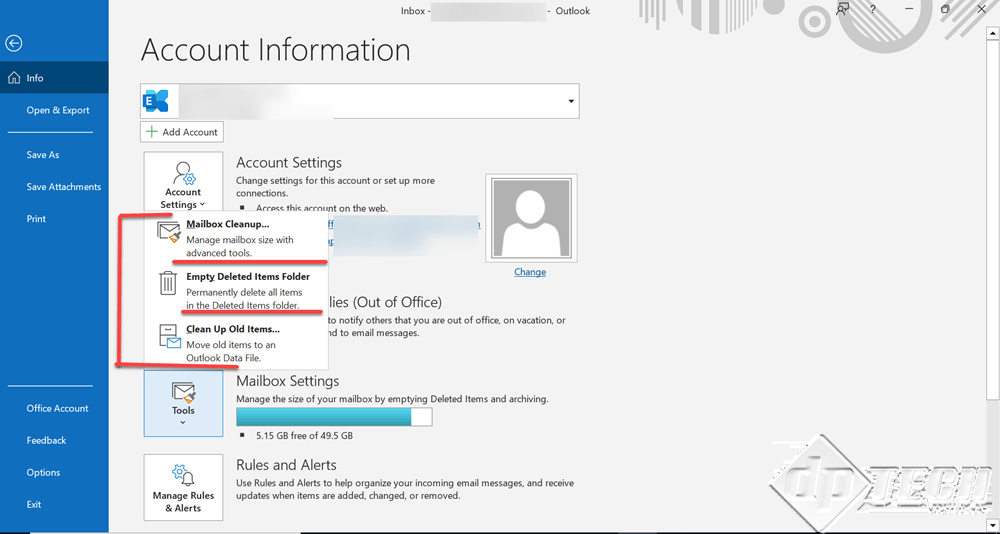
Click on the ‘Tools’ menu to see the different options to free up the space. The 3 options you will see are – ‘Mailbox Cleanup...’, ‘Empty Deleted Items Folder’, and ‘Clean Up Old Items…’.
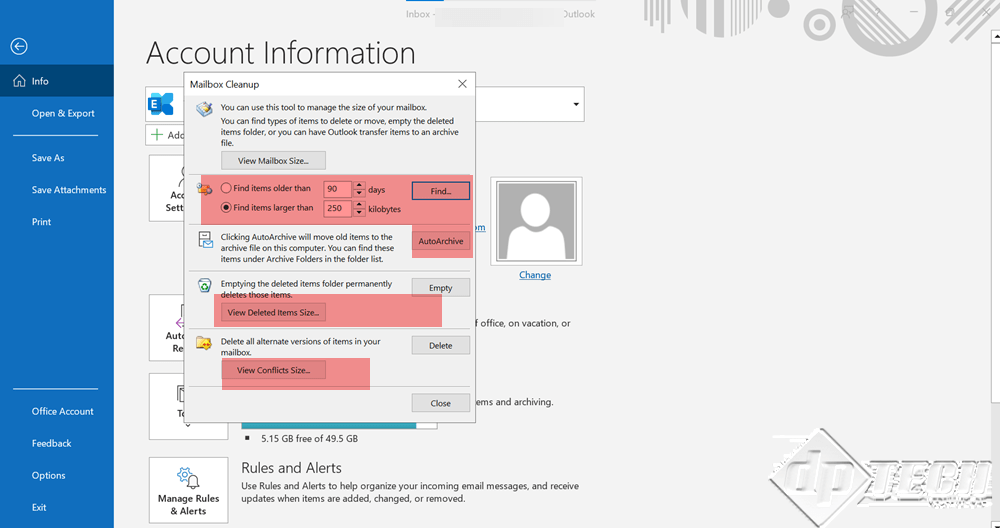
We will start with the first option – ‘Mailbox Cleanup..’. On clicking this option, you will see a dialog box as shown in the image below.
From this dialog box – you can use the following options to free up disk space –
- You can free up space by either – Finding items older than – ‘x‘ days (the default value is 90 days) or Finding items larger than 250 KBs. Depending on the requirement – you can filter emails either way and delete the same to free up space.
- The second option is to ‘Archive’ the old email messages. From Outlook 2010 and onwards, ‘AutoArchive’ is by default turned Off. When enabled ‘AutoArchive’ will move all the messages – older than 6 months (depending upon the settings) – to the Archive folder. One thing we need to remember – Archive works on .pst files only.
- The next option is to empty the ‘Deleted Items’ folder. Emails you delete from your ‘Inbox’ or other folders, are not permanently deleted and are moved to the ‘Deleted Items’ folder, in case you want to restore them later. To permanently delete these items – empty the ‘Deleted Items’ folder, further making space.
- The last option is to check/compare the conflicts’ size. Conflicts in Outlook 2019 occur when you modify the same item separately – e.g., using the Web version and using Outlook in offline mode. After comparing the ‘Conflicts’ you can then decide and remove the redundant copy.
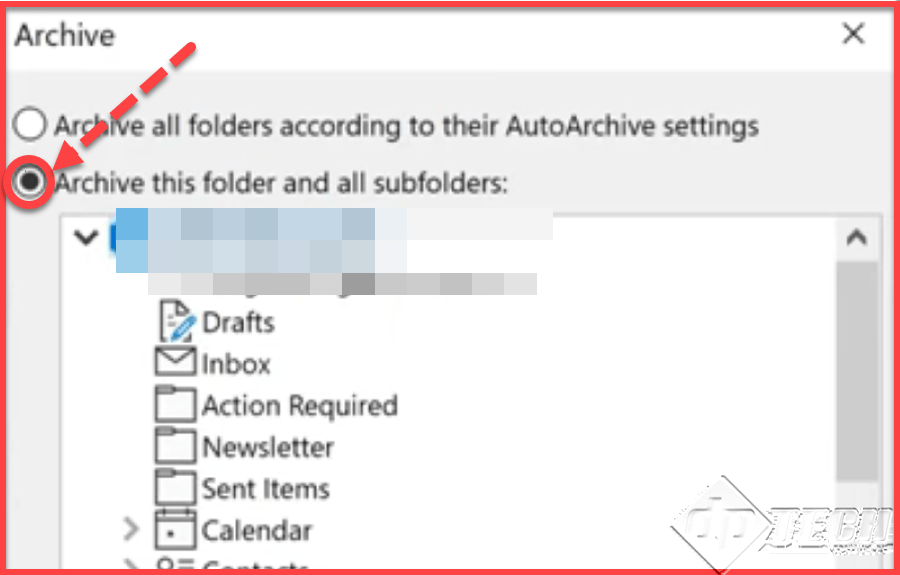
The other option to free up space is – ‘Clean Up Old Items…’. This option is useful when you do not want to delete any email but still make space for the proper working of Outlook 2019. When you click on this option, you will see a dialog box as per the image below.
Here you can select the individual folder(s) to Archive the items, or you can enable Archive for all the folders by selecting the radio button – ‘Archive all folders according to their AutoArchive settings’.
This is how you can make space for your Outlook 2019 to work properly. If everything fails, you can also add a new .pst file for storing the items. For details on how to add pst files, click here.


