
Configure and Support Local Security Policy in Windows 7
The Local Security Policy is used to change and support the behavior of a computer system as well as users. The policy is called “local” because it is implemented on local computers and not in a Domain Network.
Local Security Policies are available in Windows 2000, Windows XP, Windows Server 2003, Windows Vista, Windows 7, Windows 8, Windows Server 2008, Windows 8.1, Windows Server 2008 R2, Windows Server 2012 R2 and Windows Server 2012.
- Account Policies Include
- Password Policy
- Account Lockout Policy
- Local Policies Include
- Audit Policy
- User rights Assignment Policy
- Security Options
Here’s a short guide on how to configure and support local security policy in Windows 7 Operating System:
Step 1: To get started, go to the Start Menu on Windows 7 system.
Step 2: Type in “Administrative Tool” in the “Search Programs and Files” tab. (Check the screenshot below of Windows 7)
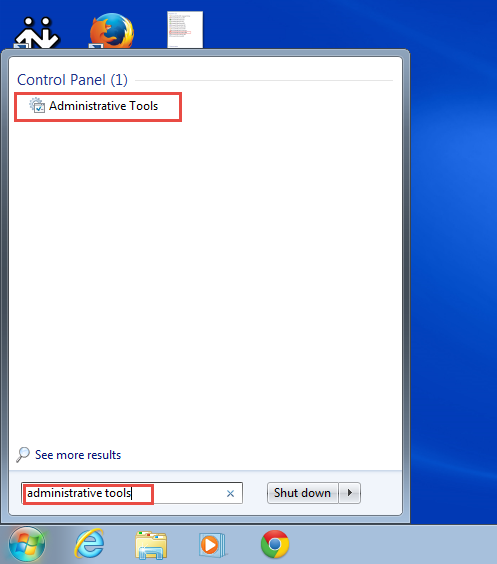 Step 3: In the next window, scroll down and click on “Local Security Policy” to start configuring local security policy for your Windows 7 OS. (Check the screenshot below)
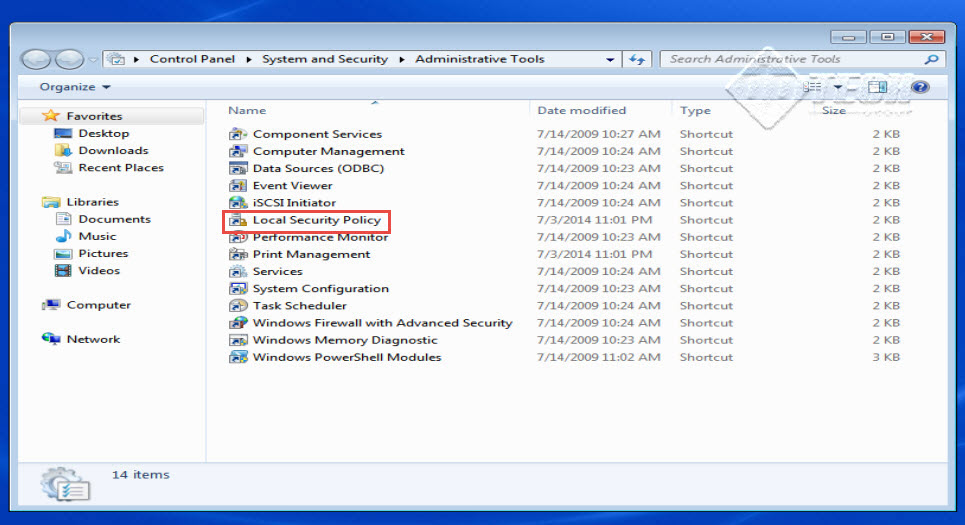 Step 4: Click on “Account Policy” tab located on the left side of the “Local Security Policy” window.
Step 5: “Password Policy” and “Account Lockout Policy” options will now appear on the screen.
Step 6: Click on the “Password Policy” option. (Check the screenshot below)
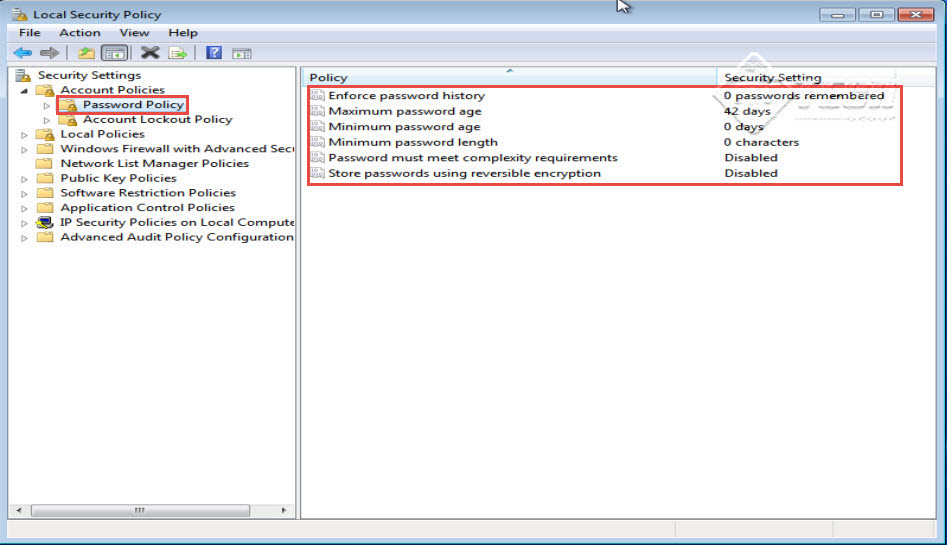 Step 7: Once you click on the “Password Policy” option, you will be provided with the following options:
- Enforce Password History: This policy will determine the unique new password that has to be associated with a user account before an old password can be reduced. The value of “Enforce Password History” lies between 0 and 24 passwords.
- Maximum And Minimum Password Age: This policy allows you to set passwords to expire after a number of days between 1 and 999 at the time of creating a local security policy.
- Minimum Password Length: This policy determines the total password length. Here, you can set a value anywhere between 1 and 14 characters.
- Password Must Meet Complexity Requirements: This policy determines that your user password meets the standard complexity requirements i.e. your password must be complex enough to be safe. You can even Enable/Disable this policy here.
- Store Passwords Using Reversible Encryption: This policy determines that our operating system password must be stored in reverse encryption order.
Step 8: Next, you can click on “Account Lockout Policy.” This is the policy that we are going to apply on user accounts. (Check the screenshot below)
 Step 9: Clicking on the “Account Lockout Policy” policy will provide you with the following options:
- Account Lockout Threshold: We first enable this policy; this will automatically enable the remaining two policies. “Account Lockout Threshold” determines the total number of login failure attempts. Here, we can set in a limit between 0 to 999 failure attempts. ‘0’ in this case means that the account has never been logged out.
- Account Lockout Duration: This policy determines the total duration (number of minutes) for which an account is logged out. Here, we can fix a limit between 0 to 99,999 minutes for an individual account.
- Reset Account Lockout Counter After: This policy determines the remaining account lockout counter after 0 – 99,999 minutes. The reset time must be in between, less than or equal to “Account Lockout Duration.
Step 10: Go back to the left panel of the “Local Security Policy” window. Here, click on the “Local Policies” tab.
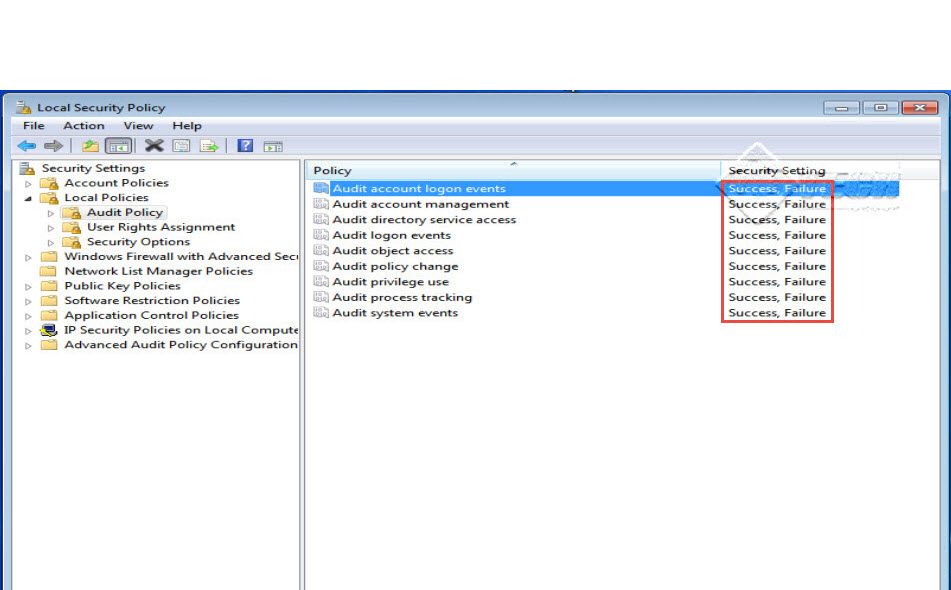
Step 11: Next, click on the “Audit Policy” tab. This is the security policy used to audit the user activities. Enabling these policies (Success/Failure) will help us monitor every activity of the user – how they login to the system, which programs and applications can be accessed and what all is restricted for them. We can also view the user activity in Event Viewer. These settings can help you configure a very powerful local security policy in Windows. (Check screenshot below)
 Step 12: We can now enable “Audit Security Settings.” (Check the screenshot below)
Step 13: In order to monitor the activities of a particular user, we first have to add the user in the auditing account. For instance, we have a user called “User1”, who attempts to gain access to some confidential information on the computer. To monitor all suspicious activities, we must add the user to the auditing account.
Step 14: Click on “Computer” icon on your desktop.
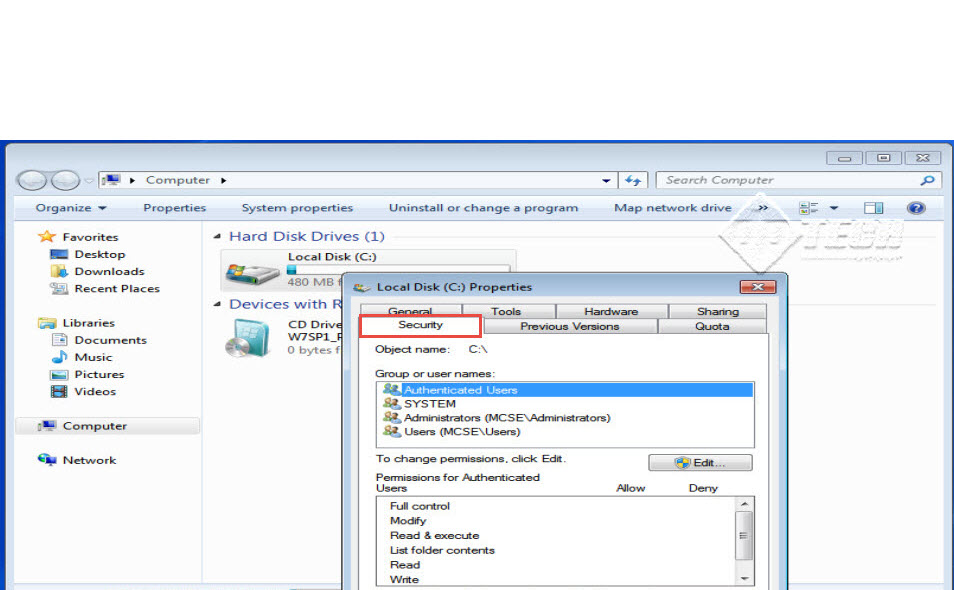
Step 15: Right click on any Drive and click on the “Properties” tab. (Check the screenshot below)
 Step 16: “Local Disk Properties” window will now open up on the screen. Click on the “Security” tab on this window.
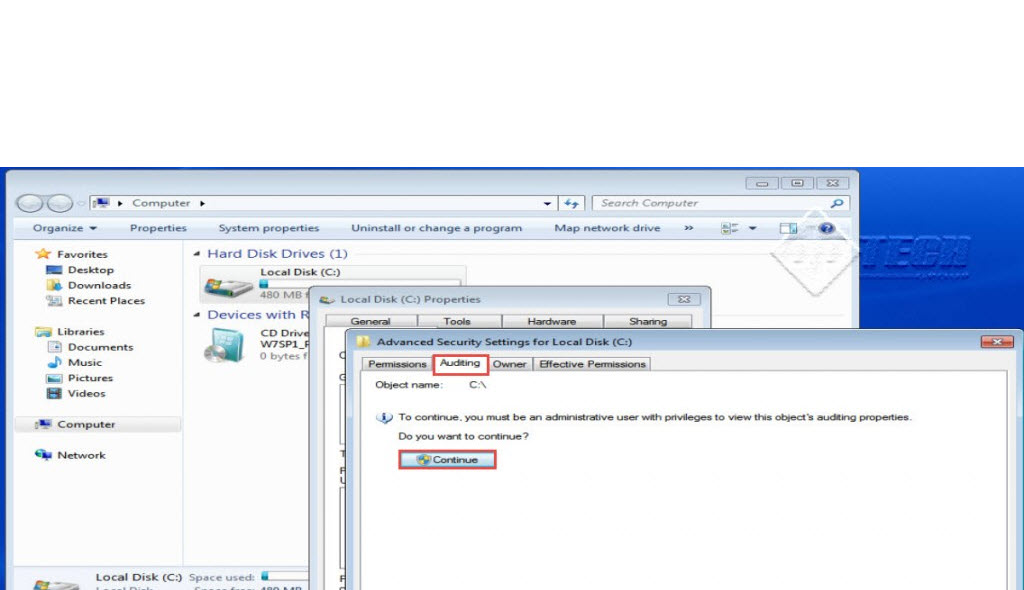
Step 17: Scroll down and click on the “Advanced” tab. (Check the screenshot below)
 Step 18: Click on the “Auditing” tab in the next window and then, click on the “Continue” button. (Check the screenshot below)
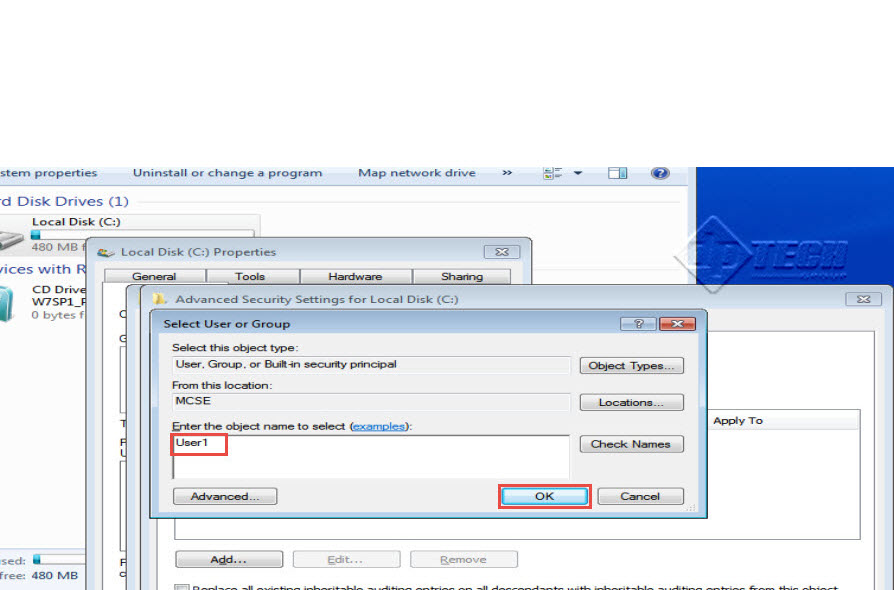
 Step 19: “Select user or group” window will now load on the screen. Type in the user name i.e. “User1” in the provided space and click on the “OK” tab to confirm. (Check the screenshot below)
 Step 20: In the next window that opens, select all “Success” and “Failure” options and apply changes you have just made by clicking on the “OK” button. (Check the screenshot below)
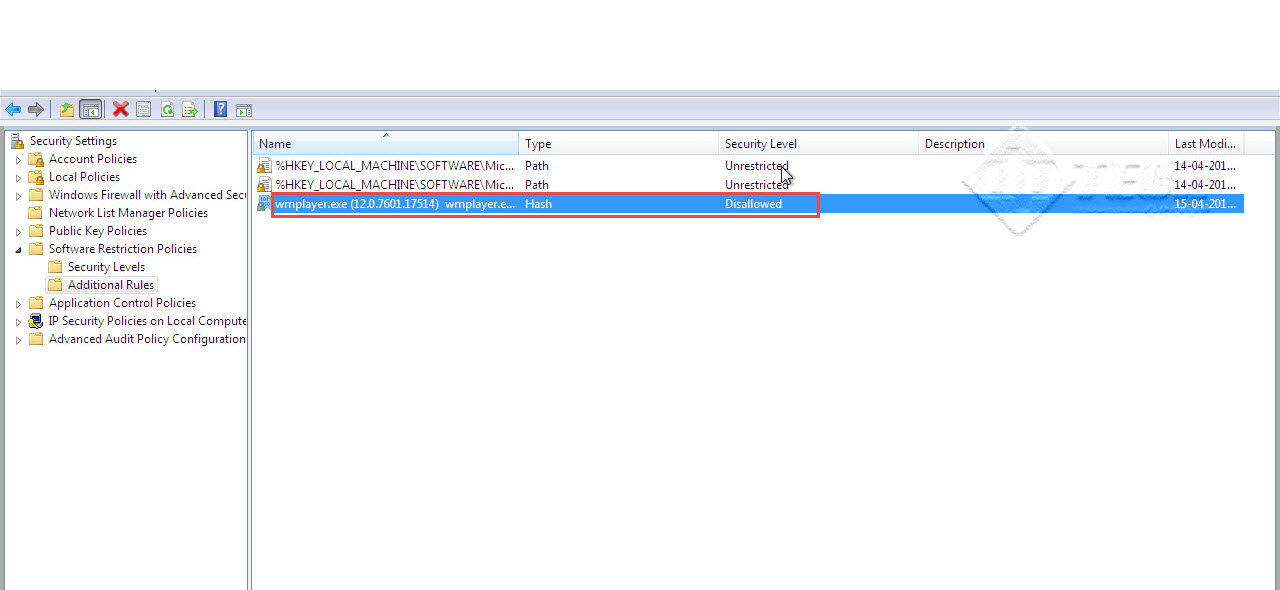
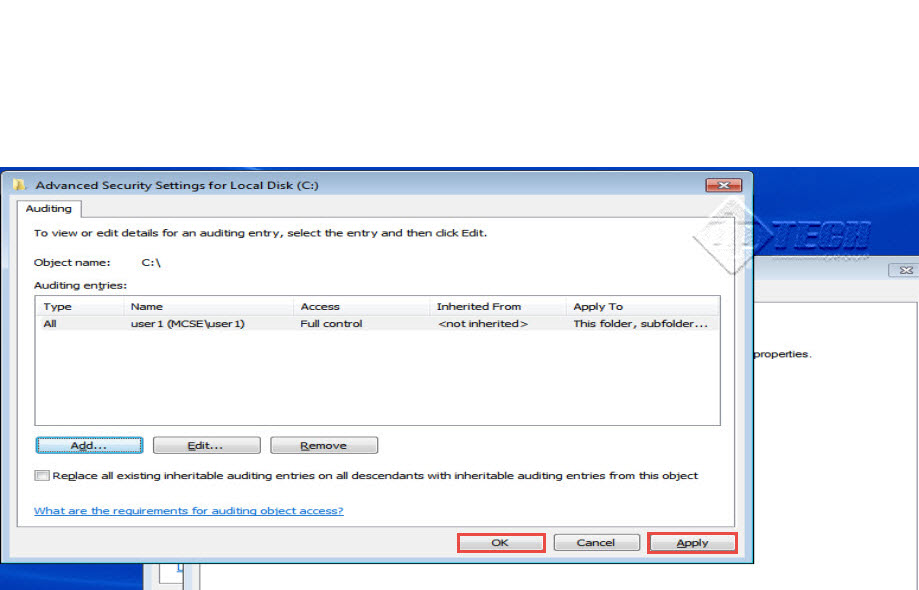
 Step 21: We’ve now successfully enabled the Auditing Policy for User1. (Check the screenshot below)
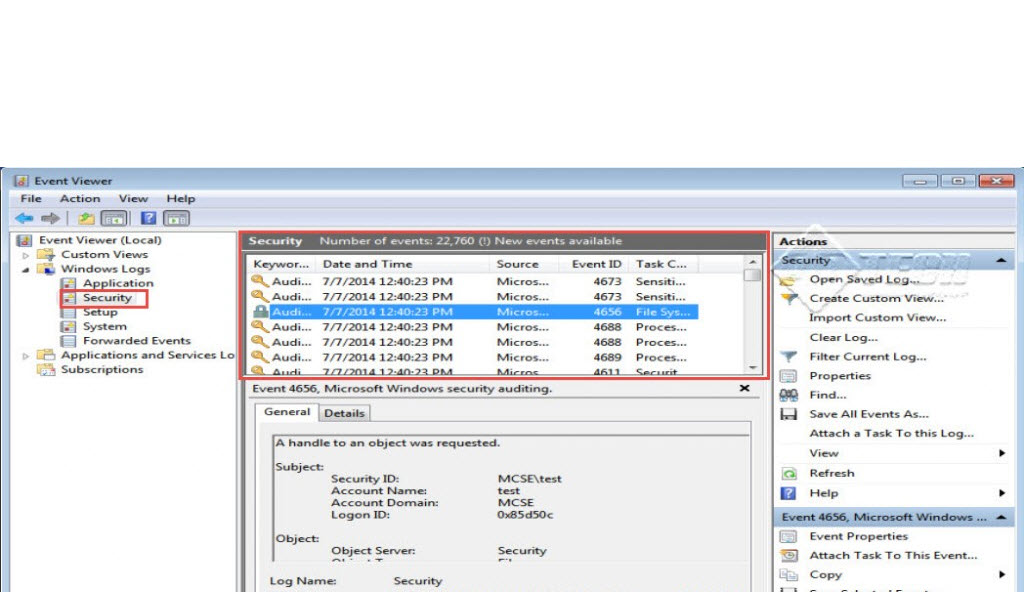
Now login by admin account to check the activity of User1 by using Event Viewer
Step 1: Go to the Start Menu and type “Administrative Tool” in the “Search Programs and Files” tab.
Step 2: Click on the “Administrative Tool” tab and next, click on the “Event Viewer” tab.
Step 3: Click on the “Windows Logs” tab on the left side panel of the “Event Viewer” window.
Step 4: Click on the “Security” tab. (Check the screenshot below)
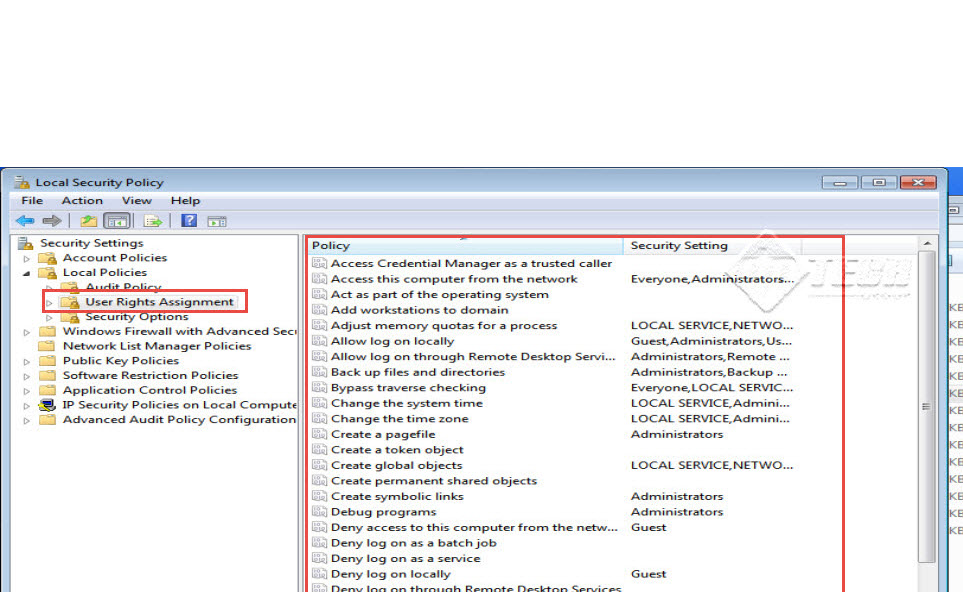
 Step 5: Going back to the “Local Security Policy” window, click on “User Rights Assignments” tab on the left side panel of the window.
Step 6: The “User Rights Assignments” policy is applied on users and groups in Windows Operating Systems. We can use these policies to restrict or allow the users and groups from accessing various programs at the time of configuring local security policy in a Windows OS. (Check the screenshot below)
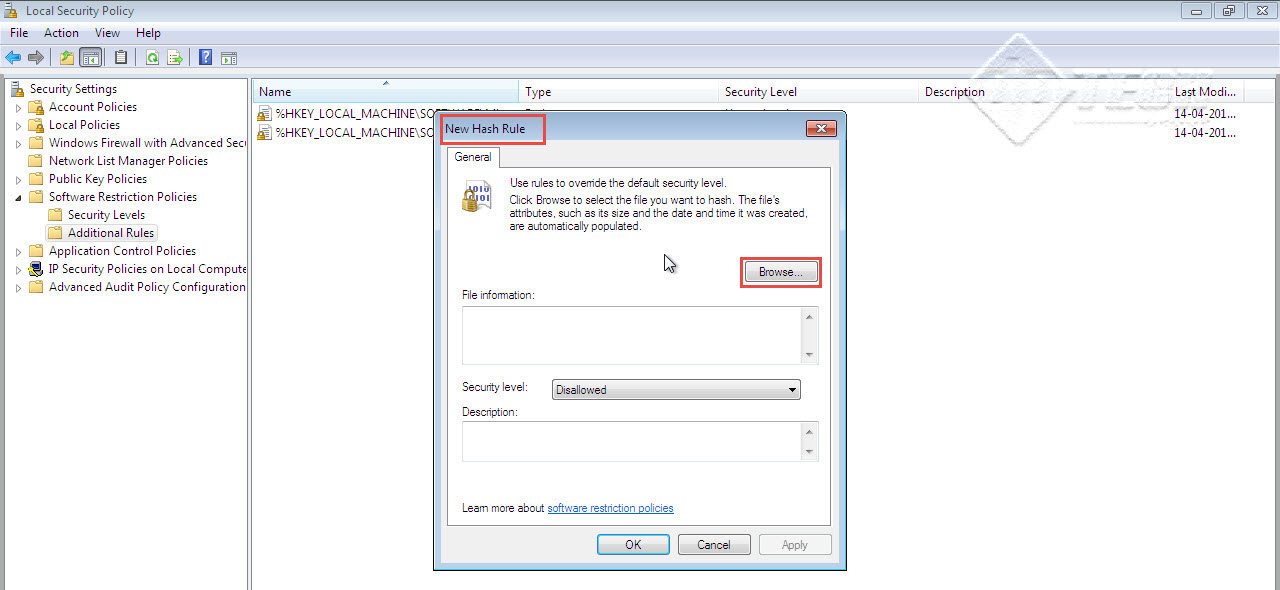
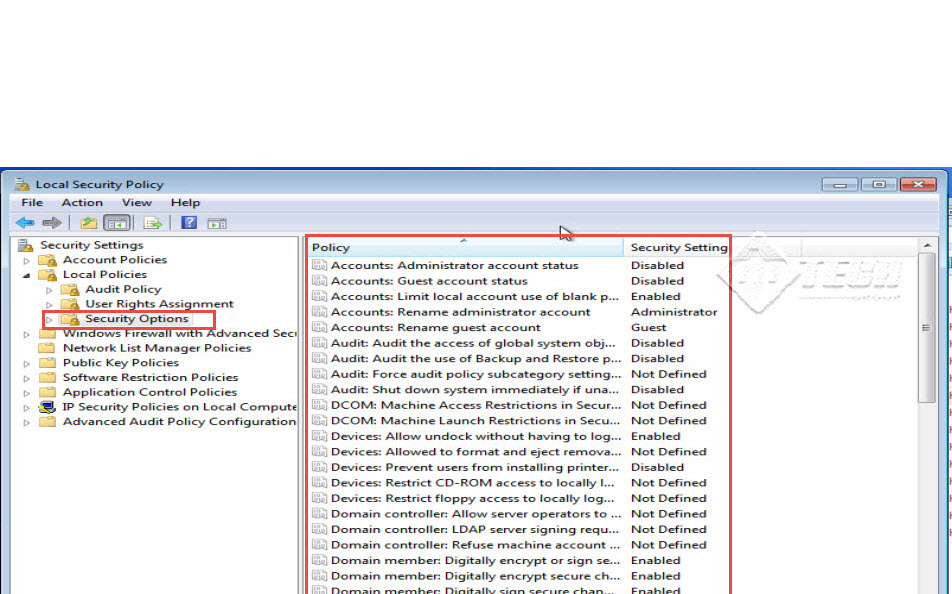
 Step 7: Next, you can click on the “Security Options” tab in the left panel of the window. Security Option policy can be applied to restrict a local computer’s hardware and software for various users. (Check the screenshot below)
You may face some difficulty in configuring a local security policy on the first occasion. Don’t give up and try following up on the above sstep by step guide on local security policy configuration once again.
If you are stuck, don’t worry. We are here to help you out. Just drop your queries in the comment box below.
 (1)")