How to schedule a meeting in outlook 2013
Outlook email allows user to send and receive emails add tasks in the calendar, keep an updated contact list, and so much more, making you more organized and efficient in the workplace. One of the great features in Outlook 2013 is the ability to organize and schedule meetings, whether they are face-to-face or virtual. We are going to discuss schedule a meeting, step by step:
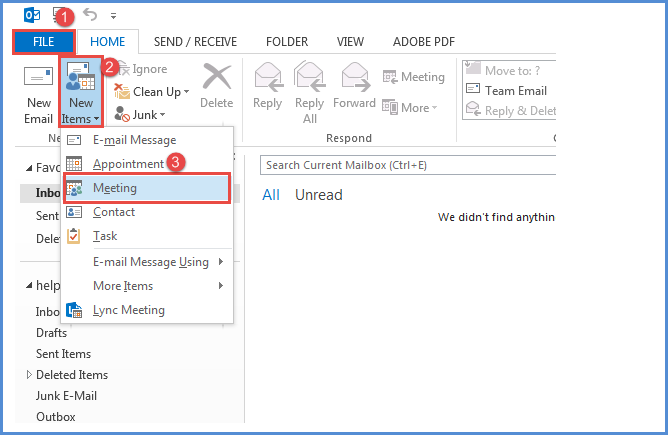
- Click on file menu then point on New Items>Meeting, as per the image below:
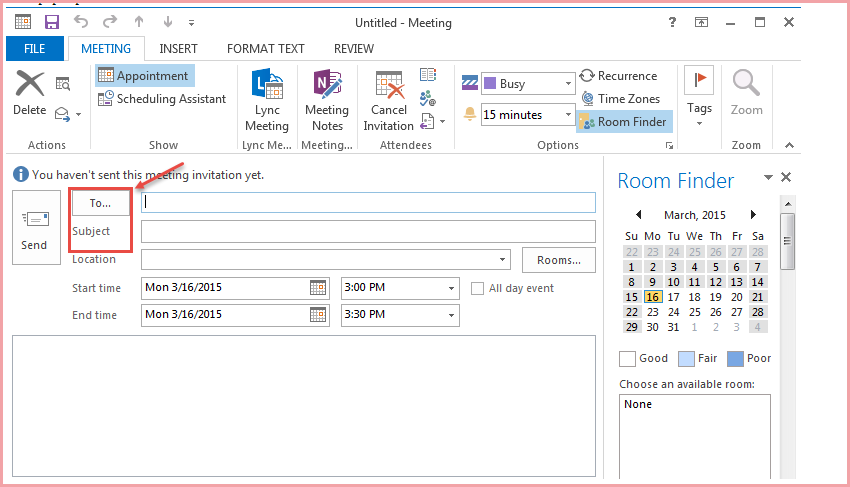
2.This untitled meeting window pops up where user can fill all the fields like ‘To’, ‘Subject’ as shown in the image below:
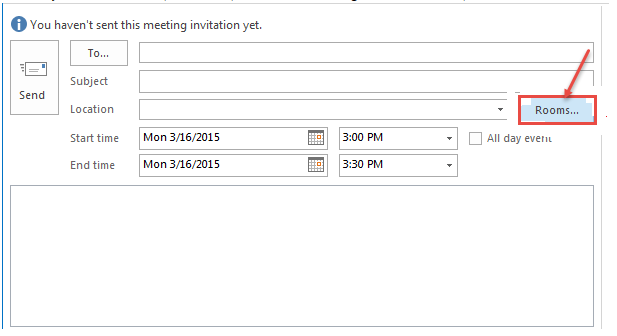
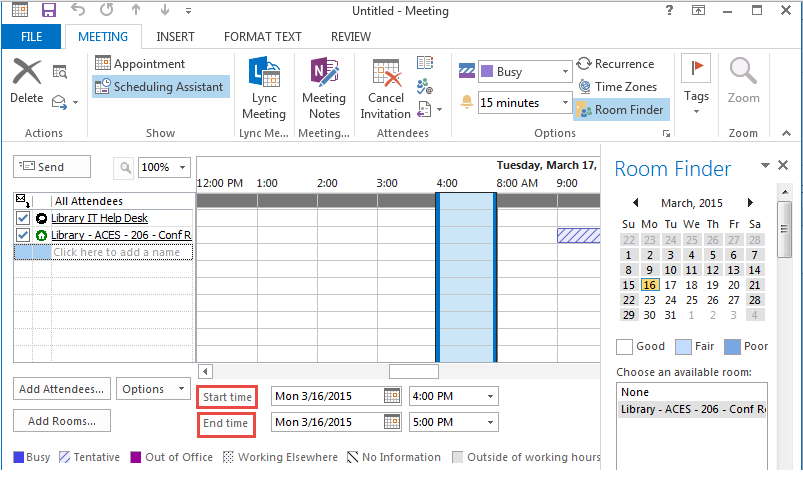
- Click on Rooms option, type ‘Library’ in the search box, then ‘Enter’, and select a meeting room from the list, and click ‘Rooms ->’ option, click OK as shown in the image below:
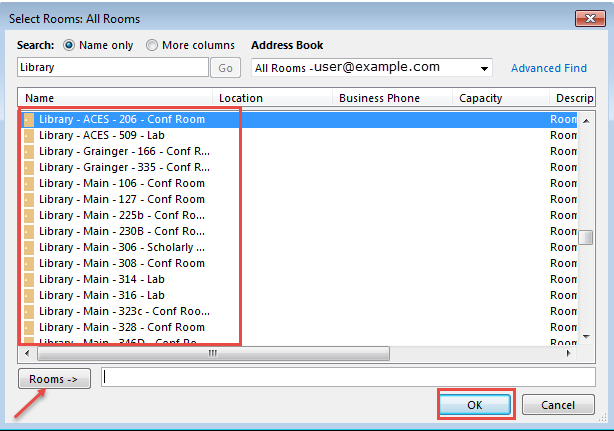
4.Select the Start time and End time for the meeting, type any information that you want to share with the recipients.
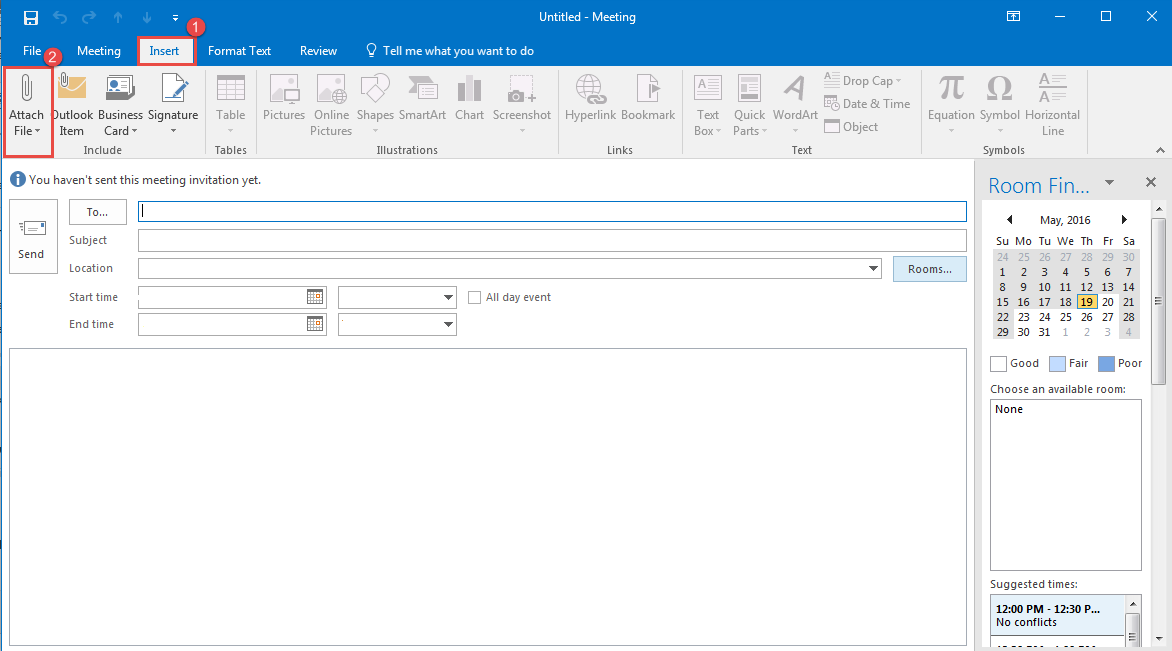
5.If you want to attach any files, click “Insert” tab, then click “Attach File”.
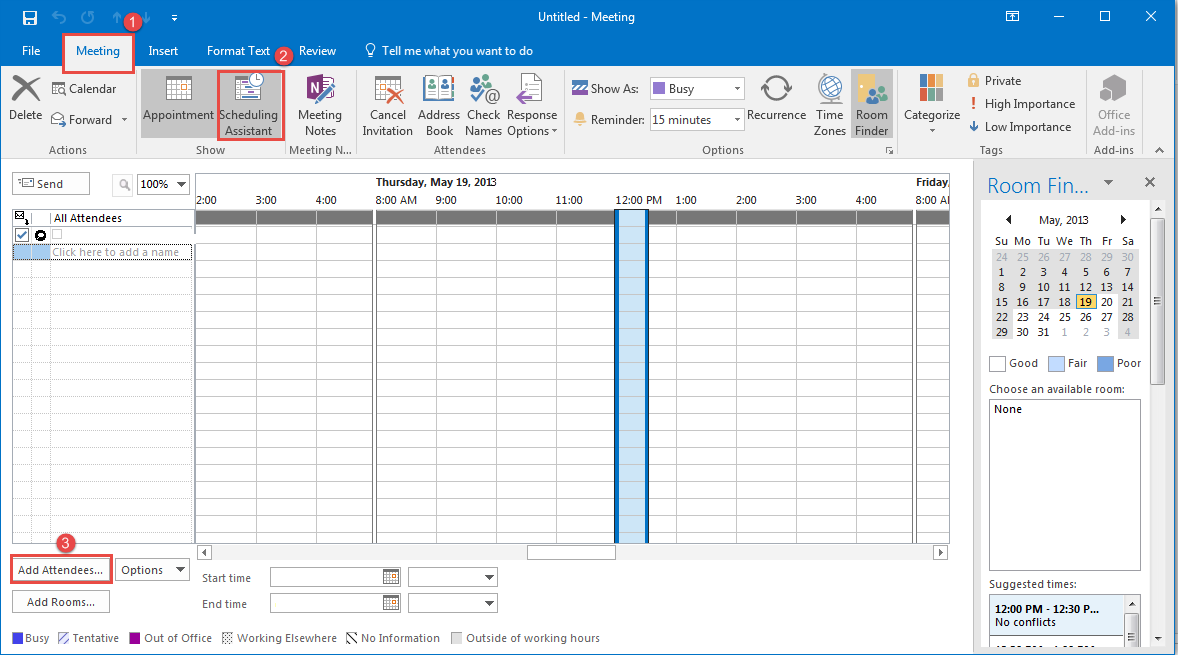
6.On the Meeting tab, in the “Show” group, click on “Scheduling Assistant”. “Scheduling Assistant” helps to find the best time for your meeting. Click “Add Attendees” (refer the image below for options)
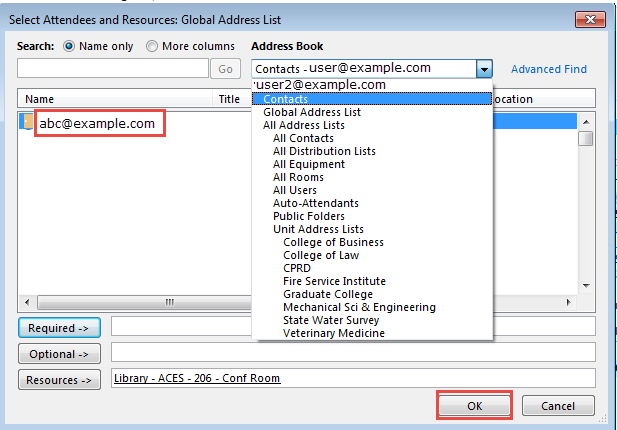
7.In the “Select Attendees and Resources” dialog box search for the contacts to invite them for the meeting.
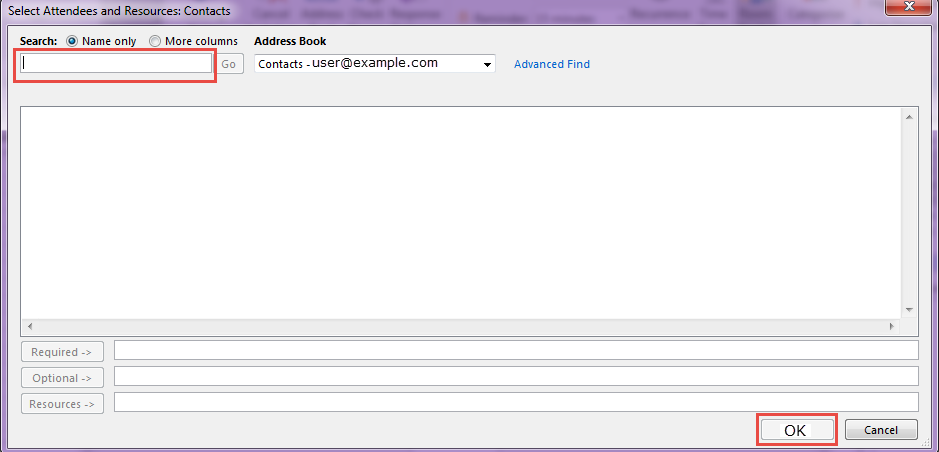
8. You can change “Address Book” to “Global Address List” to expand the search criteria. Enter the name of a person that you want to invite to the meeting in the Search box. Select the name from the results list, and click “Required” and then click “OK” (see the image).
9.All Attendees that a user wants to add in meeting invitation will appear as shown in the image below:
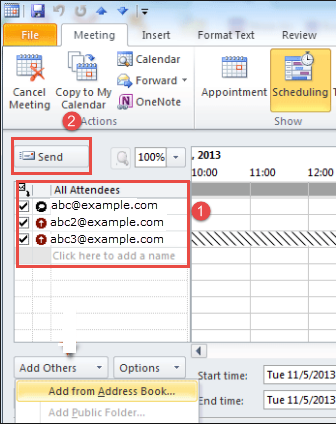
After filling all the required details, click on “Send” button to invite people for the meeting.
Explore info about ‘Set Schedule in Microsoft Outlook 2016‘.

