
How to use navigation in office 365
- Firstly, Log onto Outlook for web (Office 365).

- Click on the “App Launcher” in the top-left corner of the navigation bar.You will a see a listing of all available services, depending upon your license. We will start with “Calendar”.
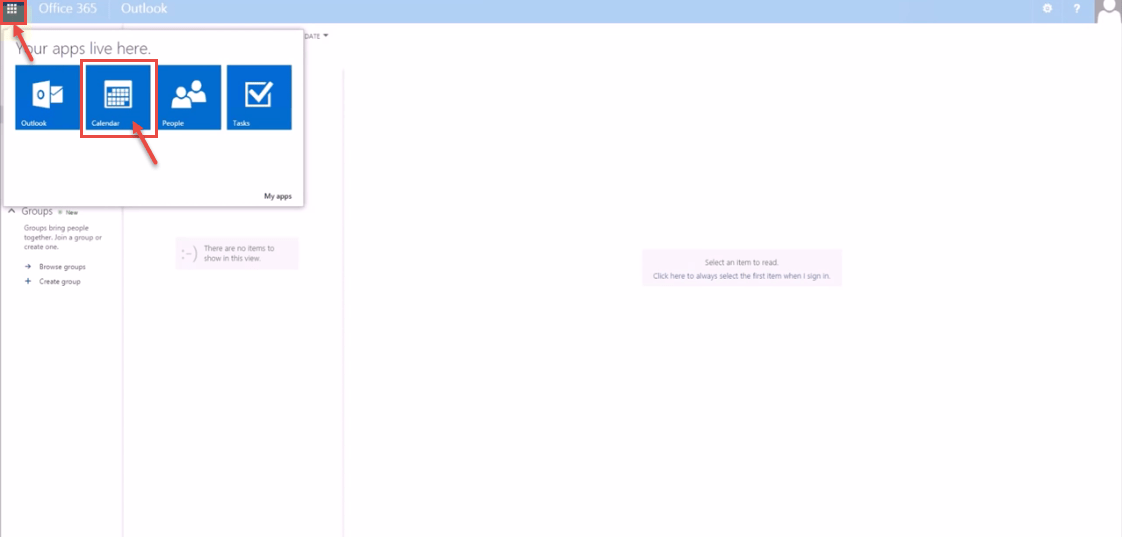
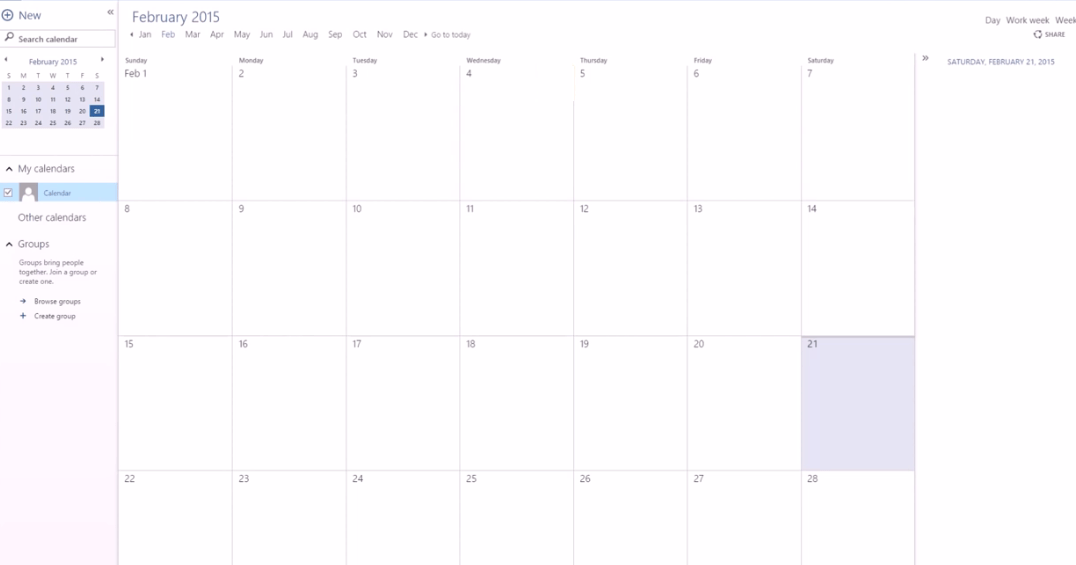
- “Calendar” window appears on your screen. You can set your daily routine schedule, office meetings, events etc.
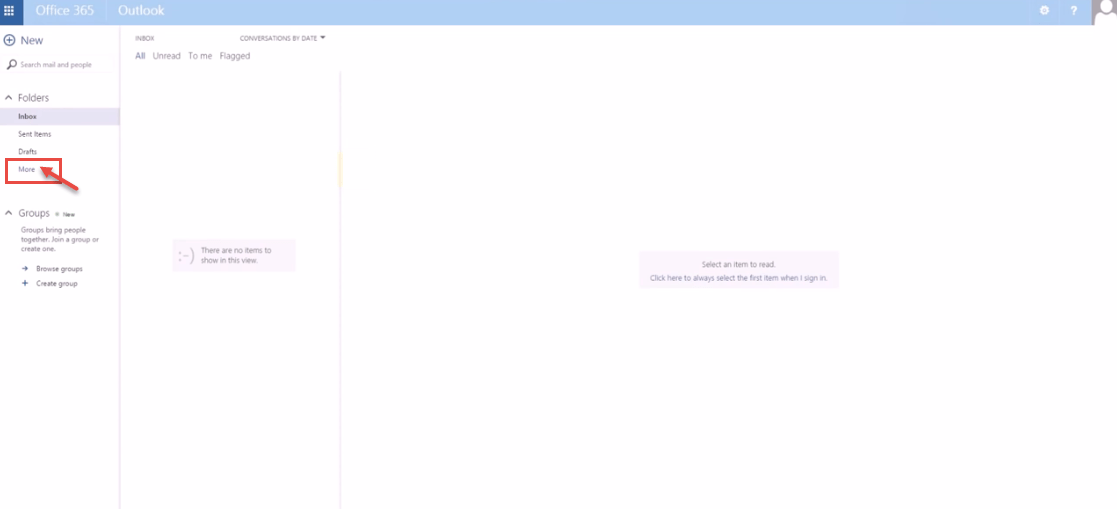
- From the “App Launcher“, select “Outlook”. Following window appears on your screen. Click on “More” to view detailed options.
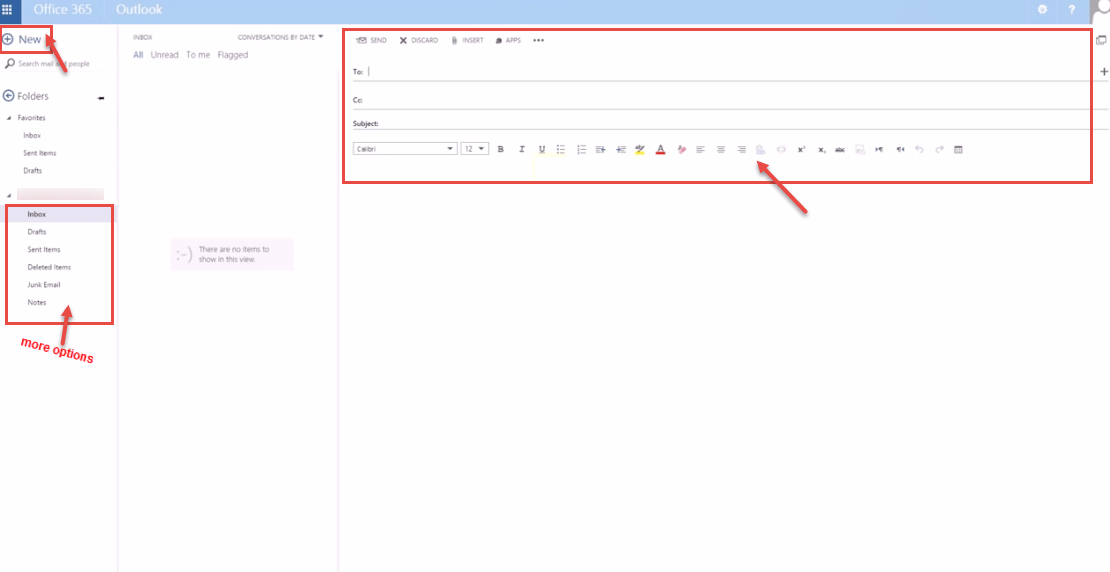
- Click “New” for sending emails.
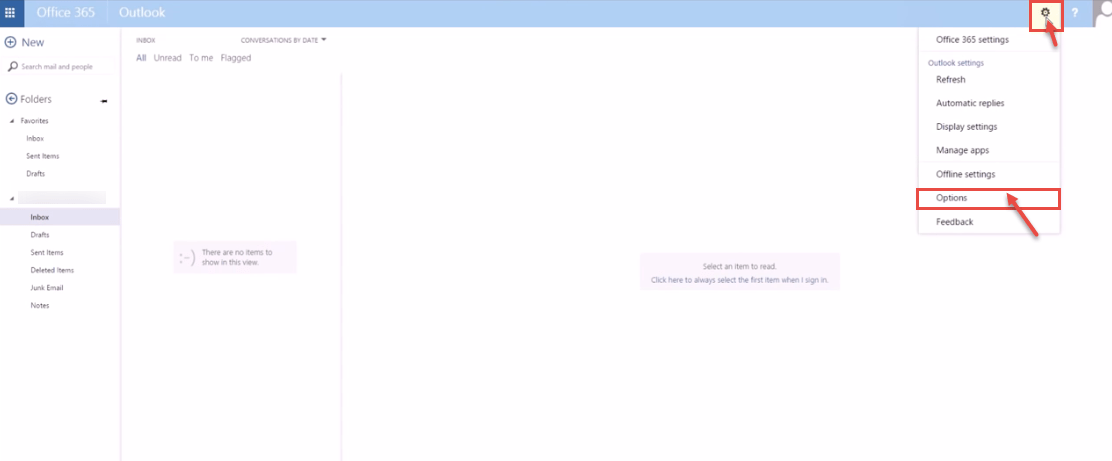
- If you want to explore further, from the settings menu, select “Options” (refer below image).
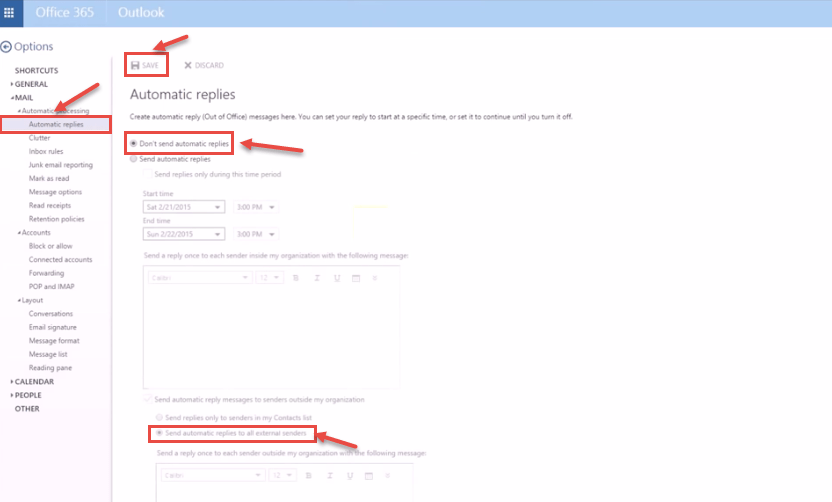
- “Mail” options will be visible on your screen. From the navigation in the left, you can select any option – “Automatic processing“, “Accounts“, “Attachment Options” and “Layout“. E.g. when working with emails, you can set “Automatic replies” for your emails. To set, select “Automatic replies“ option and enable/disable the settings. Specify the time frame for the replies – start and end date and how would you like your Calendar to work.
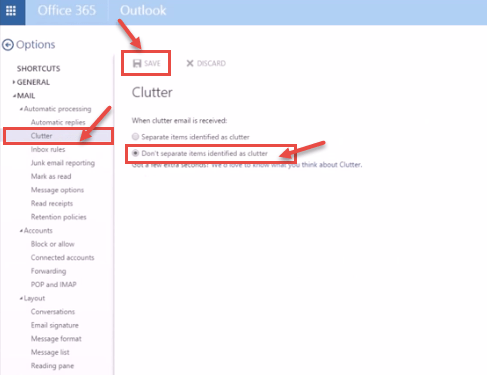
- Outlook for Office 365 automatically scans for emails and moves them to “Clutter” folder depending upon your response to the emails in the past. To enable/disable “Clutter” service, click on “Clutter” (as shown in the image).
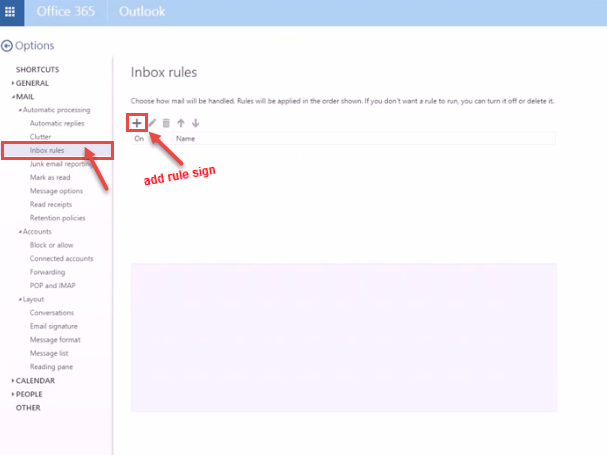
- If you want to specify rules for mails, go to “Inbox rules” and create rules.
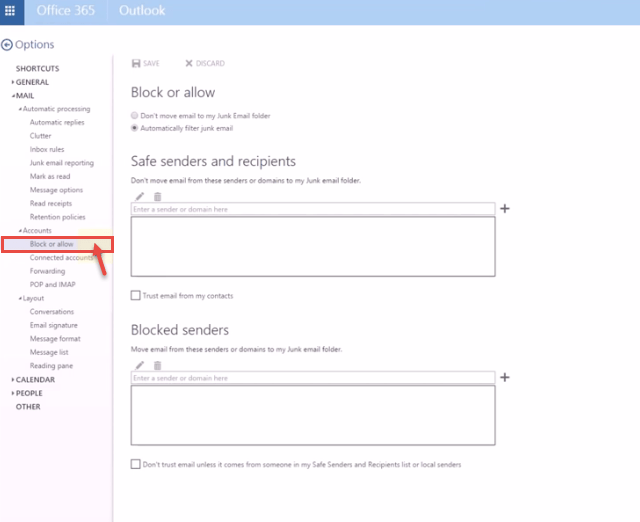
- Under the “Accounts” sub-head, you can explicitly block or allow emails from the contacts. Emails from the “Blocked senders” are automatically moved to the “Junk” email folder.You can set forwarding, connect different account and even check POP/IMAP settings for your account.
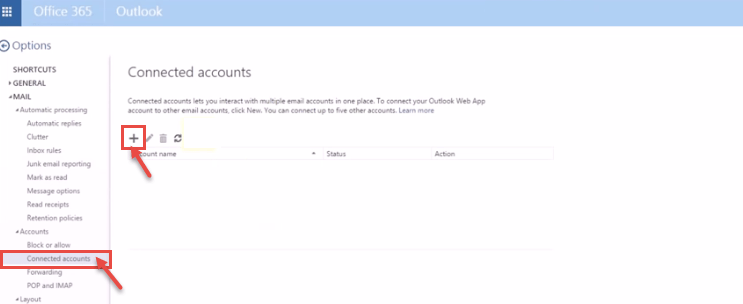
- To check emails from other accounts within Office 365 account, click on “Connected accounts” option. You can easily manage your different accounts from one consolidated account.
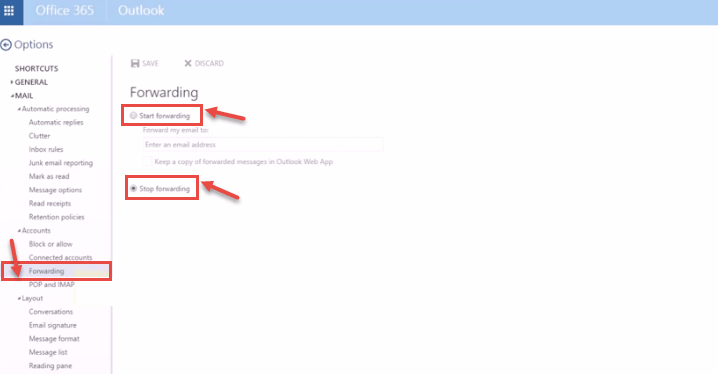
- To check Forwarding status i.e. to start or stop forwarding , click on “Forwarding” under “Accounts“.
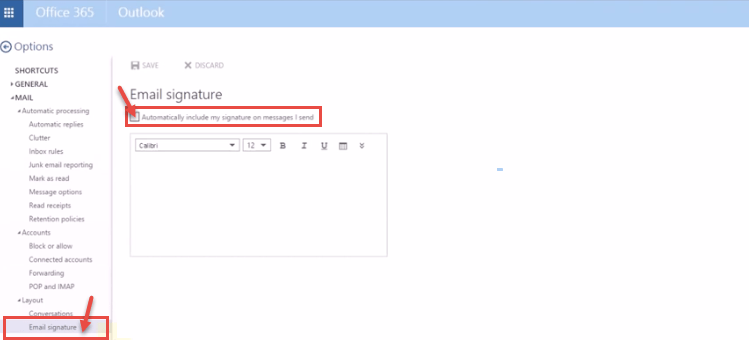
- To set signatures in your email messages, use for “Layout” option. Under “Layout“, select “Email Signature“. To automatically add your signatures, select “Automatically include my signature on message I send” option.
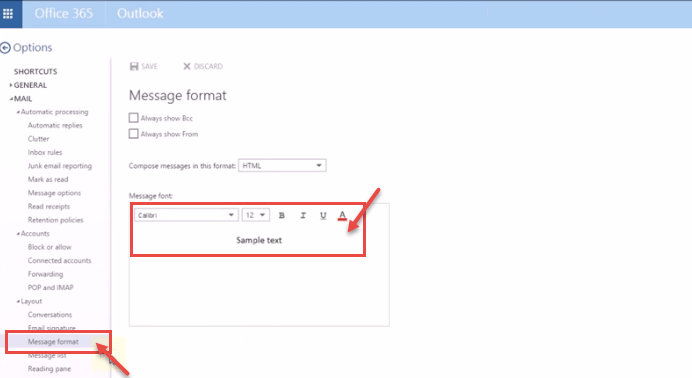
- If you want to format text in the email messages – select “Message format” and specify font-type, font-size, and font-effects like bold, italics or underline.
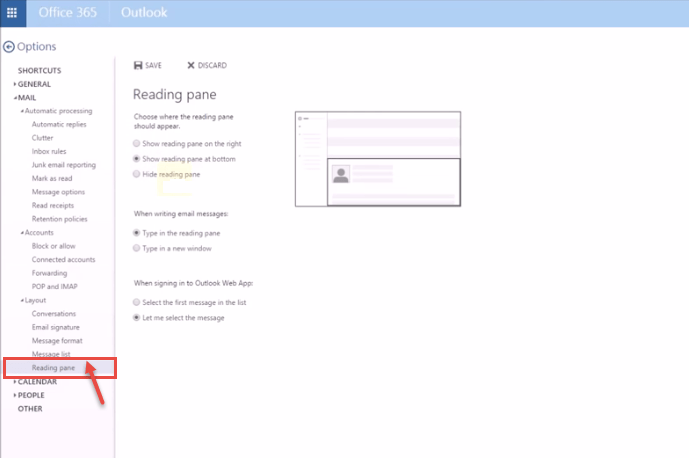
- To set the layout of your mail window, select “Reading Pane”.
 (1)")