
How to upload videos to a channel in Microsoft Office 365
Microsoft Office 365 Video provides an easy interface to upload the videos to your channel. It’s as easy as drag and drop when uploading multiple videos in one go or traditional upload feature. The best thing about Office 365 Video is the number of video file formats it supports. All these different formats are automatically converted to a standard format which can be easily played on computer or mobile devices. After logging in Office 365 Video, follow these steps –
- From the top navigation bar, choose “Upload“.

- If you have more than one channel configured for your account, from the “Select a channel to upload your video” drop-down, select the channel to which you want to upload the video.

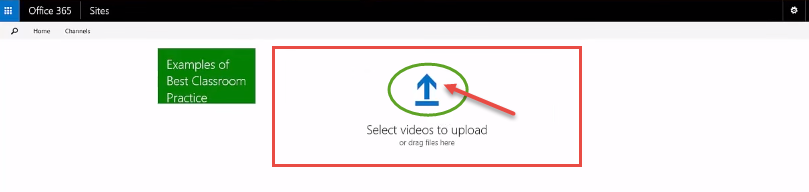
- The next step, drag and drop the video file(s) in the window or click on “Select videos to upload“.
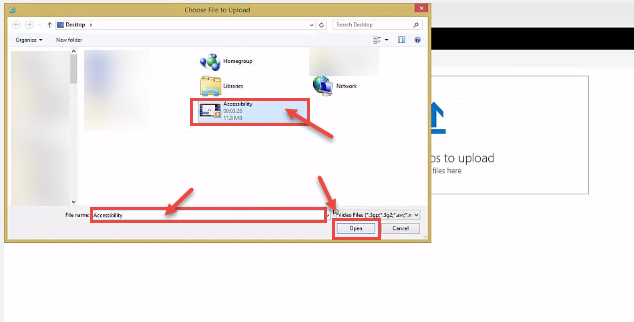
- Browse your computer for the video file. Select the file and then press “Open“.
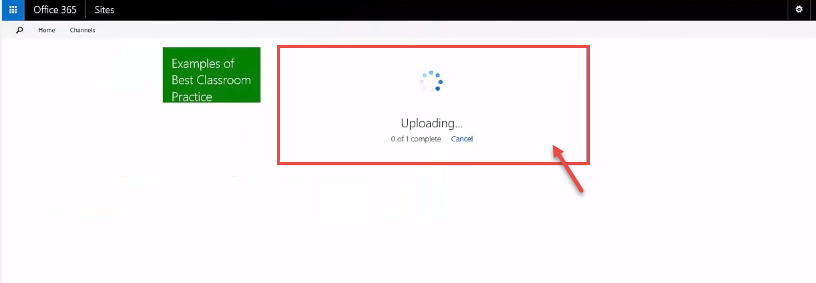
- The upload process will start. The uploaded video file is processed and converted to a standard format, viewable across different platforms.
- Specify a title and description for the video, and then click “Save“. After the upload is complete, click “Go to video” to view your uploaded video.
 (1)")