How to set Email Signature in Office 365 Outlook Email
If you have an Office 365 account, you can create a signature for your email messages. Your signature can be added automatically to all outgoing messages, or you can choose to add your email signature only to specific messages.
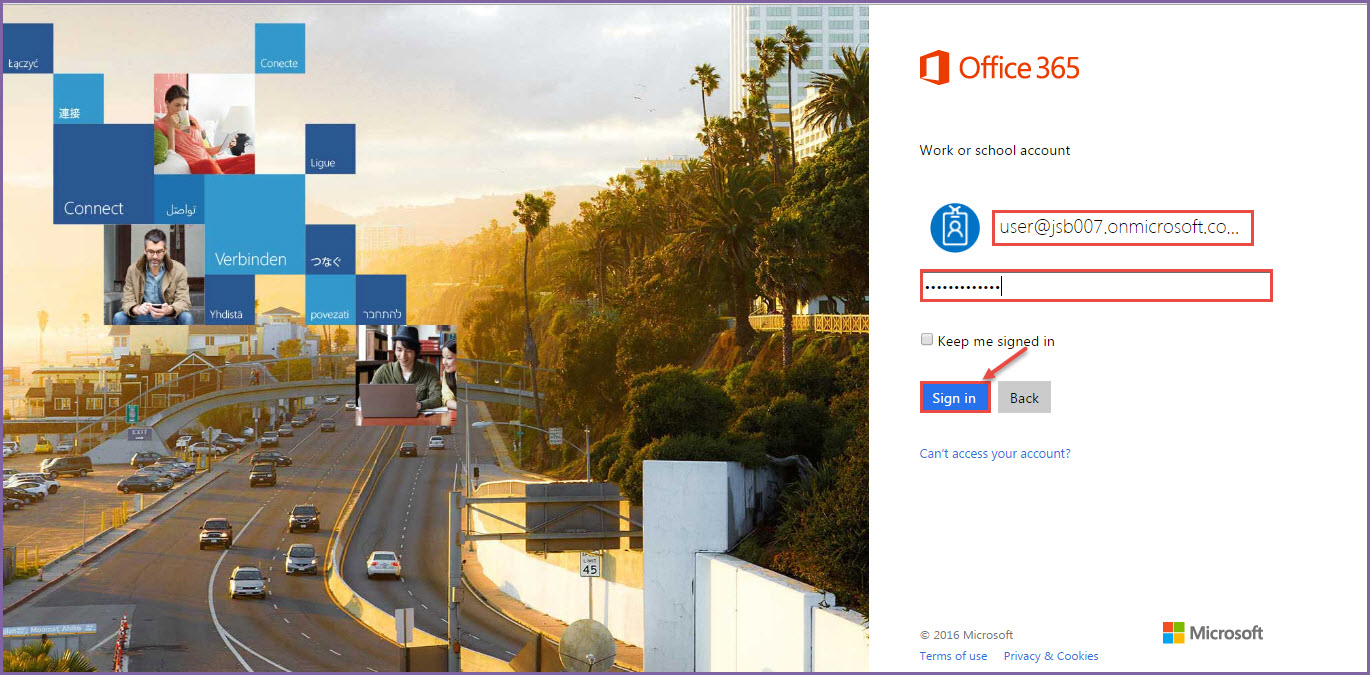
1.First login with ‘Office 365’ account details.
2.Go to ‘Settings’ from the right top navigation bar and select ‘Mail ‘option.
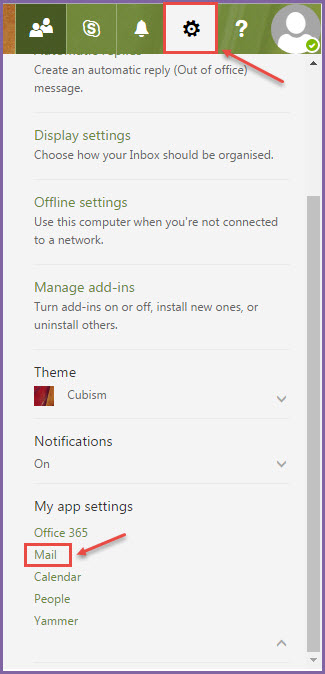
3. Mail options will expand. From the expanded navigation, select ‘Layout’ and then ‘Email Signature’ as shown in the image below.

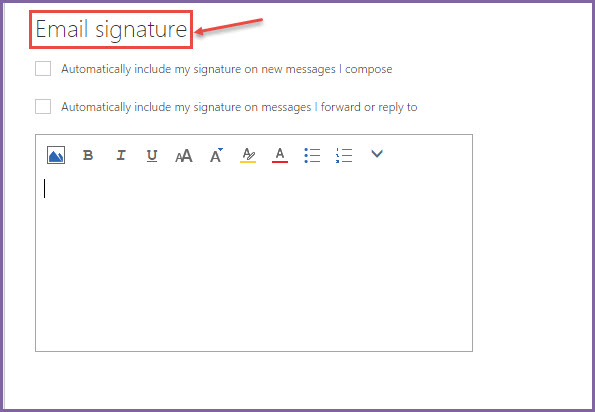
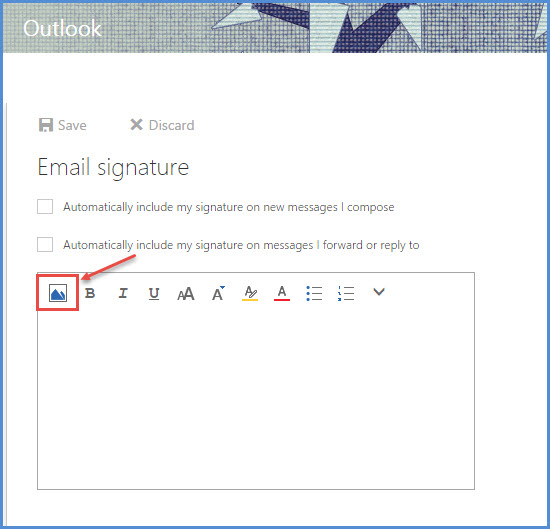
4. Email signature window will open, as shown in the following image.
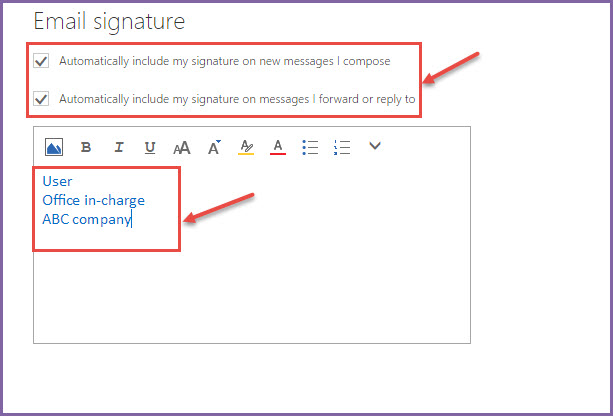
5.Check how you want to use your signatures – Automatically for all messages you compose and/or in the replied email messages. Check the either or both checkbox as per your requirement. Specify the Signature with the desired formatting/image etc.
6. To use an image as your signature, click on the ‘Image’ icon.
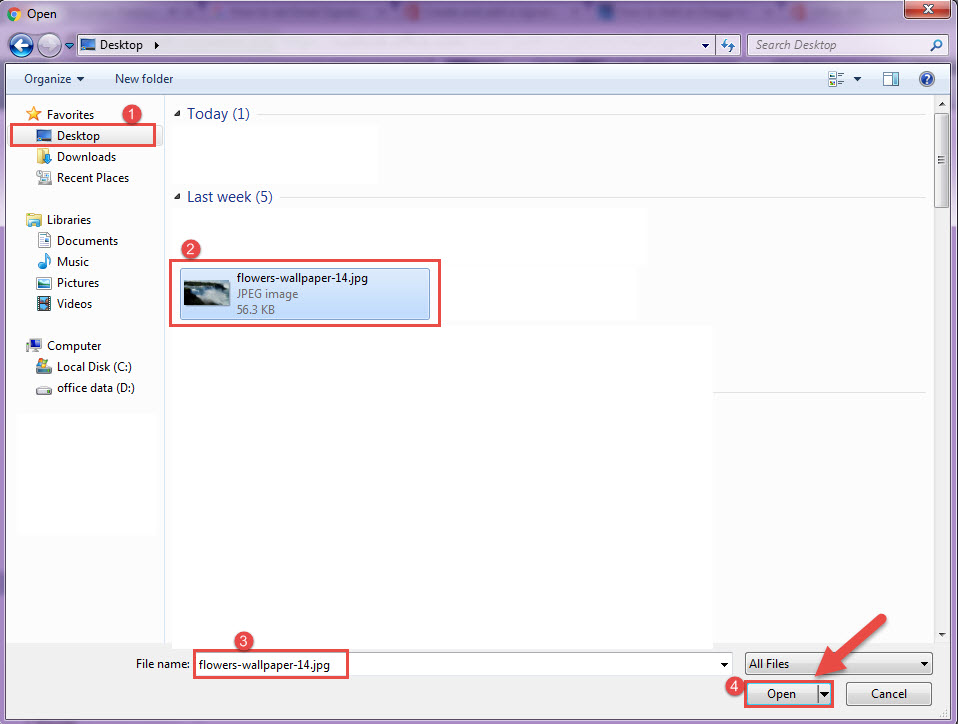
7.Upload image from your device and click ‘Open’.
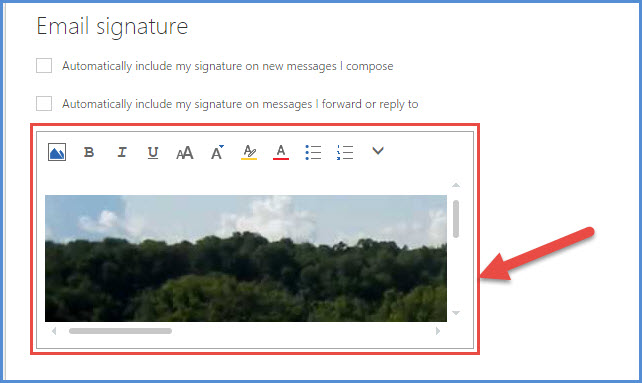
8.Image is uploaded as your email signature.
9.After making all changes, click on ‘Save’ from the top.


