How You Can Set Auto Archive Emails in Outlook 2010
Auto Archive is not set by default in outlook 2010. If you want to use it for your emails then you can set it by following these steps.Also take a look to Manage Storage Space in Microsoft Outlook 2016.
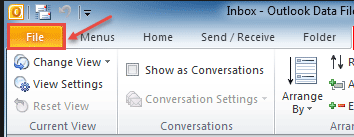
- First click on “File” option from the top, to go to the backstage as shown in the image below:
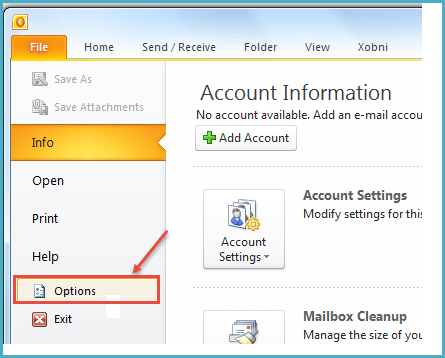
2. After opening “File”, click on “Options” (refer image below).
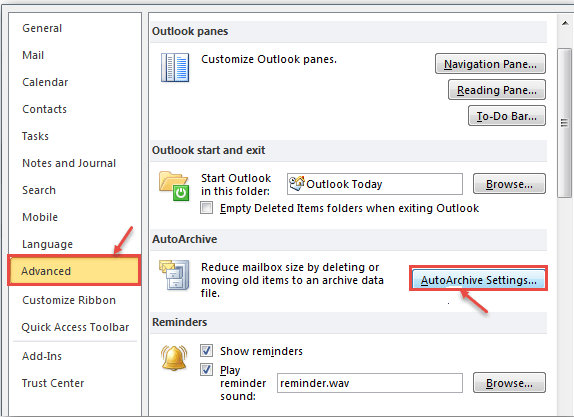
3. In “Options”, click on “Advanced” and then “Auto Archive Settings…” as shown in the image below.
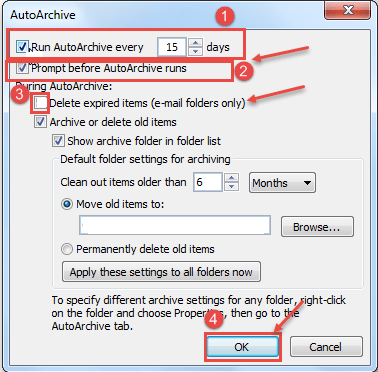
4. “AutoArchive” settings window will open, where you have to select ‘Run AutoArchive every…’ and specify the number of days. Don’t forget to un-check ‘Delete expired items (e-mail folders only)’ as it will delete all old emails. Also you need to select “Prompt before AutoArchive runs”. When done with all options click “OK”.
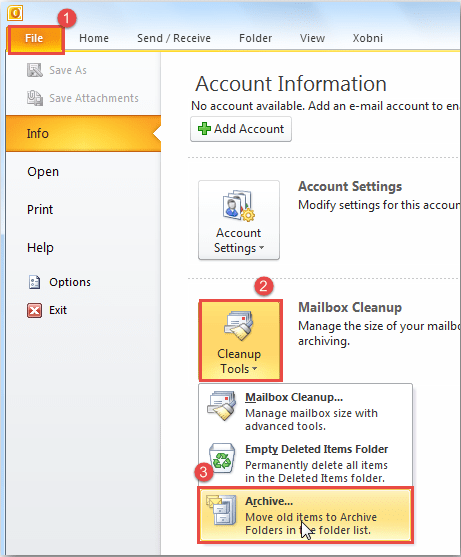
5. If you want to manually archive each folder, then follow these steps. Click on “File -> Cleanup Tools -> Archive” as shown in the image below.
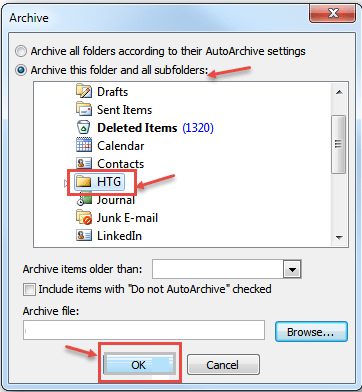
6. This will lead you to this options window (refer image), where you will select “Archive this folder and all sub-folders:” and select the folder to archive.
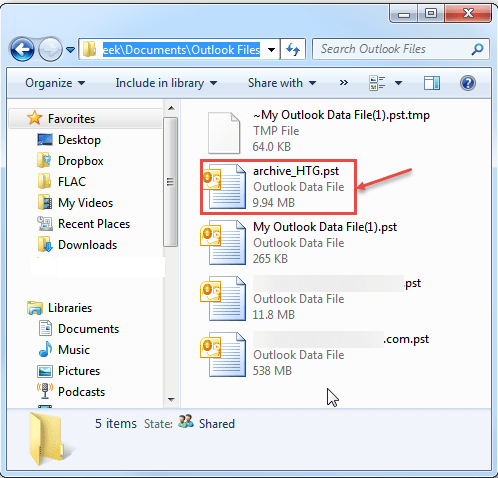
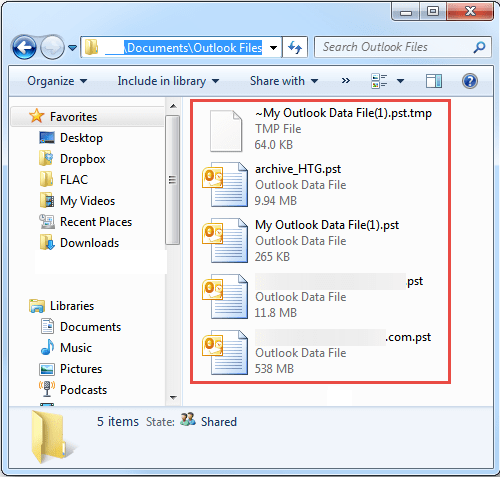
7.When you click on “OK”, the .pst files will be saved to your “Documents” folder, which you can access as per requirement.
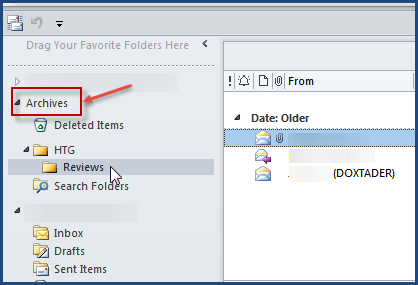
8.After setting up “Auto Archive”, you can find archived items in the “Archives” folder. In the “Navigation Pane”, expand the Archives folder. You can then view and access your messages.
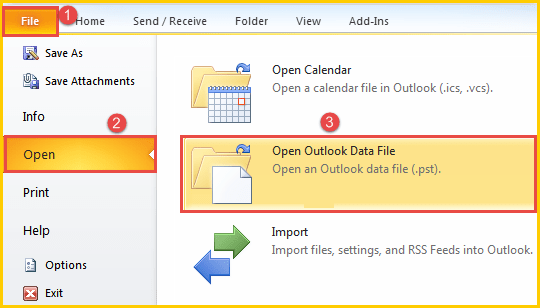
9.You can also access these files from, “Open” -> “Open Outlook Data File” from backstage of the account as shown in the image below.
10. You will be able to get all archived files and can open the desired file shown in the below image:
Archiving is a very beneficial feature of outlook 2010 with the help of archiving you can clean-up your old emails and speed-up email account.

