
User Account Support in Microsoft Windows 7
You cannot let everyone login to your computer with your “admin” account, right? What if you’ve kids at home you may accidently ruin operating system configuration or make changes that are irreversible?
This is when a standard user account can help.
What a Person with Standard User Access Can and Cannot Do
A standard account access can use most of a computer’s programs and data but he cannot directly make changes at the operating system level.
- Cannot install/uninstall new software or hardware on the system
- Can access most of the data on different drives on the computer
- Can use installed software or Windows programs
- Cannot make changes that may affect other Windows users
- Cannot just delete files that are important for correct functioning of the operating system
When the user attempts to make such changes, he would have to enter the admin password to continue.
Supporting and setting up a new user account (standard user) in Windows 7.
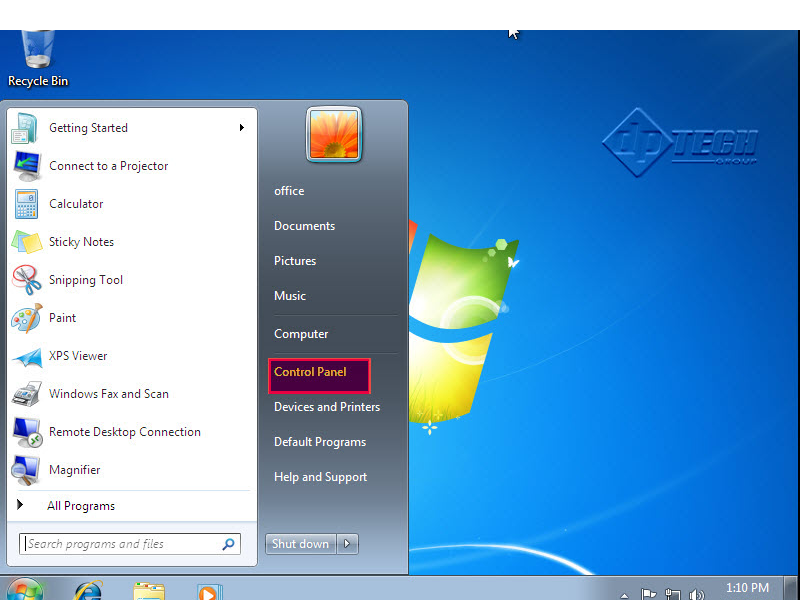
Step 1: To set up a new account, go to the Start Menu and click on the “Control Panel” tab. (Check the screenshot below of Windows 7)
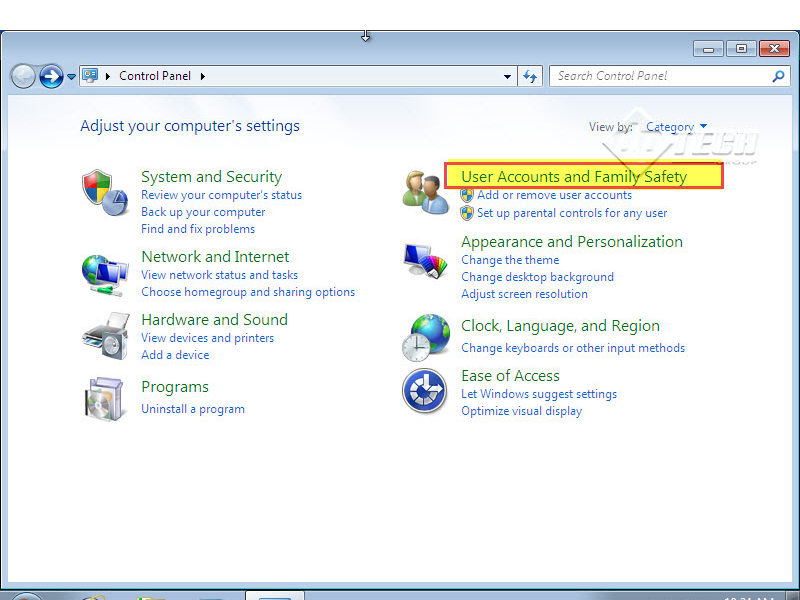
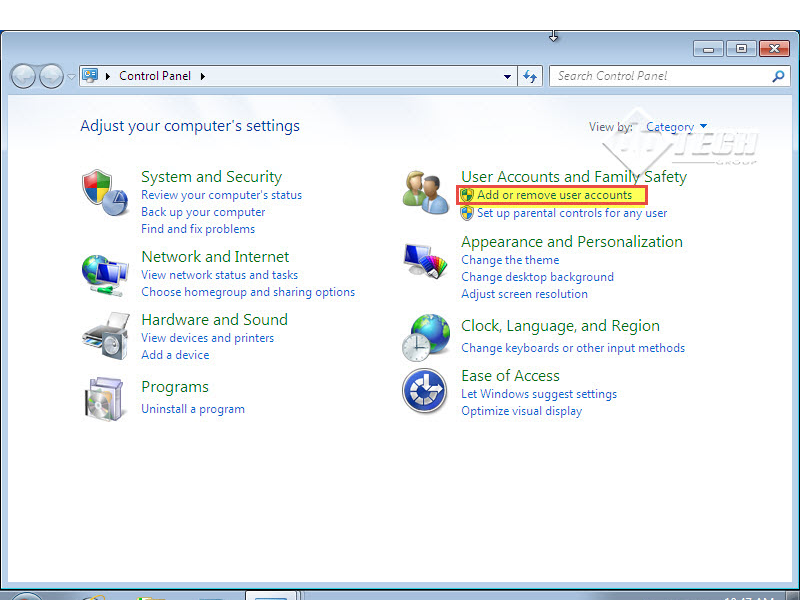
Step 2: Click on the “User Accounts and Family Safety” tab on the next screen. (Check the screenshot below)
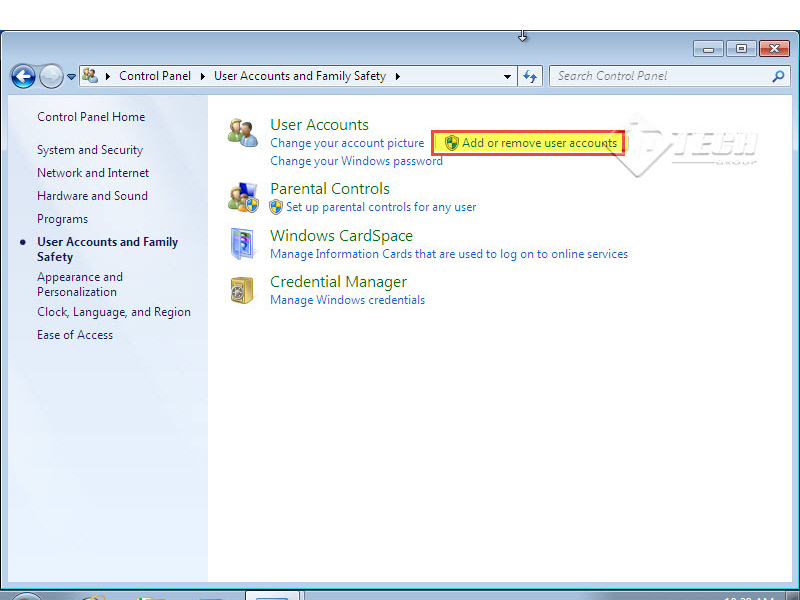
 Step 3: To set up a new user account, click on “Add or Remove User Accounts”. (Check the screenshot below)
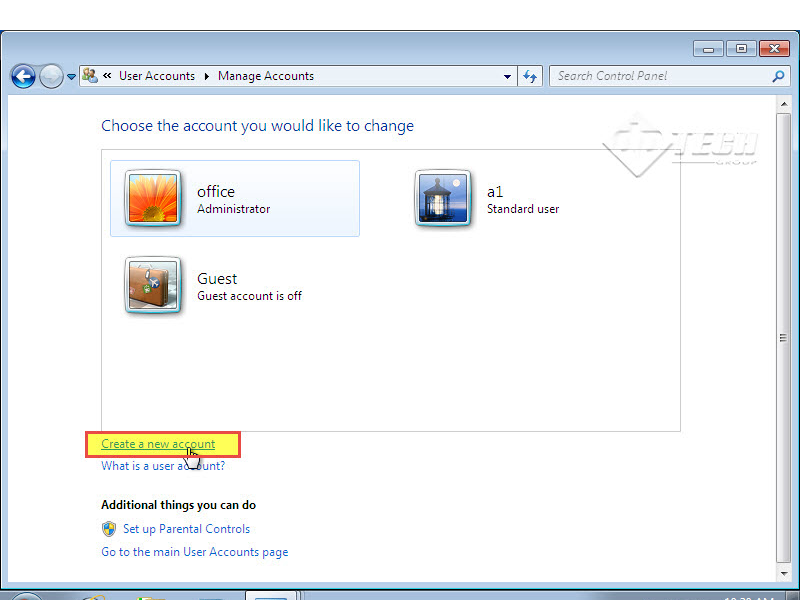
Step 4: Scroll down to “Create a New Account” and click on it. (Check the screenshot below)
Step 5: Enter a unique name for the new user account you’re setting up. Once the name has been mentioned the next step is to choose the account type, i.e. standard user.
Step 6: After selecting the new user account type, click on “Create Account” tab. (Check the screenshot below)

Step 7: Here’s an example of a new user account with standard privileges named JOY. (Check the screenshot below)
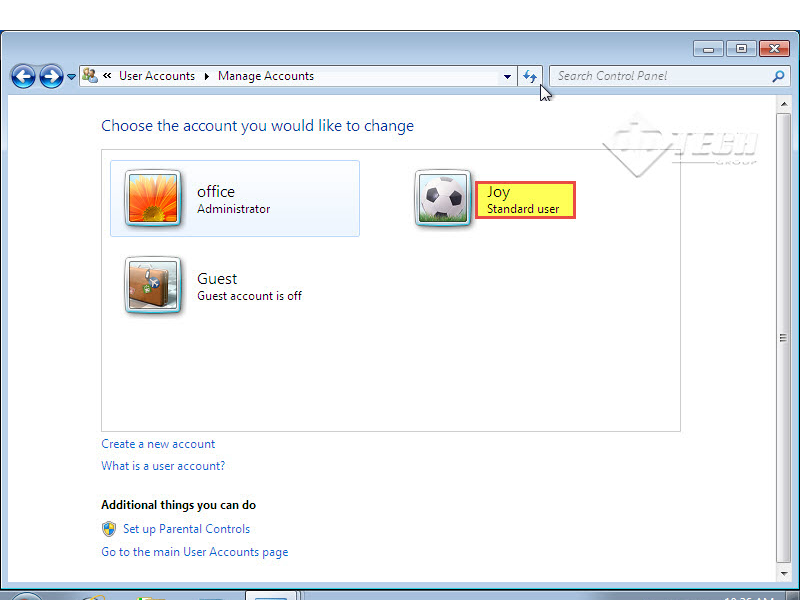
Your new user account with standard privileges is all set to be used!
Protecting a New Standard Account
You can even secure your user account from unwanted access by setting up a password. Simply follow the steps mentioned below to Add Password to a Standard Account you have just setup on Windows 7.
Step 8: To add a password to user account, go to the Start Menu and click on “Control Panel”. (Check the screenshot below)

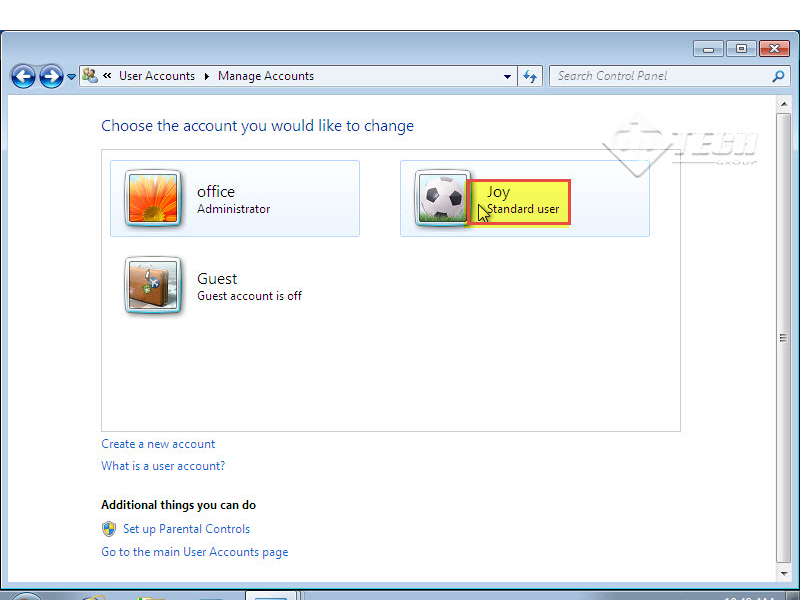
Step 9: From your Control Panel screen, click on “Add or Remove User Accounts”. (Check the screenshot below)
Step 10: The screen with user account names will appear next. This is the place where standard user account name “JOY” has been modified. Double click on this new user “JOY” to get started. (Check the screenshot below)
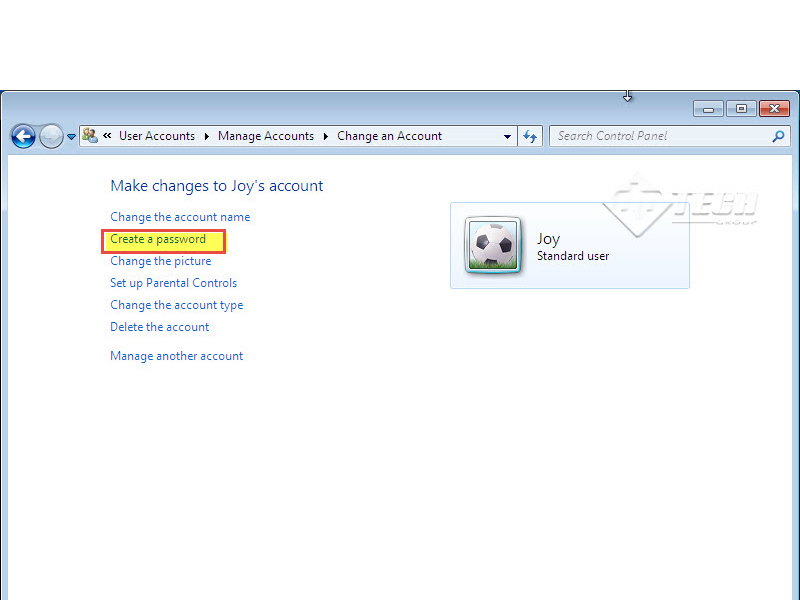
 Step 11: Click on “Create a Password” tab among st the many options appearing in front of you. (Check the screenshot below)
Step 12: Choose a strong and secure password and enter it in the provided space. Re-enter the password in the next box.
Step 13: You can even type in a password hint for future reference in case you forget your new password. (It’s a good idea to do that, always)
Step 14: Lastly, click on the “Create Password” tab. (Check the screenshot below
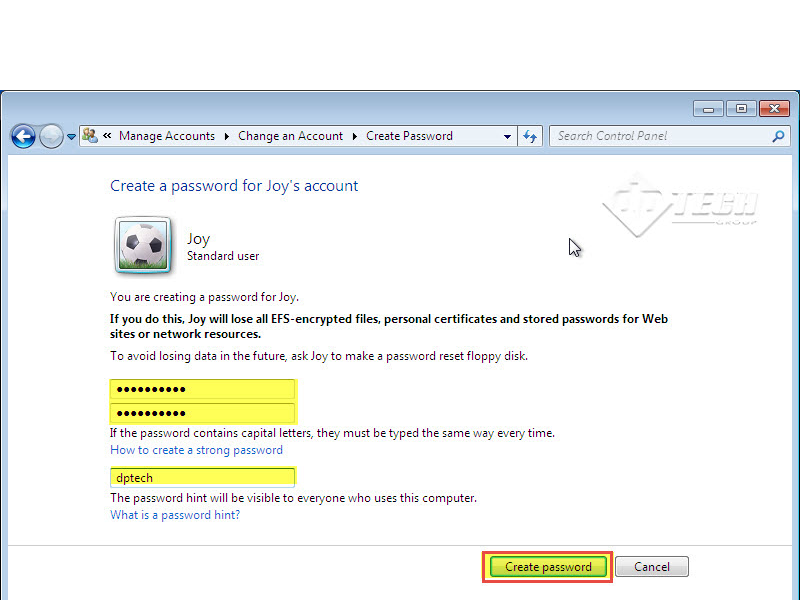
There, you have successfully secured your new user account with a password in Windows 7.
We offer instructor led classroom training in Chicago area. If you are interested in training courses give us a call today!
 (1)")