
How to Support Windows 7 Remote Desktop Connection
Remote Support Access feature in Windows operating systems is designed to allow a PC’s desktop, along with other files & folders, settings and programs to be accessible from a distant location.
For example, you may access your work computer from your home computer through remote desktop in Windows 7. This way you can access all your apps, files and network resources, as if you were working on your office PC – all from the convenience of your home.
Remote desktop connections is also a popular choice for IT support professionals to remotely support client systems.
You can create a remote connection to access a computer in GUI (Graphical User Interface) mode. This will give you full control of the system.
Follow the step by step guide to support and setup remote desktop in Windows 7.
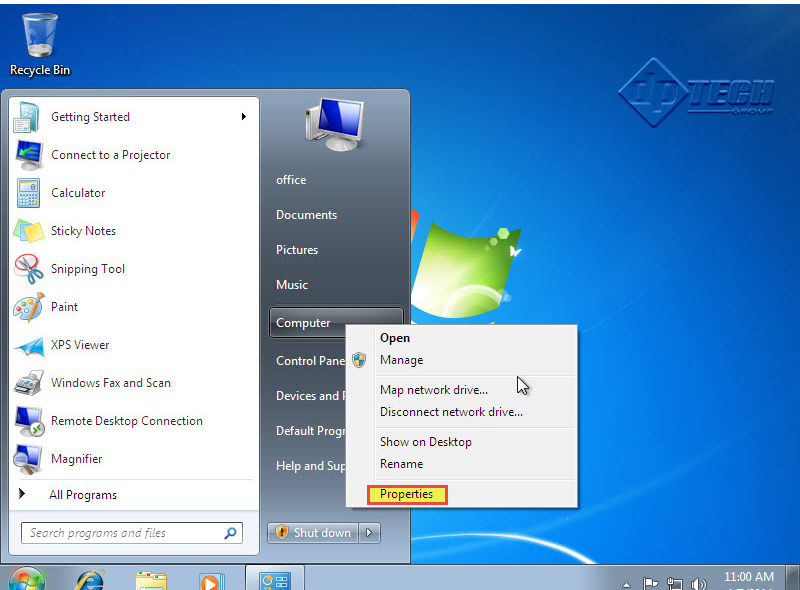
Step 1: Click on the START button.
Step 2: Right click on “Computer” tab and click on “Properties”. (Check the screenshot below)
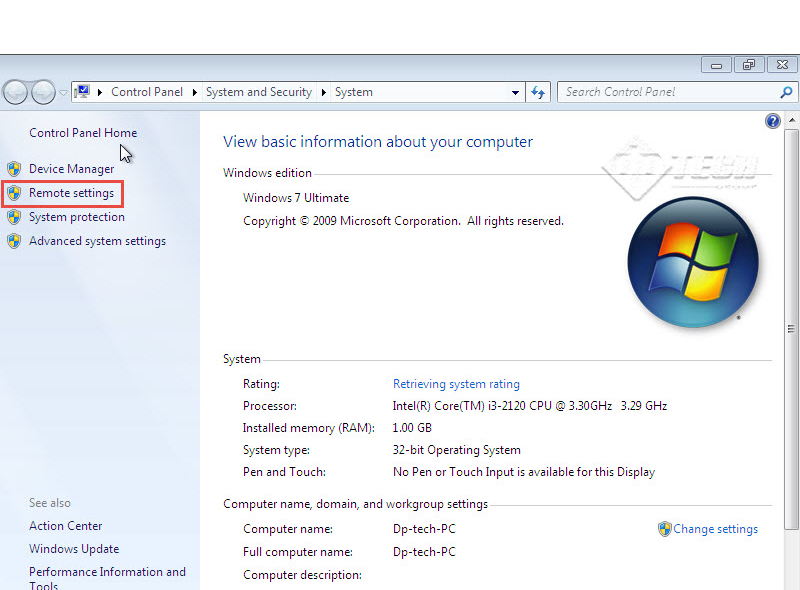
 Step 3: Click on “Remote Settings” tab on the left-side of the new window. (Check the screenshot below)
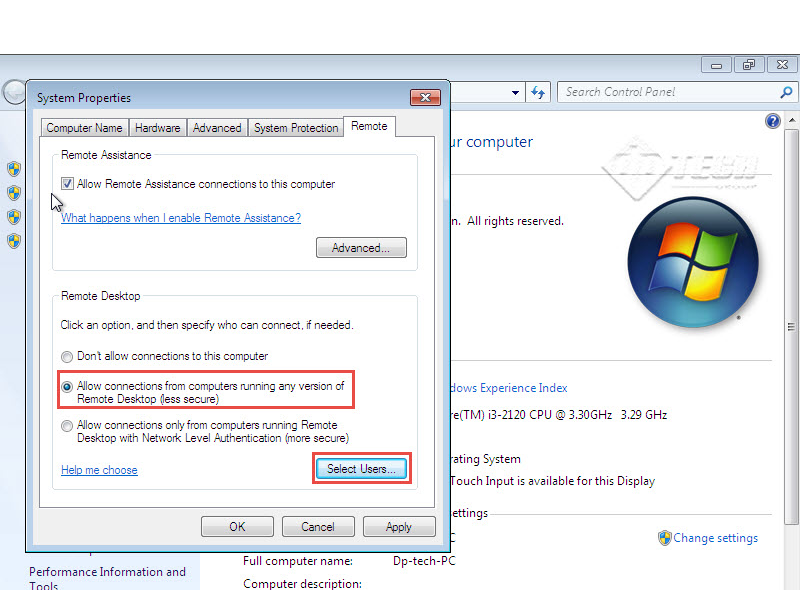
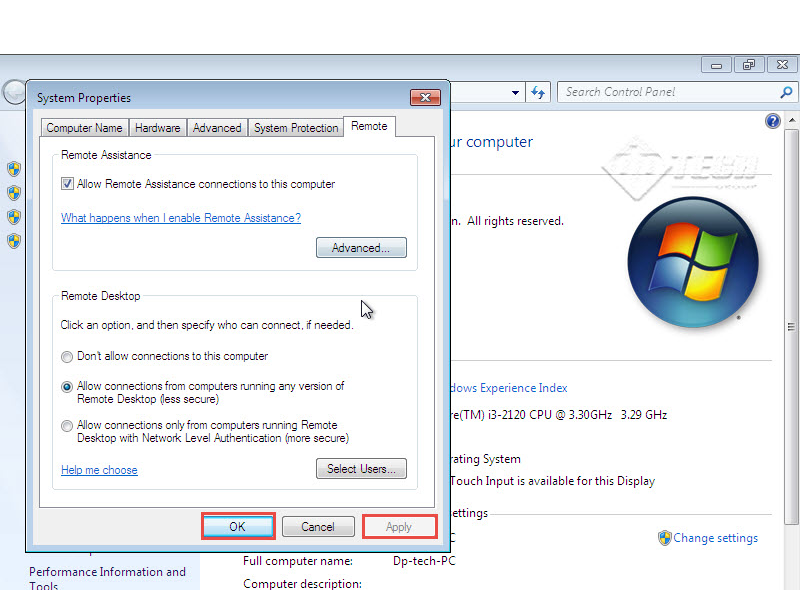
 Step 4: A “System Properties” screen will open up. Select “Allow connections from computers running any version of Remote Desktop”.
Step 5: Next, click on “Select Users” tab. (Check the screenshot below)
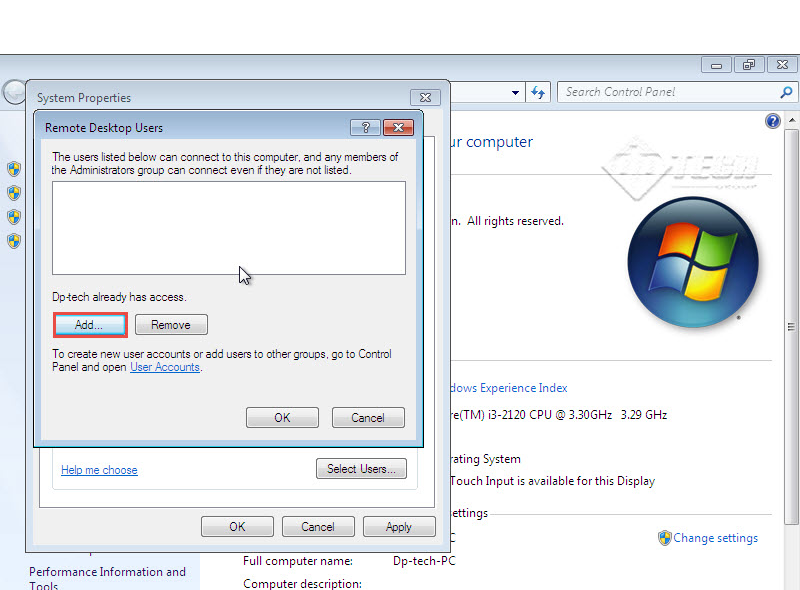
 Step 6: The “Remote Desktop Users” window will now be displayed on the screen. You can now add the desired user by clicking on “Add…” tab.
Step 7: Once you’ve added the user, click on “OK” tab to proceed. (Check the screenshot below)
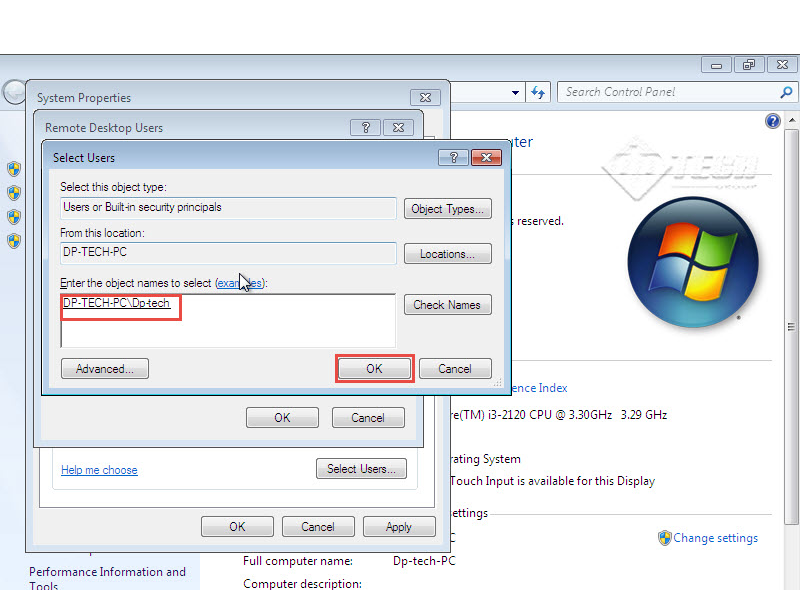
 Step 8: A “Select Users” screen will now appear on the screen. Under “Enter the object name to select (examples)”, type in the user name and click “OK”. (Check the screenshot below)
 Congratulations: You’ve successfully added a user who can access a Windows 7 workstation remotely.
 Now that you’ve enabled remote desktop connection in Windows 7, let’s take a look at how to remotely access the target computer system by using Remote Desktop Protocol.
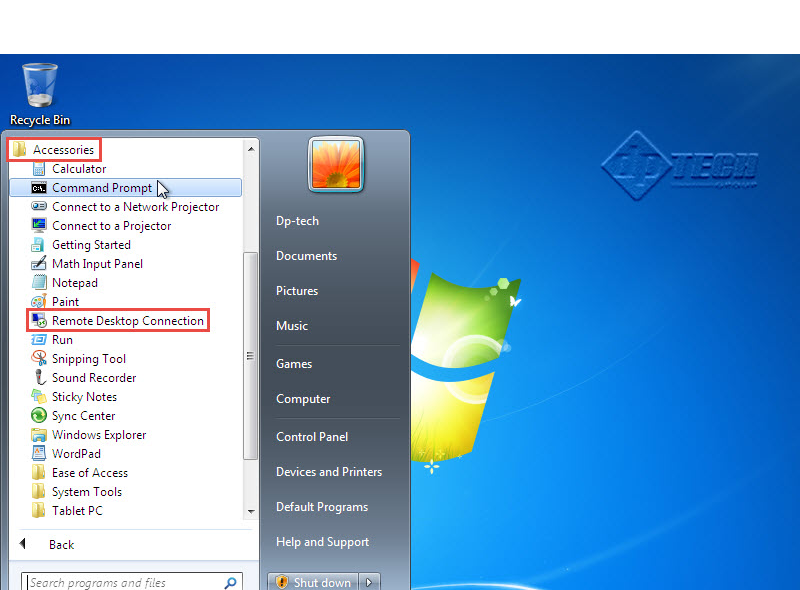
Step 9: Open the Start Menu and click on “All Programs” tab. (Check the screenshot below)
Step 10: All Program, Scroll down to “Accessories” and click on “Remote Desktop Connection”. (Check the screenshot below)
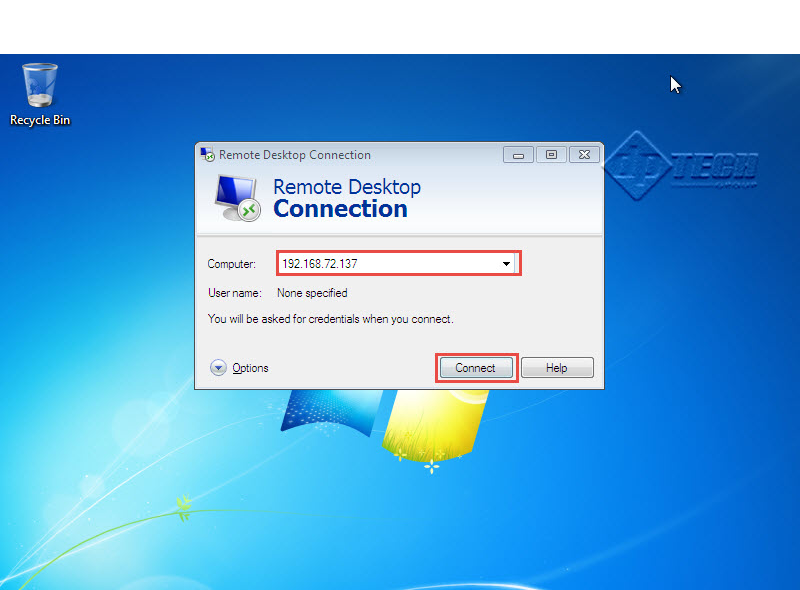
 Step 11: The Remote Desktop Connection window will now appear on the screen. Provide the “IP address of destination computer.”
Step 12: Click on “Connect” tab to start the connection. (Check the screenshot below)
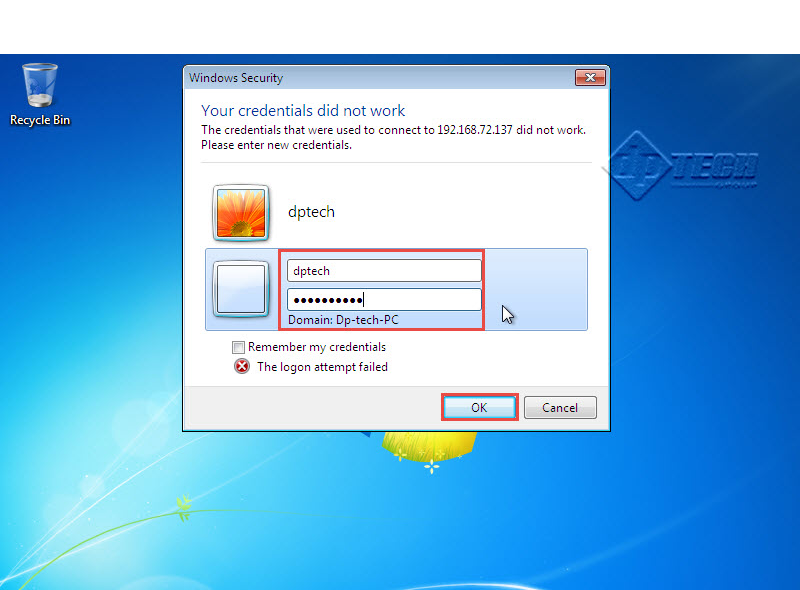
 Step 13: Enter the User Name and Password of the destination computer in given input fields of the Windows Security window.
Step 14: Once you feed in the required details, click on “OK” tab.
 Step 15: Click on “Yes” to ignore the certification error. (Check the screenshot below)
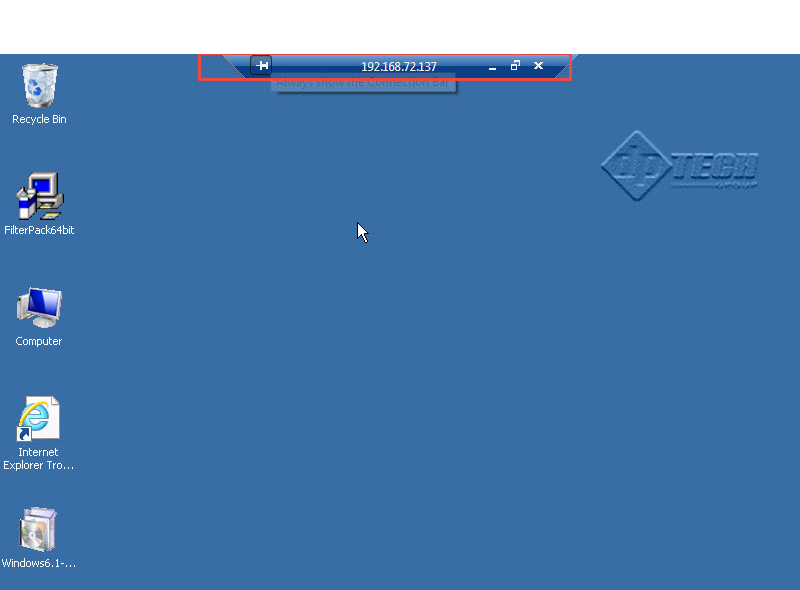
 Step 16: There, you’ve successfully accessed the destination computer. You can even see the IP Address of the destination computer. (Check the screenshot below)
NOTE: You can go ahead and make desired changes on the destination computer now.
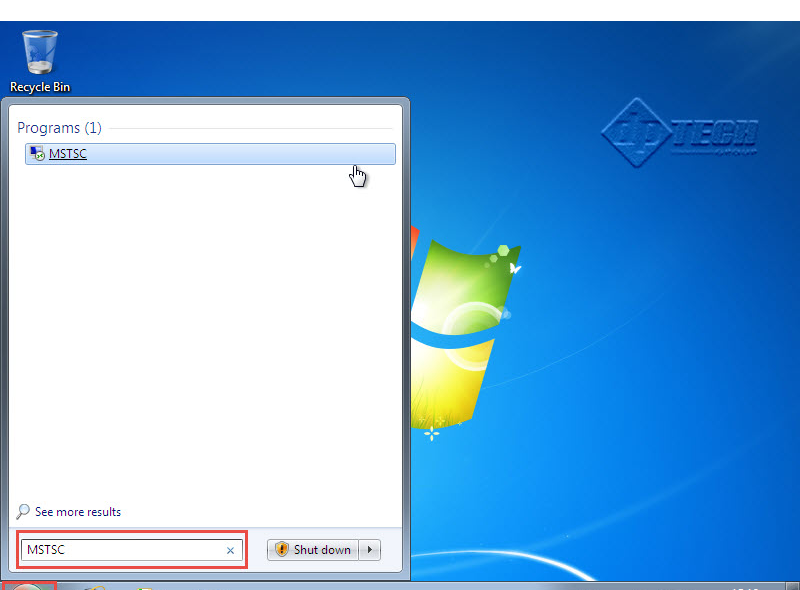
Alternative Method to Open Remote Desktop Connection
 Step 17: Go to the Start menu and type in “MSTSC” in search programme and file space. Hit Enter. (Check the screenshot below)
By following these simple steps, you can easily use Remote Desktop connection feature in Windows 7. (Check the screenshot below)
 If you are having difficulty in establishing Remote Desktop connection in Windows 7 or while adding users, please let us know in comments below. Try to be as descriptive as possible so that we can offer you the easiest and most appropriate solution.
 (1)")