
Support – How to Connect Your Computer to a Domain
Domain is a collection of computers over a network that share general rules & procedures and are administrated “together as a single unit.”
If you wish to connect your computer to a particular domain, you need a valid account as well as the exact name of the domain.
Supporting Domain Environment:
Note: Before we join a client computer, it is important to verify the following two network configurations:
- The IP address or subnet mask of the client computer must be in the same class as that of the domain controller.
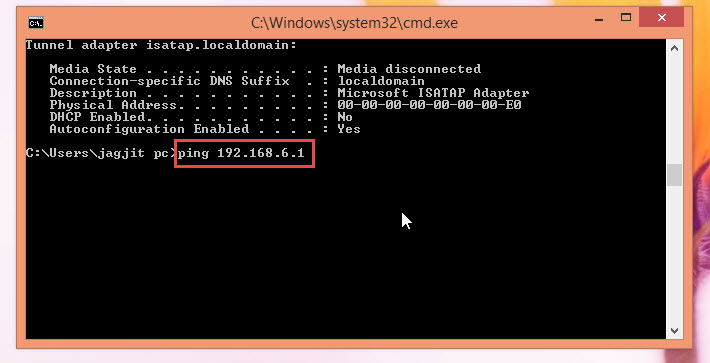
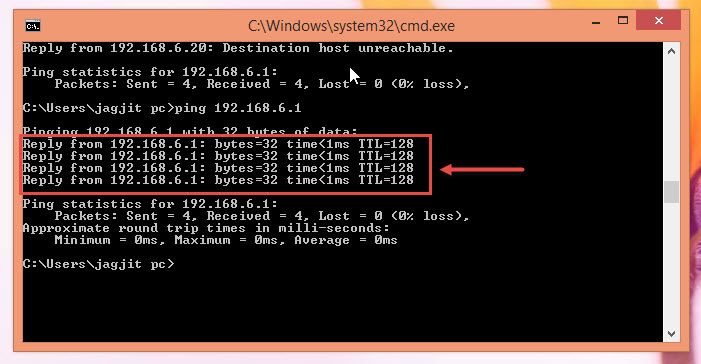
- Make sure to provide IP address of the Domain Controller in “Preferred DNS Server.” (Check the screenshot below)
 Once you’re done cross checking the above two configurations, you may continue with the following step by step guide on connecting a computer to a domain in Windows 7:
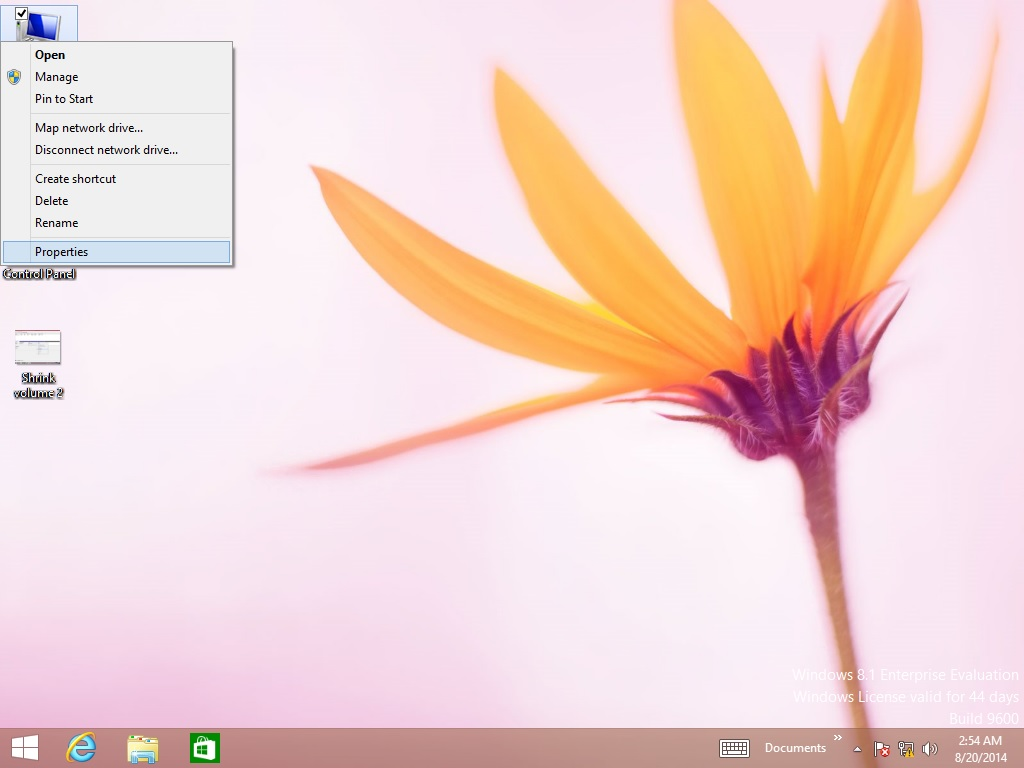
Step 1: To get started, go to the Start Menu and right click on the “Computer” option.
Step 2: Next, select “Properties” from the drop down menu that appears on the screen upon right clicking. (Check the screenshot below)
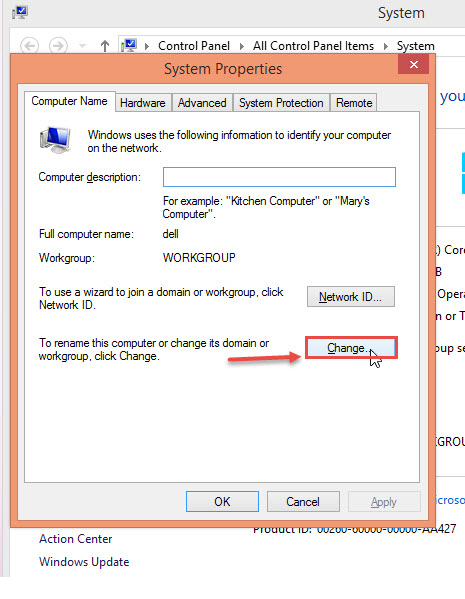
 Step 3: The computer name, domain name and workgroup settings option will appear under the “Computer name, domain, and workgroup settings” tab.
Step 4: We can even change the Domain Name by clicking on the “Change Settings” tab. (Check the screenshot below)
 Step 5: Click on the “Computer Name” tab in the “System Properties” window. Add your desired computer description in the provided space and click on the “Change” button.
Step 6: Click on the “OK” button to save the changes. (Check the screenshot below)
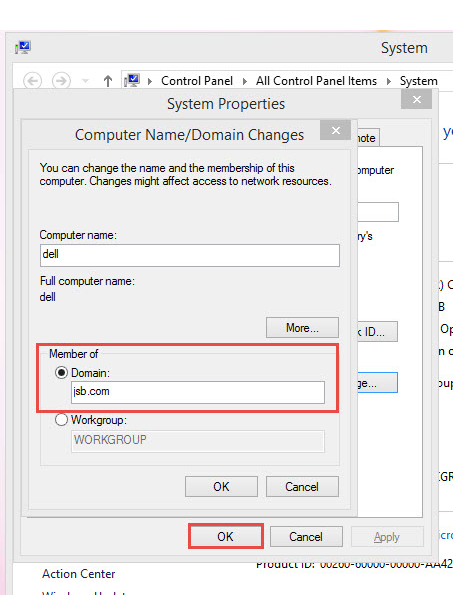
 Step 7: Click on “Domain” on the “Computer Name/Domain Changes” dialogue box and enter the name of the domain in the text box as indicated in the screenshot below.
Step 8: Click on the “OK” button to save all changes you’ve just made. (Check the screenshot below)
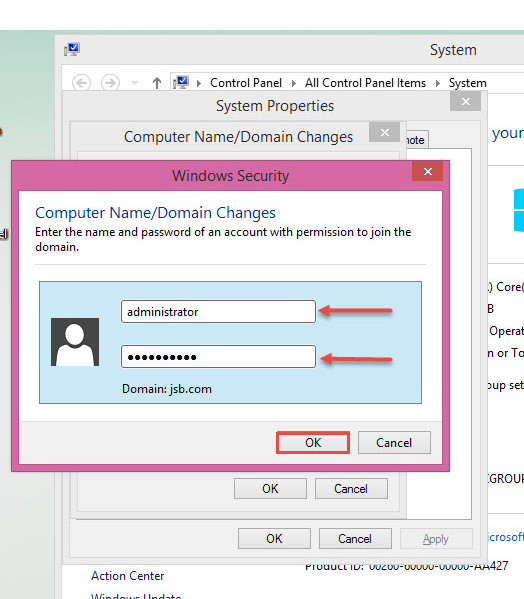
 Step 9: Feed in your valid user name and password credentials to validate that you have appropriate permissions to join the desired domain.
Step 10: Click “OK” to validate. (Check the screenshot below)
 Step 11: You will now receive “Welcome to the <your-domain-name> domain” message. Congratulations, you’re about to finish connecting a computer to a domain in Windows 7. Simply click on the “OK” tab. (Check the screenshot below)
 Step 12: A dialogue box displaying the following message “You must restart your computer to apply these changes” will appear on your screen after you hit the “OK” button.
Step 13: Click on the “OK” button to save all changes. (Check the screenshot below)
 Note: Make sure you save and close everything you had previously opened as your system will restart immediately after you hit the “OK” button.
Step 14: If you wish to restart your computer later, you can do so by clicking on the “Restart Later” tab. (Check the screenshot below)
Your computer system will now act as Domain client machine.
Were you able to follow the steps?
If you are unable to connect a computer system to a domain, let us know the details in the comment section below. A senior IT support professional will respond to your request.
 (1)")