Server Help configure account lockout
Server Help configure account lockout
Account Lockout Threshold in Windows Server is a security setting; it determines the number of failed sign-in attempts that will cause a Windows user account to be locked.
In this post, we will shed light on account lockout threshold in Windows Server 2012.
Since you can’t access your account because of a “lock”, you need to take administrator’s help to reset/unlock your Windows Server 2012 account to log in.
You can define the account lockout value between 0 and 999. Your account will never be logged out if you set the zero value.
Here is how you can make the necessary security settings:
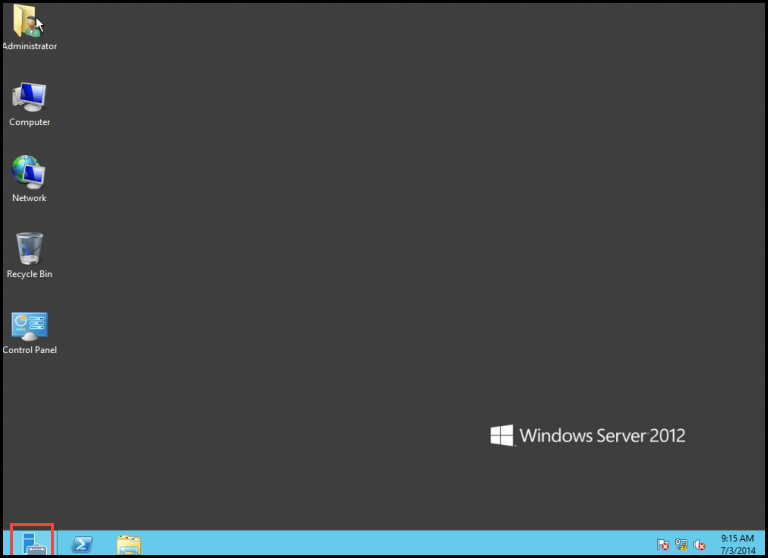
Step 1: Open the Server Manager. (Check the screenshot below)
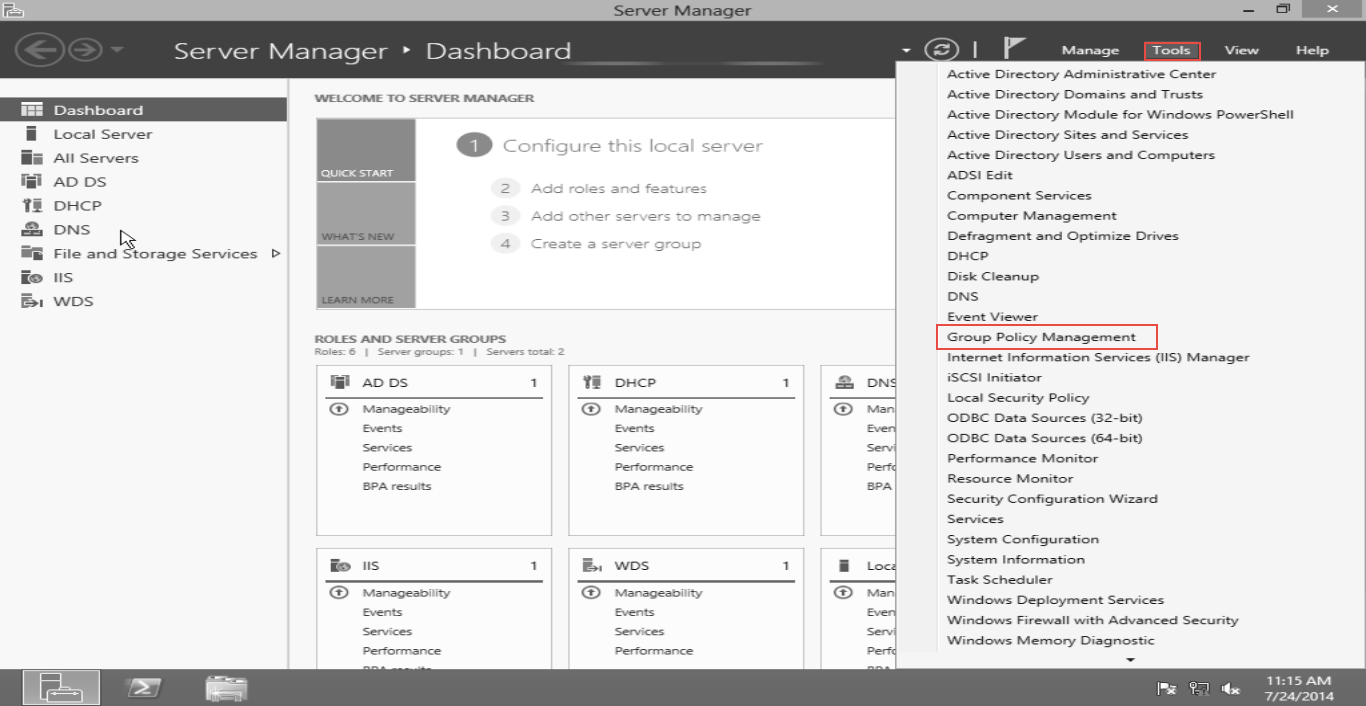
Step 2: Click on the “Tool” tab and next, select the “Group Policy Management” option. (Check the screenshot below)
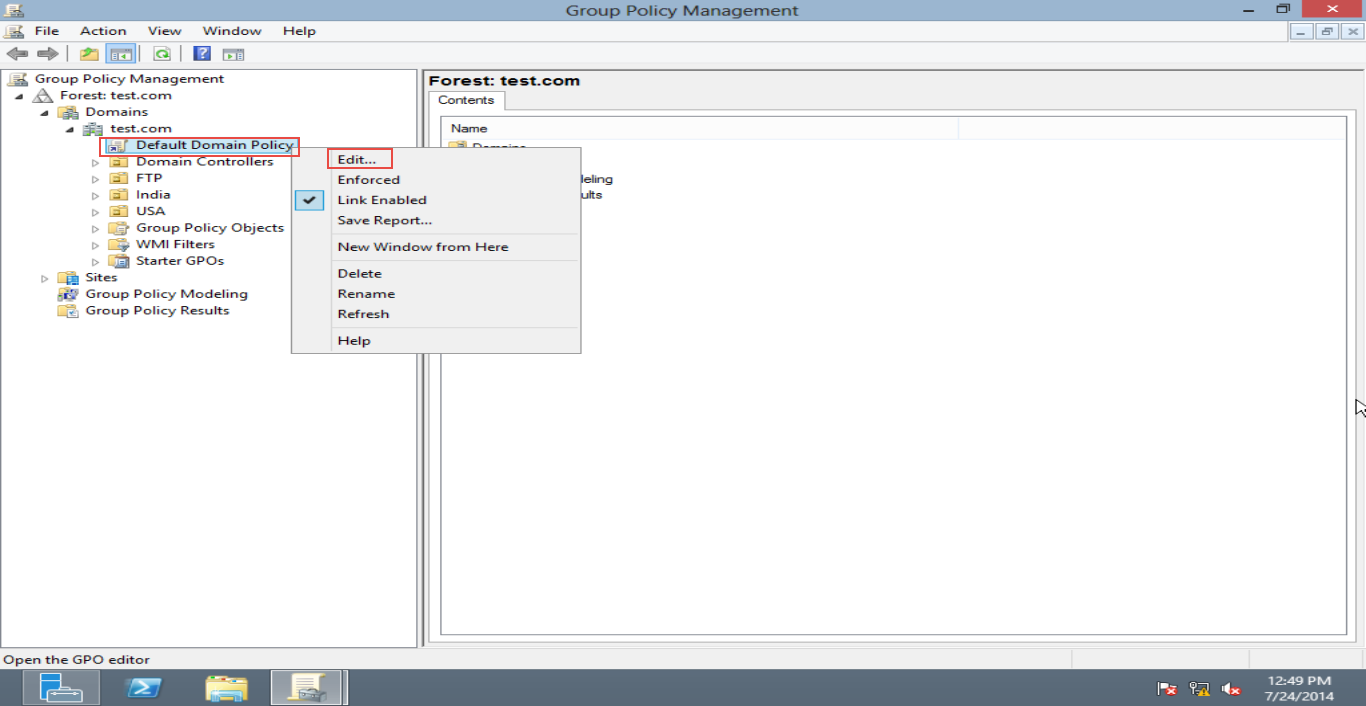
Step 3: Go to the “Domain” option on the left side panel of the screen and right click on the “Default Domain Policy” option. Next, hit the “Edit” button. (Check the screenshot below)
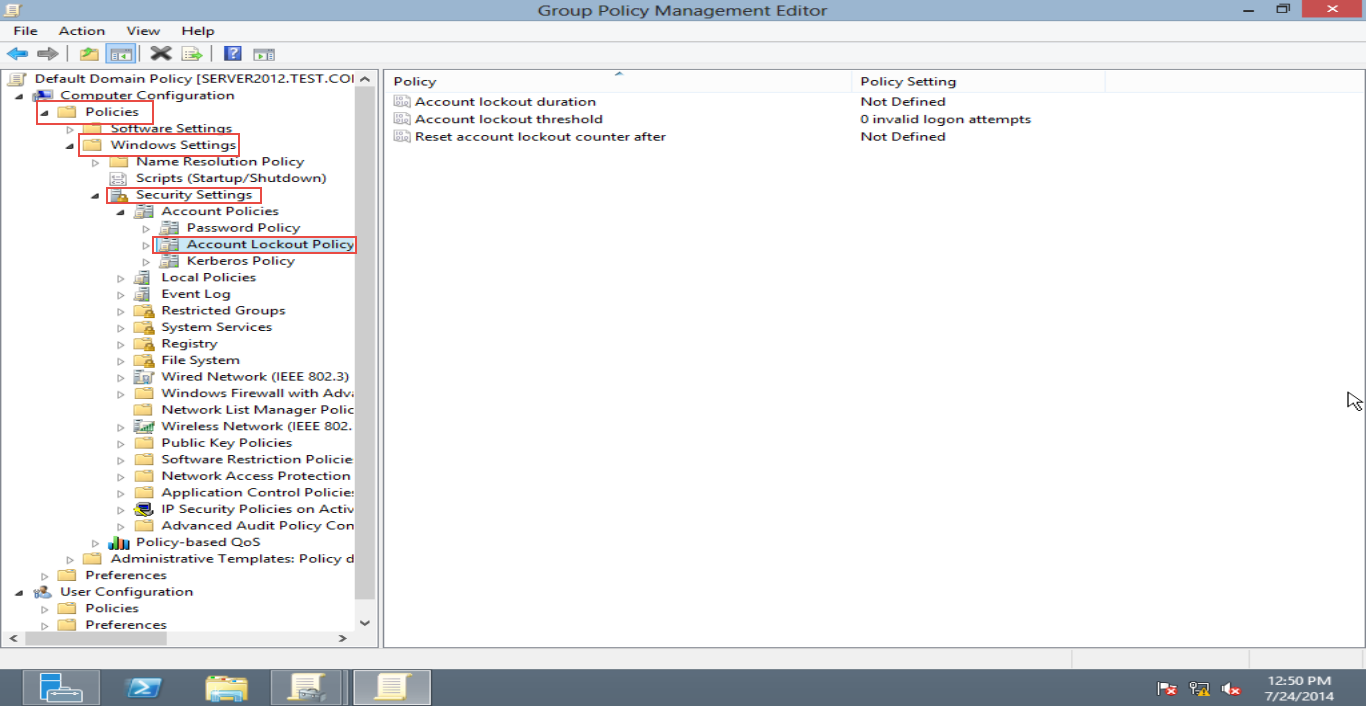
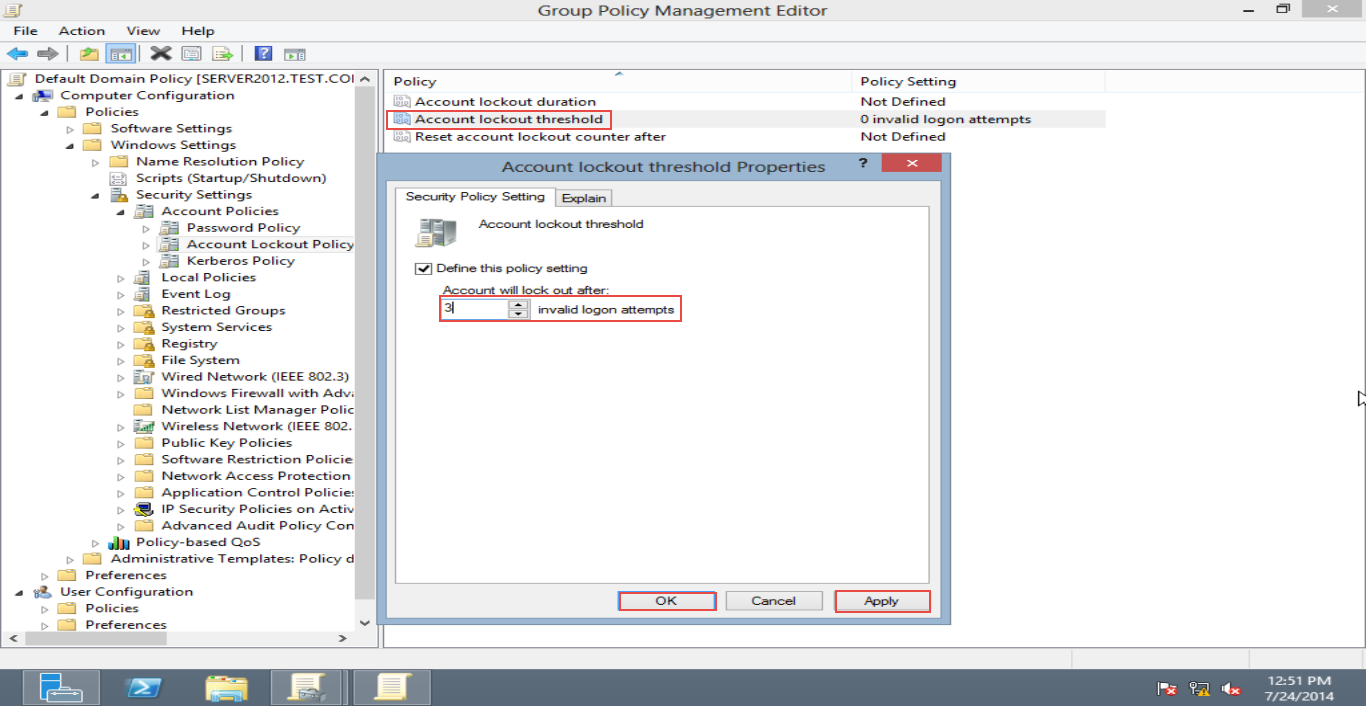
Step 4: Now, click on – Policy> Windows Setting > Security Setting> Account lockout Policy tabs in given order.(Check the screenshot below)
Step 5: Right click on the “Account lockout threshold” option and define the setting as per your requirements.
Step 6: You’ll receive the message given below if you have made three failed attempts.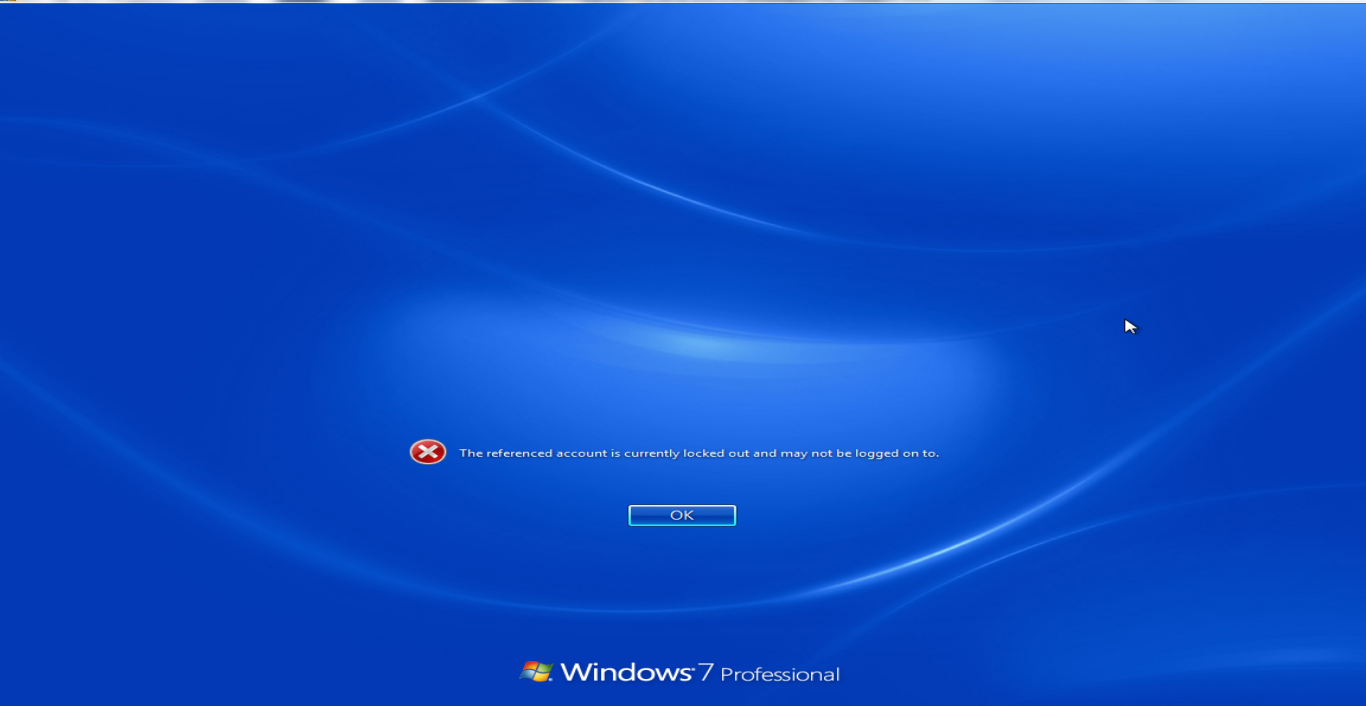
Congratulations!
You’ve successfully set up the account lockout threshold value in Windows Server 2012. Remember that you shouldn’t keep this value too low or too high.
If you need any help on the subject, feel free to write a comment below. We will get back to you with a solution.

