How to add an External contact to office 365
As an Outlook Admin of the organization you come across need to add an external contact in the company’s contact list. To add an external contact to your office’s contact list, all you need is the contact’s basic information like Name, Email etc.
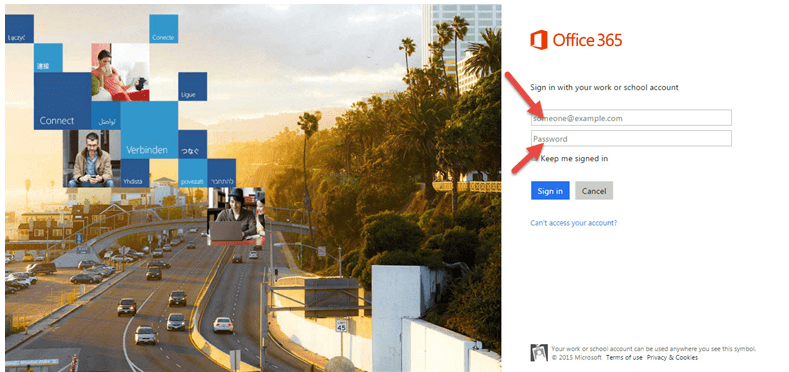
- Log into Office 365 Admin Center, by using the “Admin” credentials.
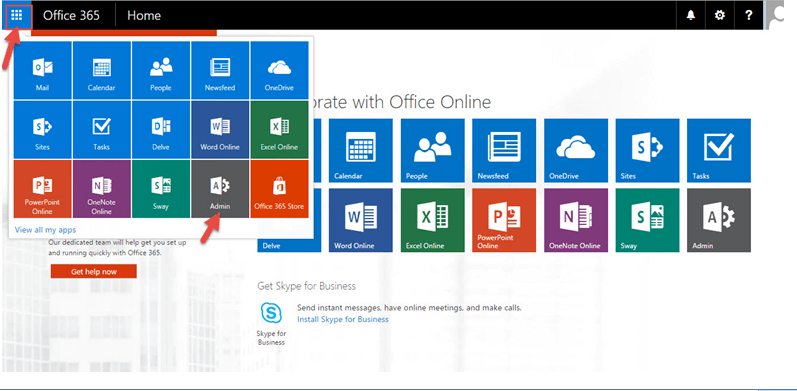
- Click on “App launcher” on the top left and select “Admin”.
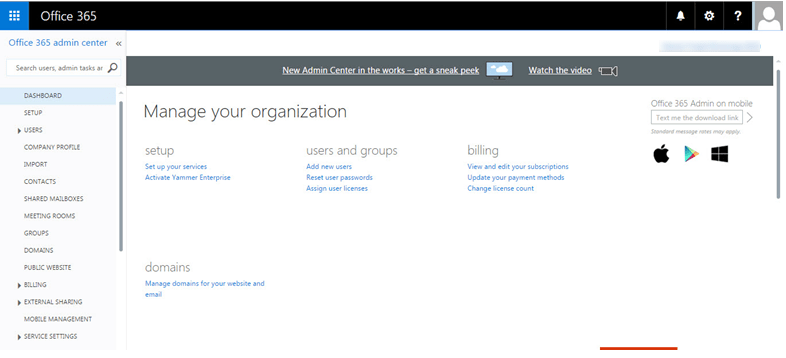
- We get a screen, similar to the screenshot below:
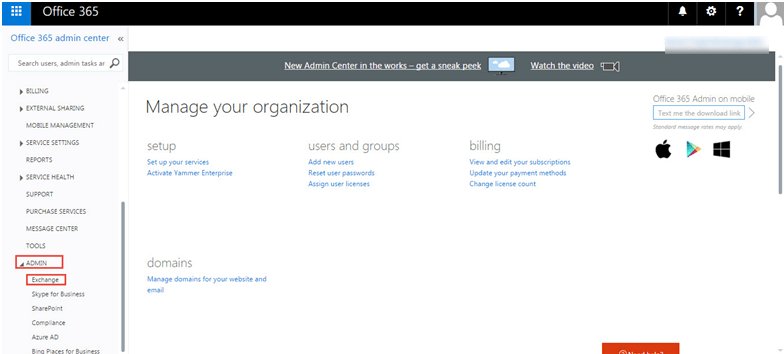
- In the Admin center, expand “ADMIN” and then select “Exchange”.
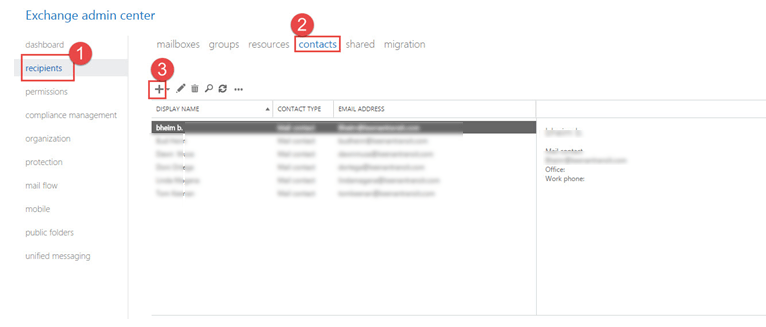
- In the “Exchange admin center”, select the “recipients” option and then click on “contacts”. Click on “+” to add contact.
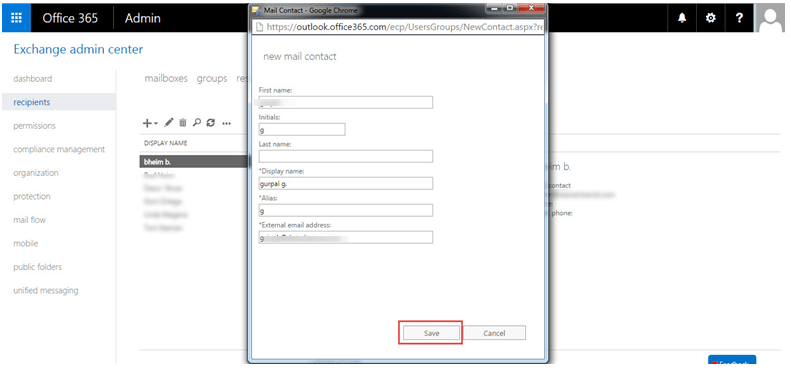
- Then fill all the required information like First name, Last name, Display name and the “External email address”. Click on “Save” to close the dialog box and exit.
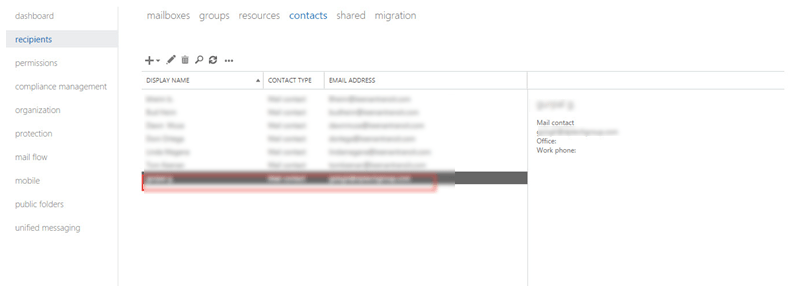
- This way, we can add an external contact to our Office’s contacts list.
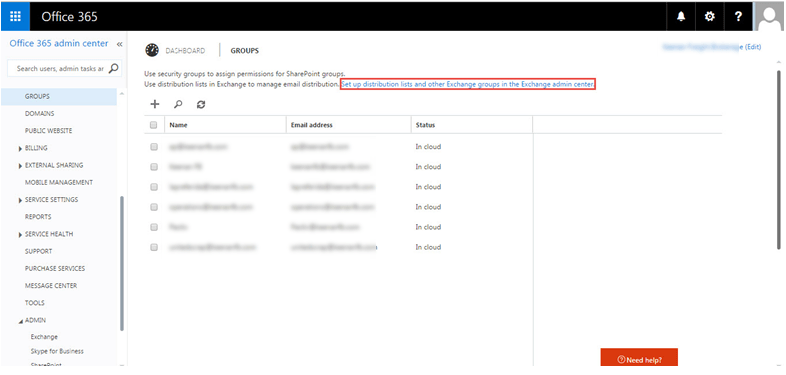
- To create a distribution group. Click on “Groups” and select “Set up distribution list…”.
- Click “+” icon to add a distribution group.
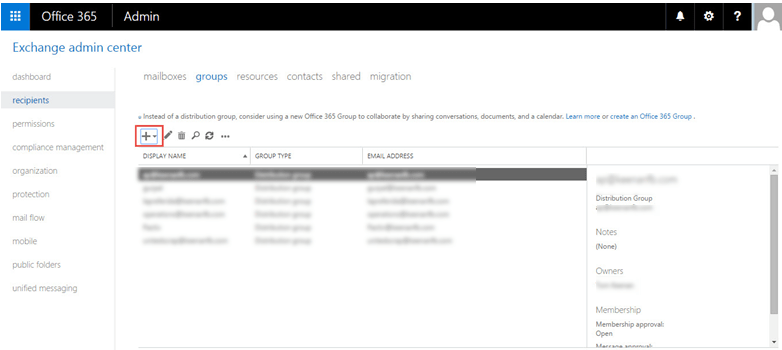
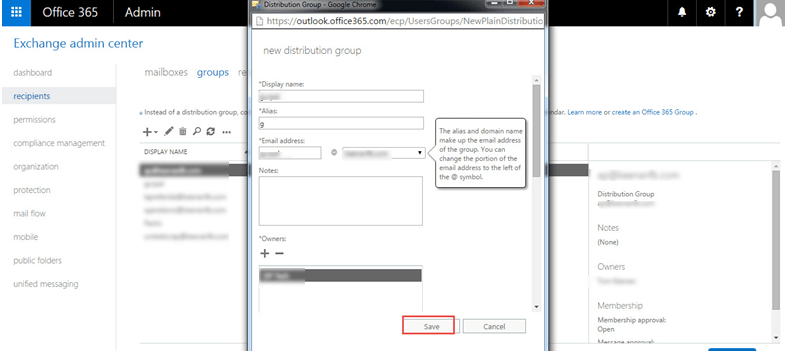
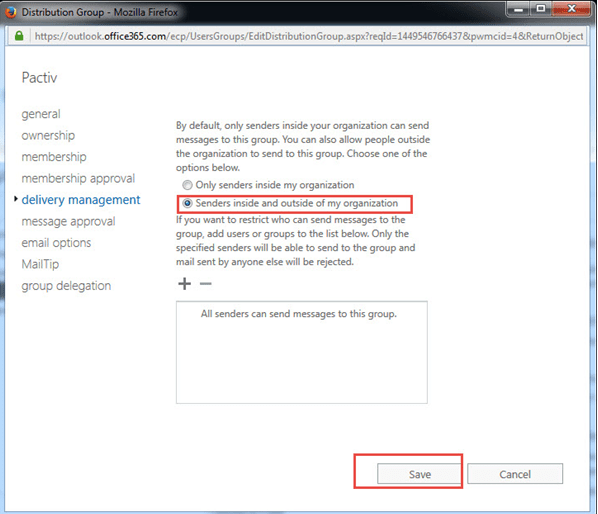
- Add all required information and then “Save” to close the dialog box. You can also manage the communication to and from the group i.e. Outsiders can send message to the group or not.
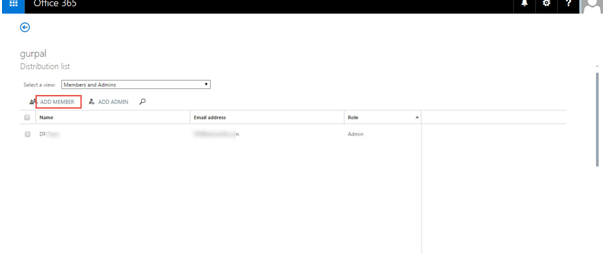
- To add users in the distribution group, click on “Edit Members and Admins”.
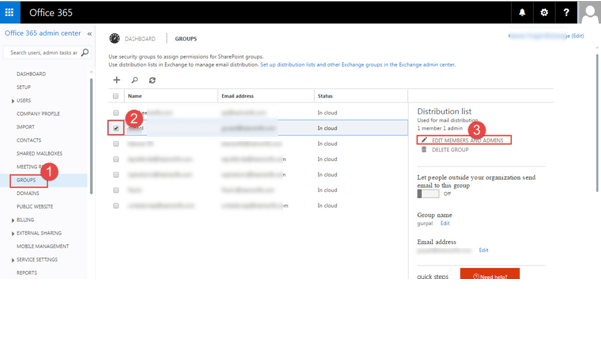
- Add members.
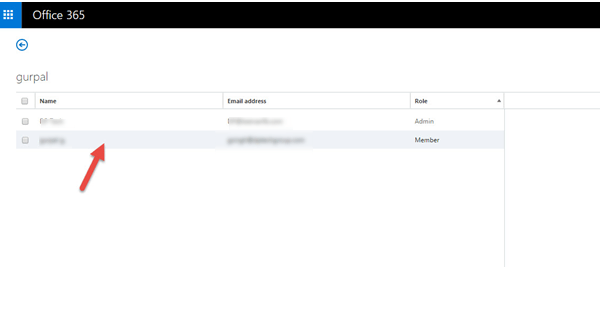
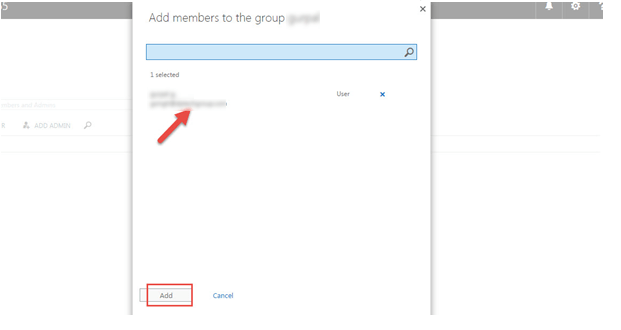
 In this way we can add external members in distribution group.

