Managing and Supporting Hard Disk Errors
Does your computer hang much too often when you try accessing some files on your system? These problems may be caused by hard disk errors. Removing all of these errors may not be possible for a beginner but yes, you can almost certainly do away with many such errors by running a check for hard disk errors in Windows 7.
One of the most common signs to watch out for is slow hard disk performance is bad disk blocks or hard disk errors. By checking for hard disk errors in Windows 7, it is possible to improve hard disk performance; you can even manage to recover the “bad” sectors.
As an IT support professional it is important you quickly identify bad hard drives to prevent major data loss.
Following are the steps to manage and support hard disk error in windows 7:
- Go to the Start Menu and click on the “Computer” option. (See the screenshot below)
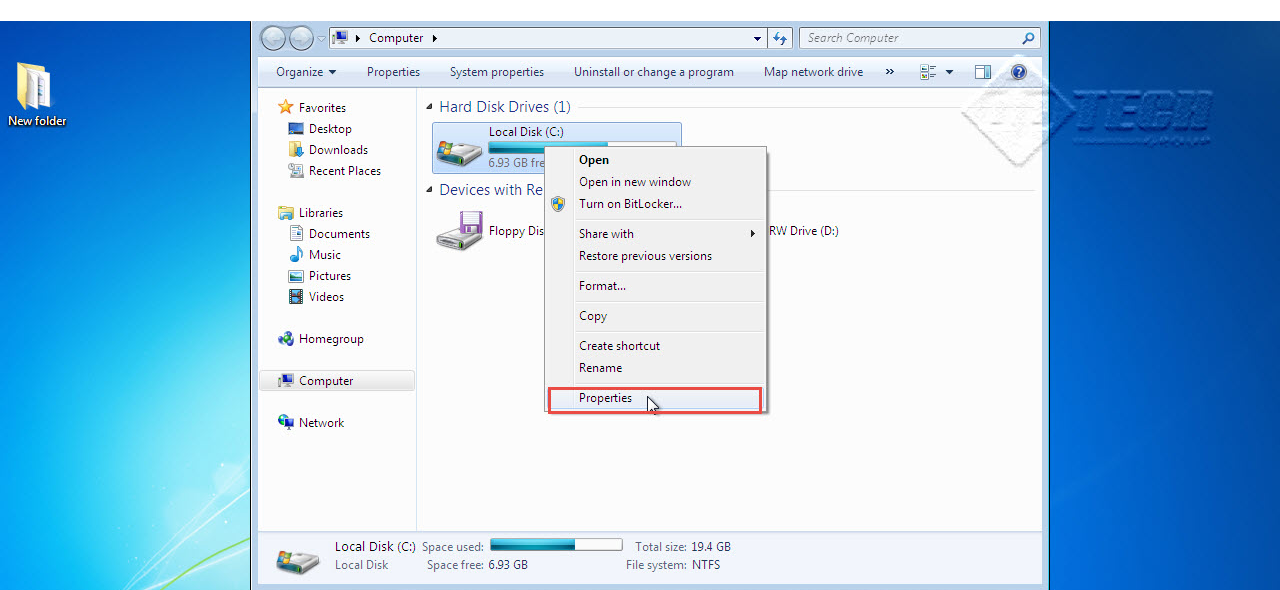
- Now, right click on the Drive you want to check for errors.
- Click on the “Properties” option. (See the screenshot below)
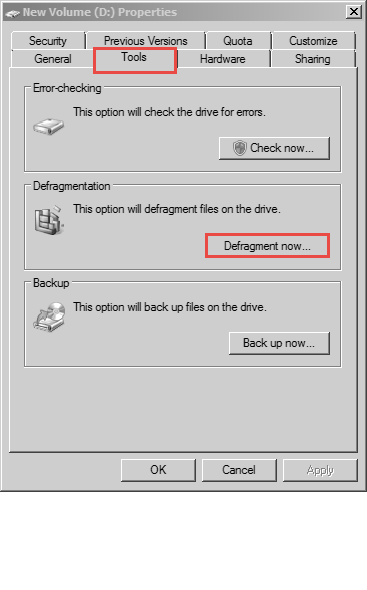
- Select “Tools” tab and click on “Defragment Now” button. (See the screenshot below)
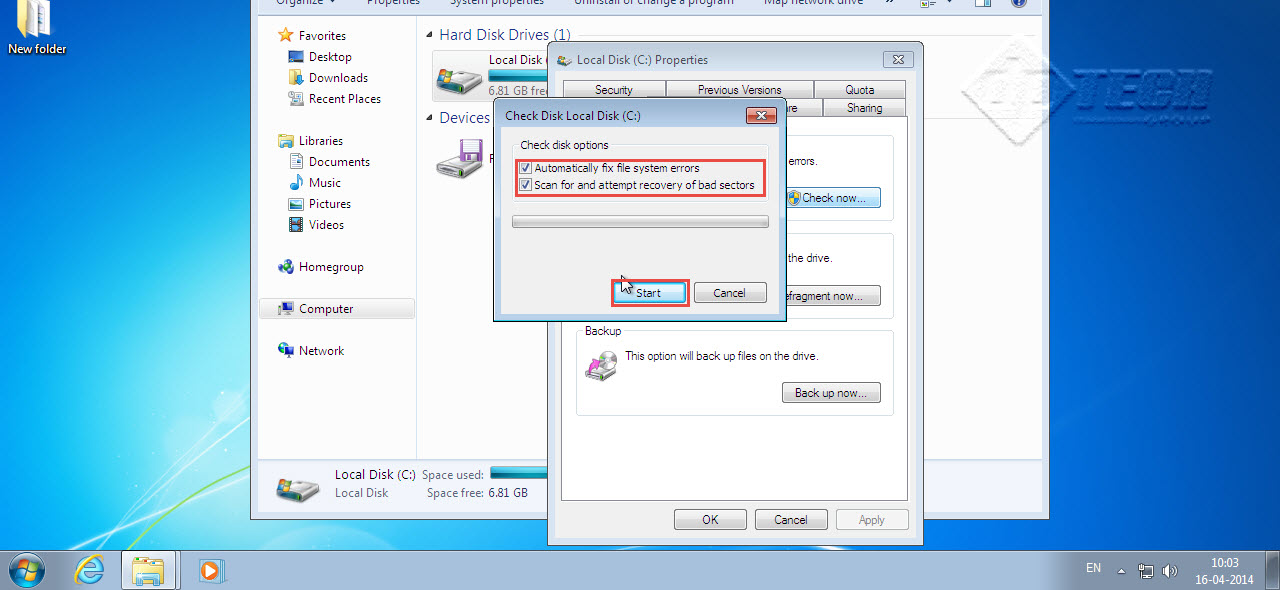
- Select both the icons. Doing so will automatically fix the file system error. Also, a scan is launched for recovery of bad sectors.
- Click on the “Start” button to launch recovery.
- This will result in recovery from system s and hard disk bad sectors.
- The entire process of hard disk error checking in Windows 7 may take several minutes to complete.
- Do not open other programs on the computer while the process is still going on. (See the screenshot below)

If a particular drive on your computer is performing below an optimal level even after you check hard disk errors and recover bad sectors, let us know in comments. We’d like to help!


