
IT Support Assigning IP Address in Window 8
When Windows 8 is installed on a system, it gets configured to obtain the IP address from DHCP (Dynamic Host Controller Protocol) Server by default. This means, Windows 8 OS automatically obtains the IP address. Under normal circumstances, this “default” configuration does not need to be altered for either private or production environments.
In some cases, however, the administrator may want to manually support and assign IP addresses to computer systems for controlling the connectivity of computers over the network. Assigning manual IP addresses in Windows 8 requires elevated support privileges; make sure that you only use the administrative account for making these support changes.
As a Windows 8 user, if you wish to assign a static IP address to your computer, you need to follow the steps mentioned below:
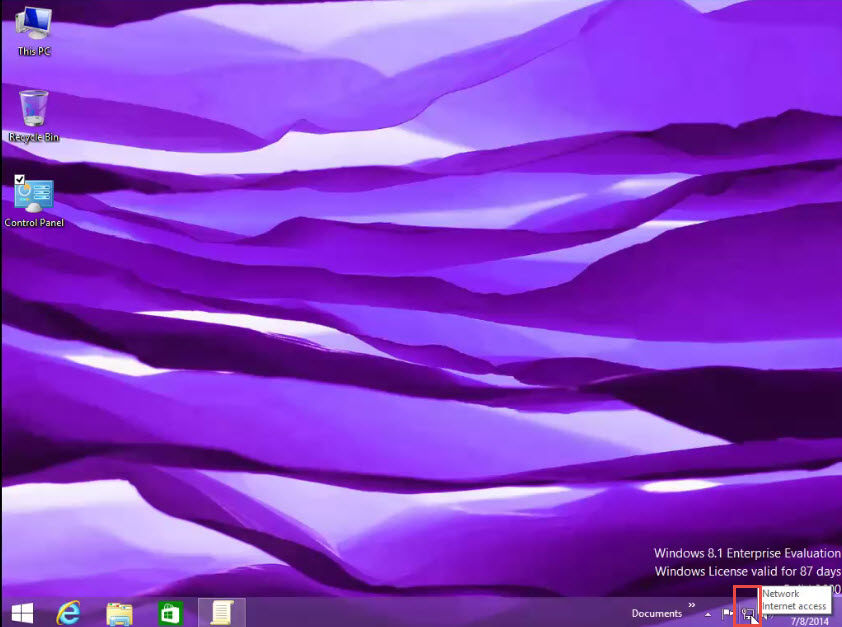
Step 1: At the bottom right corner of your desktop, look out for the “Network Internet Access” icon. (Check the screenshot below)
 Step 2: Right-click on the icon and next, click on the “Open Network and Sharing Center” option. (Check the screenshot below)

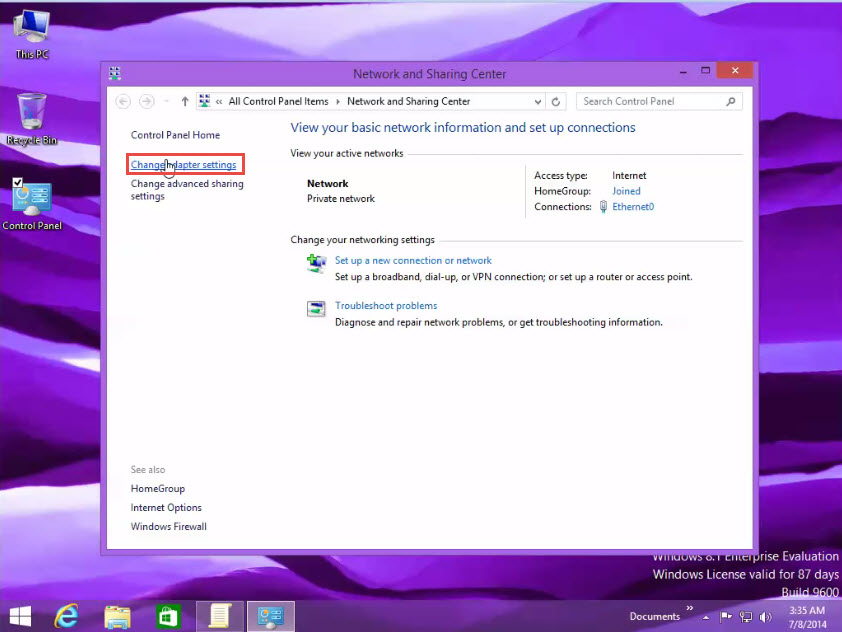
Step 3: “Network and Sharing Center” dialog box will now appear on your screen. Here, you’ve to select the “Change Adapter Settings” option. It is located on the left-side panel of window. (Check the screenshot below)
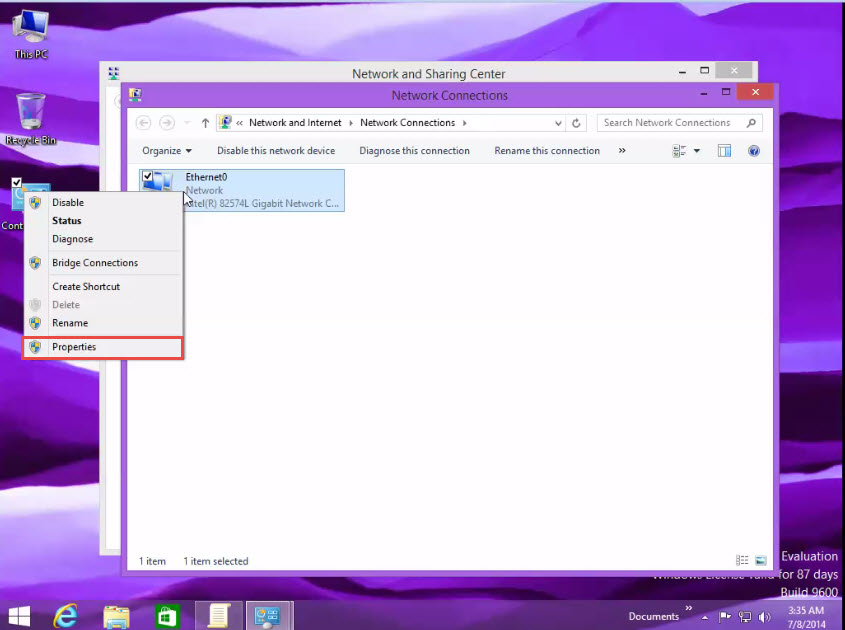
Step 4: Right-click on the “Ethernet Adapter” icon that appears on the next “Network Connections” window.
Step 5: Click on the “Properties” option from the drop down menu. (Check the screenshot below)
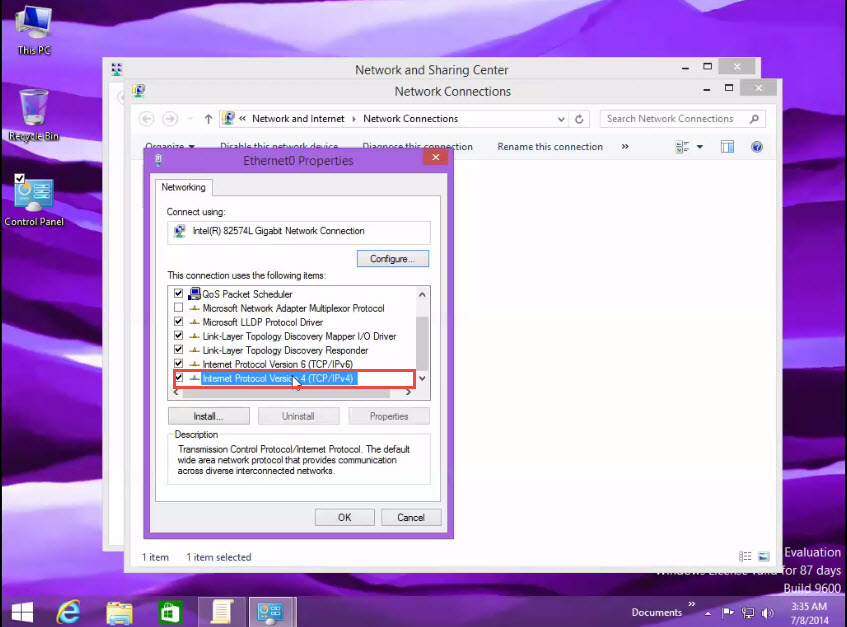
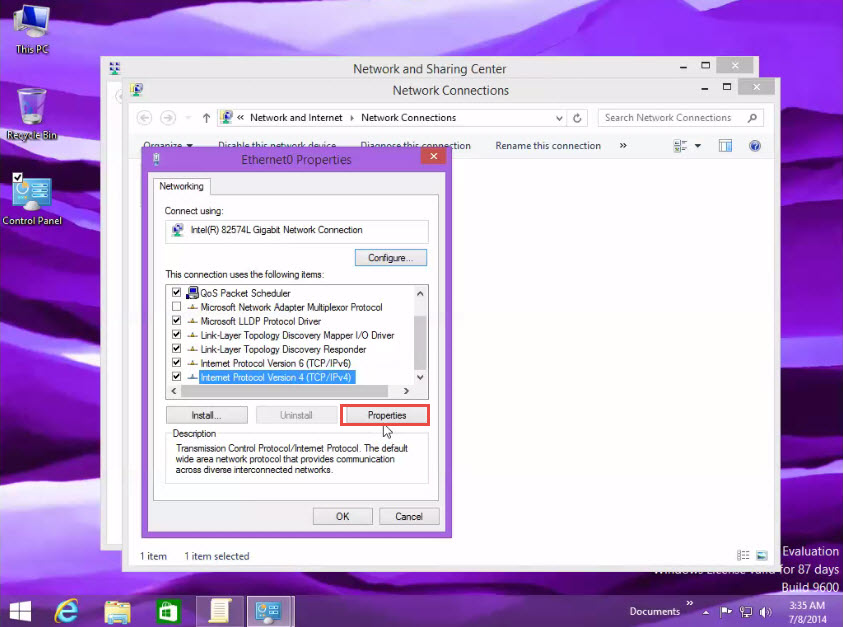
Step 6: Scroll down the arrow and select the “Internet protocol version 4 (TCP/IPv4)” option. (Check the screenshot below)
Step 7: Now, click on the “Properties” option. (Check the screenshot below)
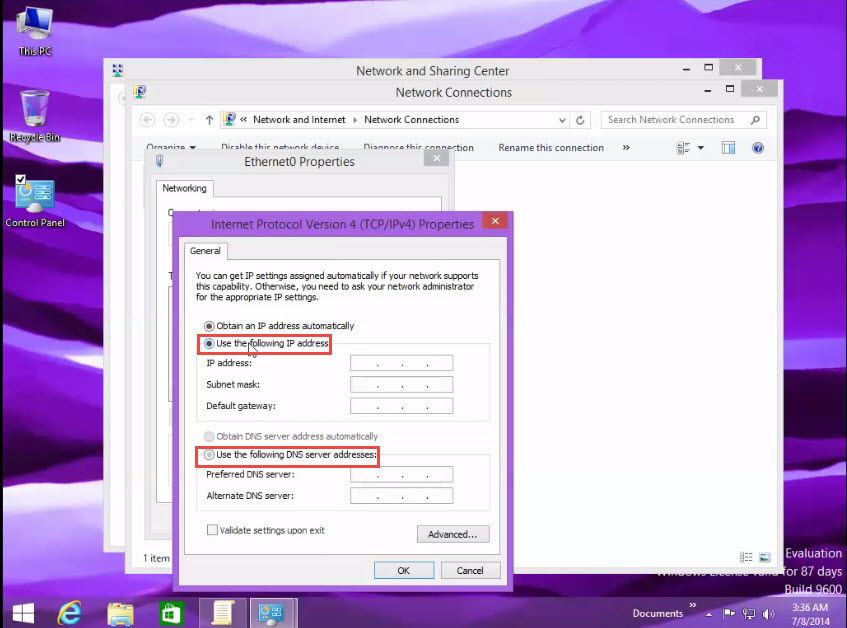
Step 8: Next, select the “Use the following IP address” option. (Check the screenshot below)
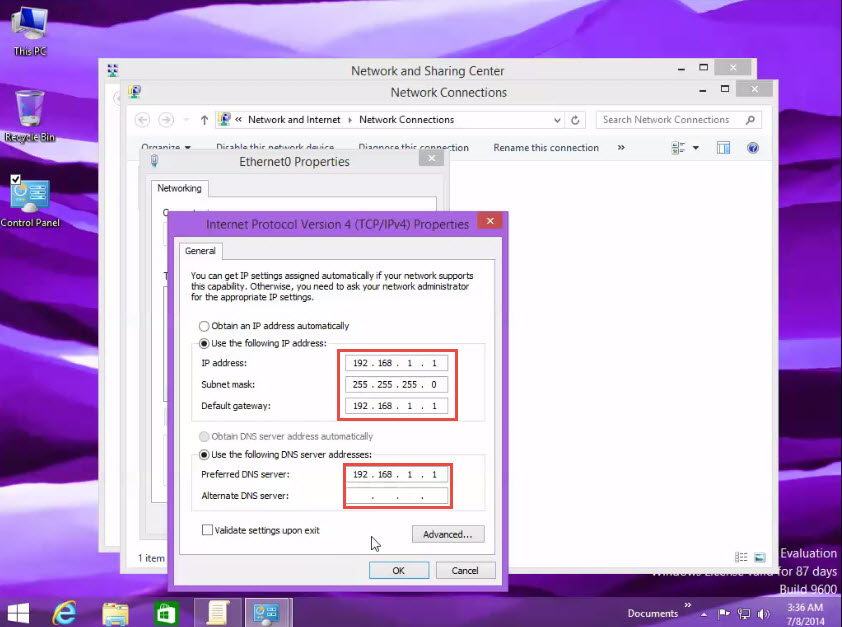
Step 9: Now, assign the IP you want your Windows 8 system to have or type in the IP address which supports your local network. (Check the screenshot below)
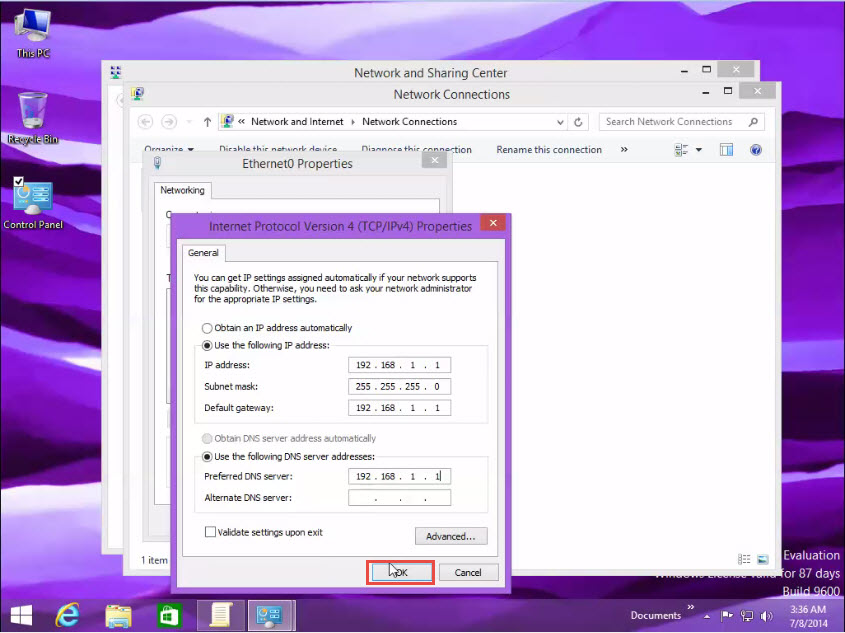
Step 10: Click on the “OK” button to save the changes. (Check the screenshot below)
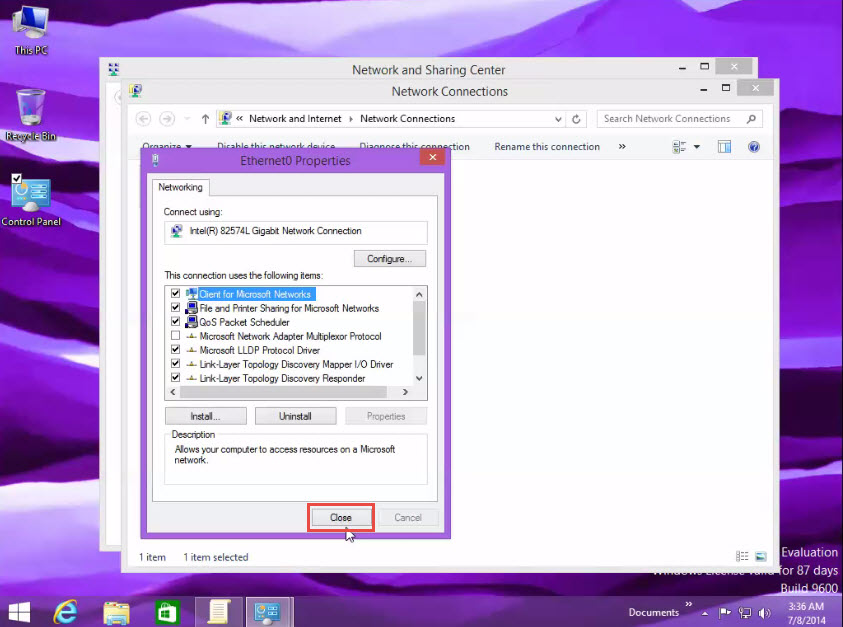
Step 11: Click on the “Close” tab to exit. (Check the screenshot below)
Close all the opened windows.
Congratulations, you’ve successfully assigned a new IP address to your Windows 8 machine.
If you were unable to follow through above steps on assigning IP addresses in Win 8, please let us know in the comment section below. Try to describe the problem you are facing in detail. This will make it easier for us to provide you with an exact answer.
 (1)")