Server Support Guide 2 – FTP Server
Server Support Guide 2 – FTP Server
When working with Windows Server 2012, FTP service can come handy on many occasions.
In this post, we will explain you can create a folder and set permissions for FTP service in Server 2012.
Follow the step by step guide below:
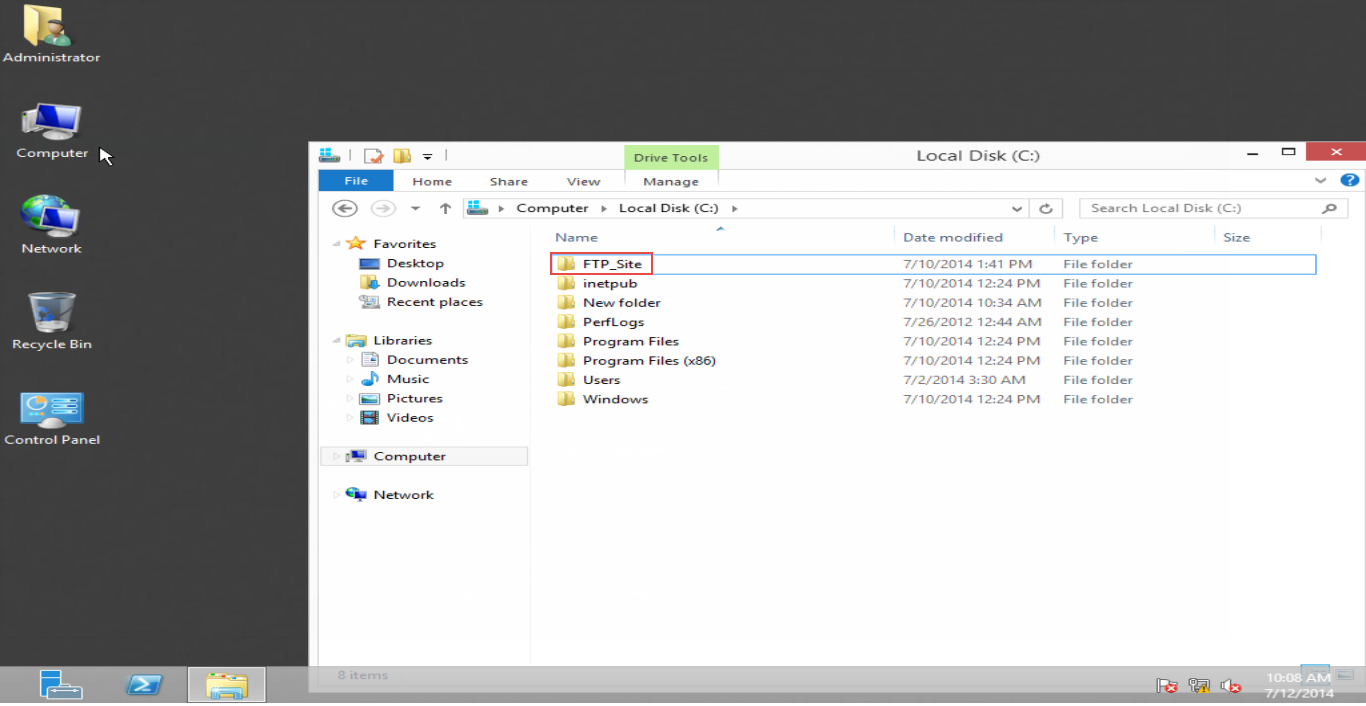
Step 1: Create a new folder in server HDD. (Check the screenshot below)
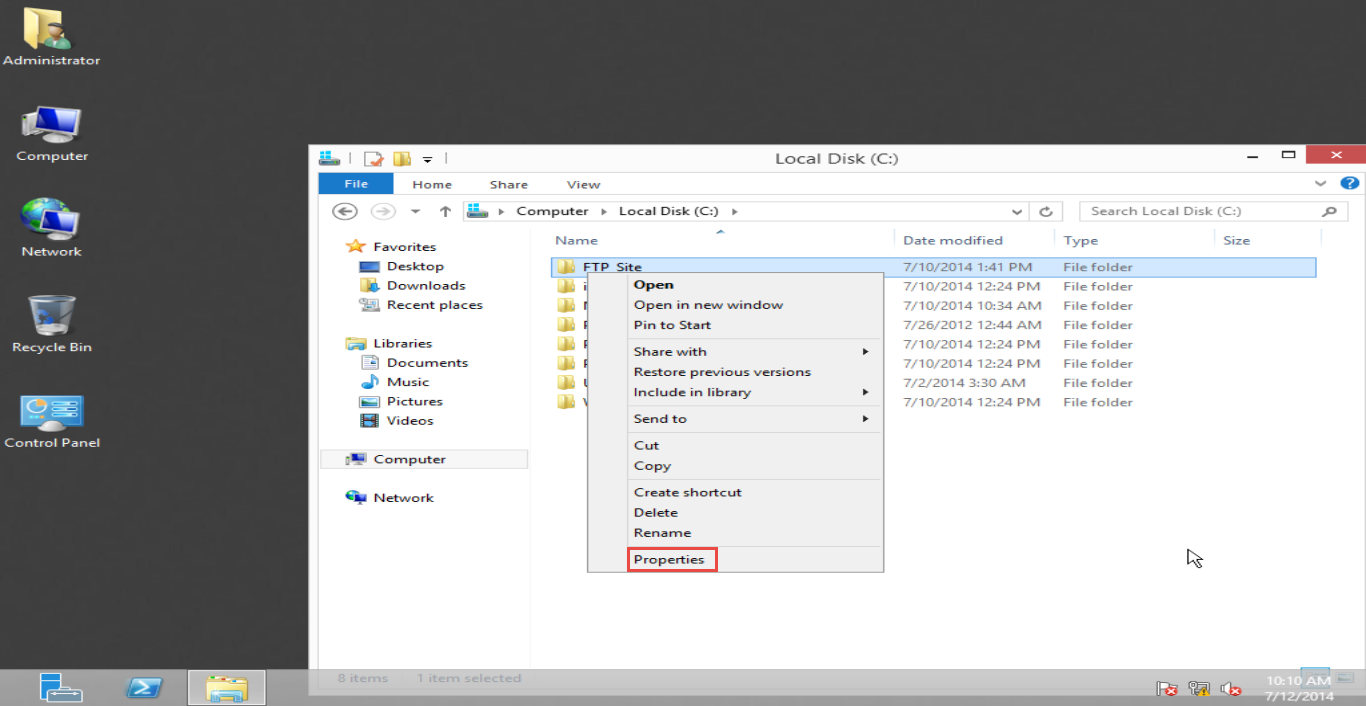
Step 2: Right click on the folder and then, select the “Properties” option. (Check the screenshot below)
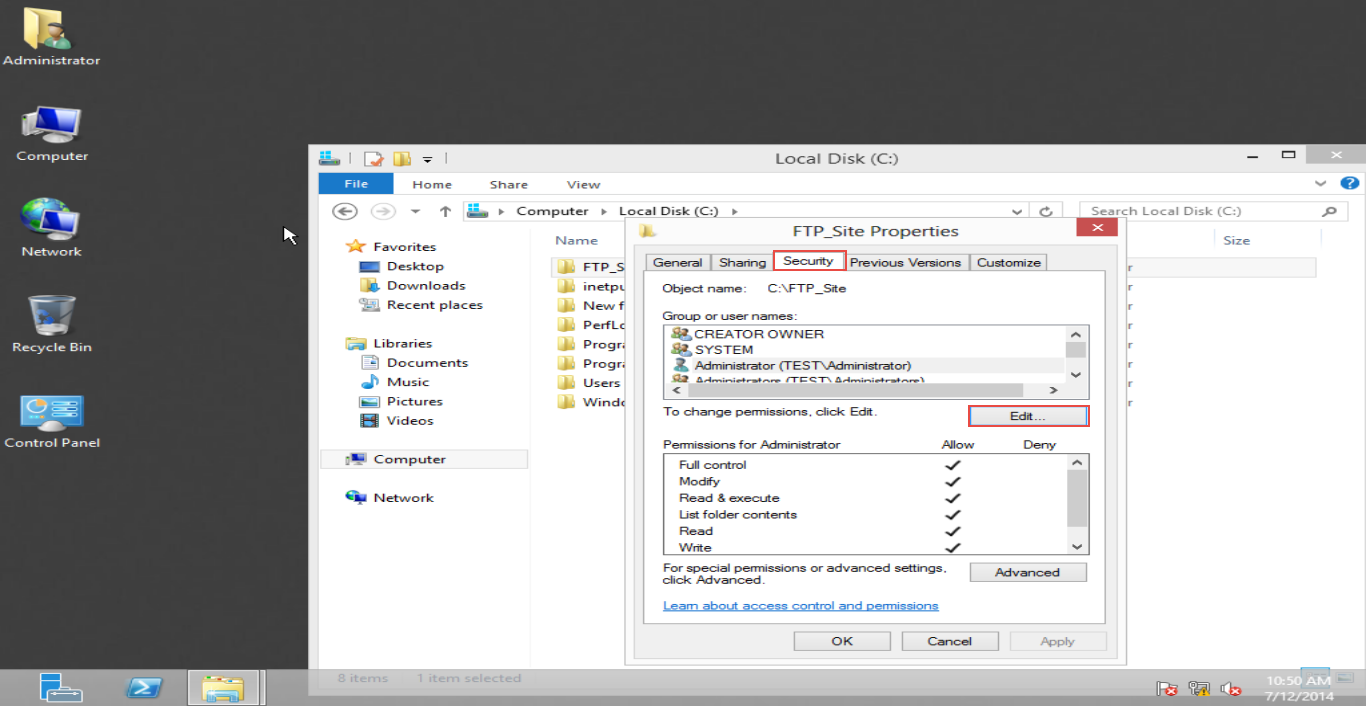
Step 3: Go to the “Security” tab and click on the “Edit” option. (Check the screenshot below)
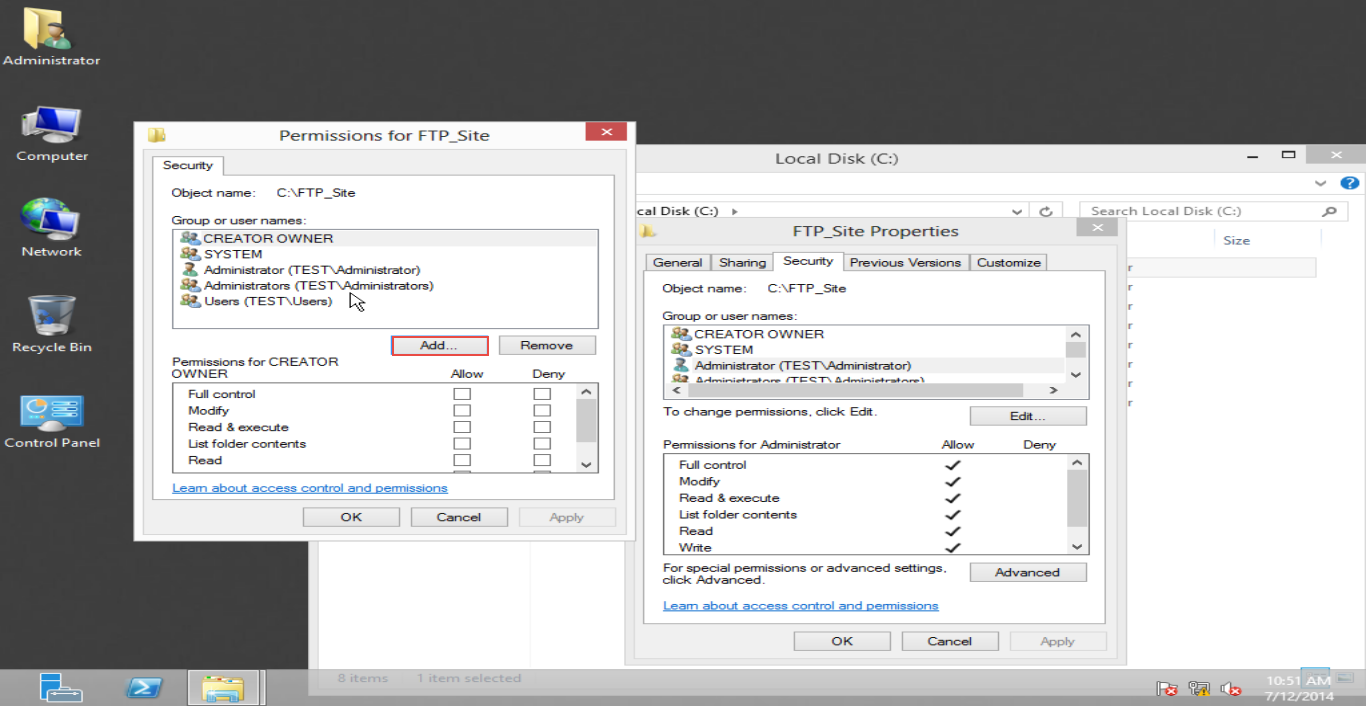
Step 4: Click on the “Add” option to continue. (Check the screenshot below)
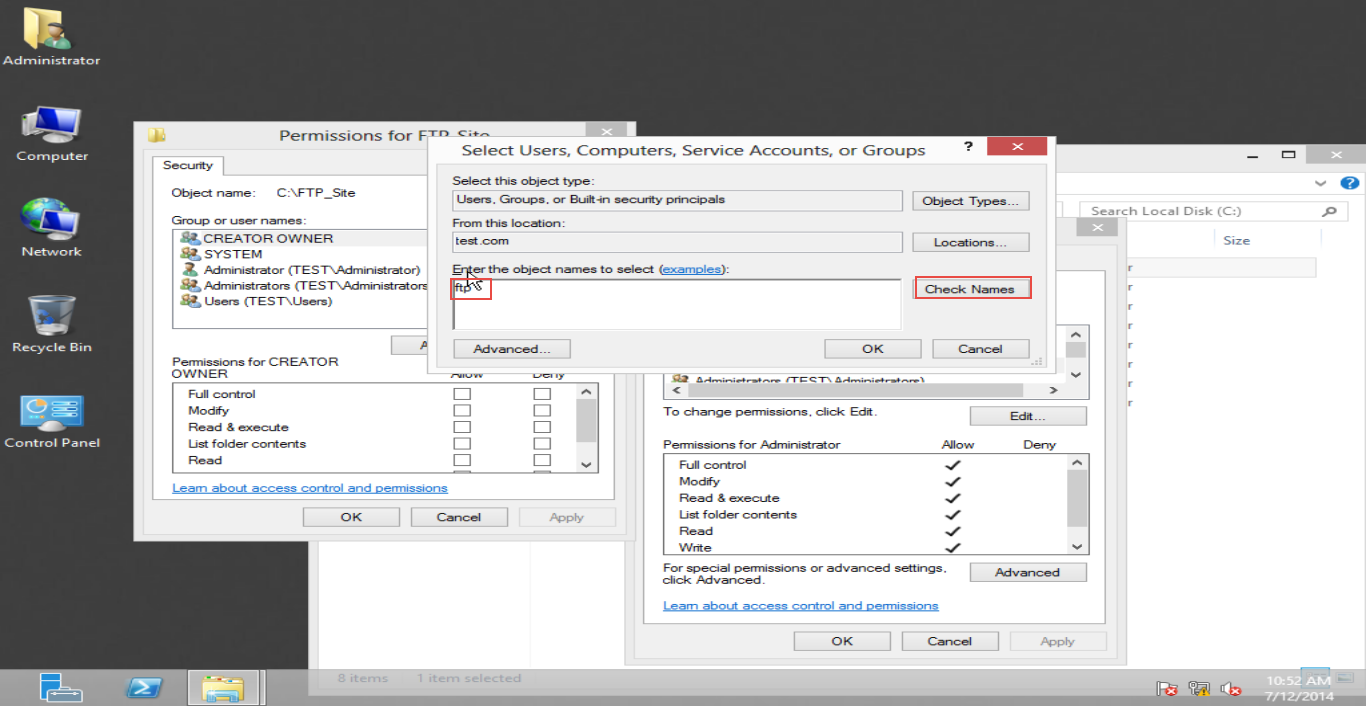
Step 5: Enter the “Group Name” and click on the “Check Name” option. (Check the screenshot below)
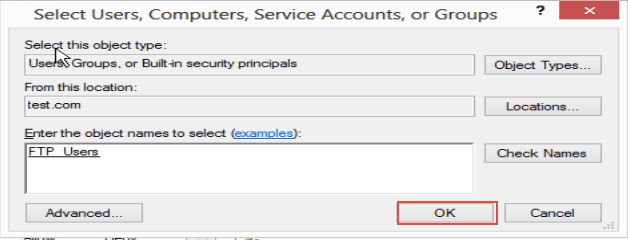
Step 6: Select “FTP_Users” as your group name. (Check the screenshot below)
Step 7: Click on the “OK” button. (Check the screenshot below)
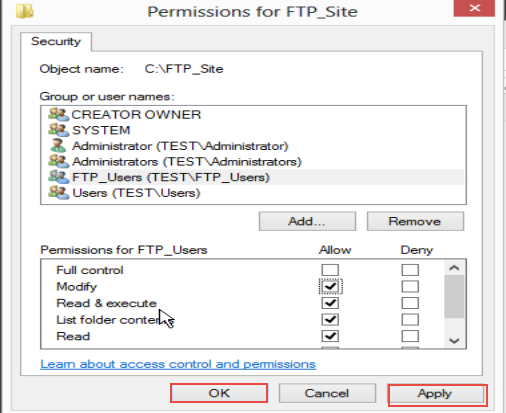
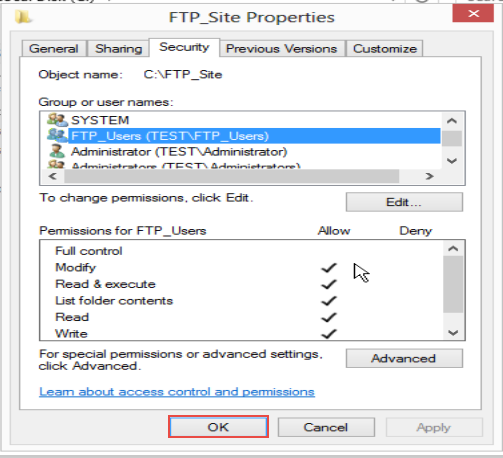
Step 8: Select the “Permissions” option and click on the “Apply” button.
Step 9: Hit the “Ok” button to save all changes you’ve just made. (Check the screenshot below)
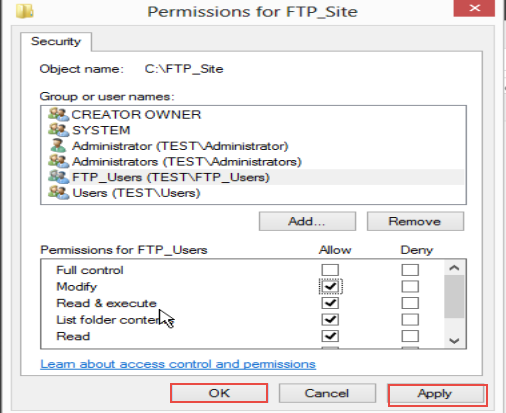
Step 10: Click on the “Ok” button. You have successfully set Permissions for the FTP Service in Windows Server 2012. (Check the screenshot below)
Were you able to set permissions for FTP service on a given folder in Server 2012? If not, we’d like to know why and help you fix issues, if any.
Write a comment below to start a discussion thread and one of our Win Server experts will follow up with answers and nearest possible solutions.

